Jason Lanier and Emily Rinaldo photograph and witness one of Earth’s most gorgeous phenomenons, the Aurora Borealis in Kiruna, Sweden for the very first time!!

Official Blog of Jason Lanier Photography
Jason Lanier and Emily Rinaldo photograph and witness one of Earth’s most gorgeous phenomenons, the Aurora Borealis in Kiruna, Sweden for the very first time!!
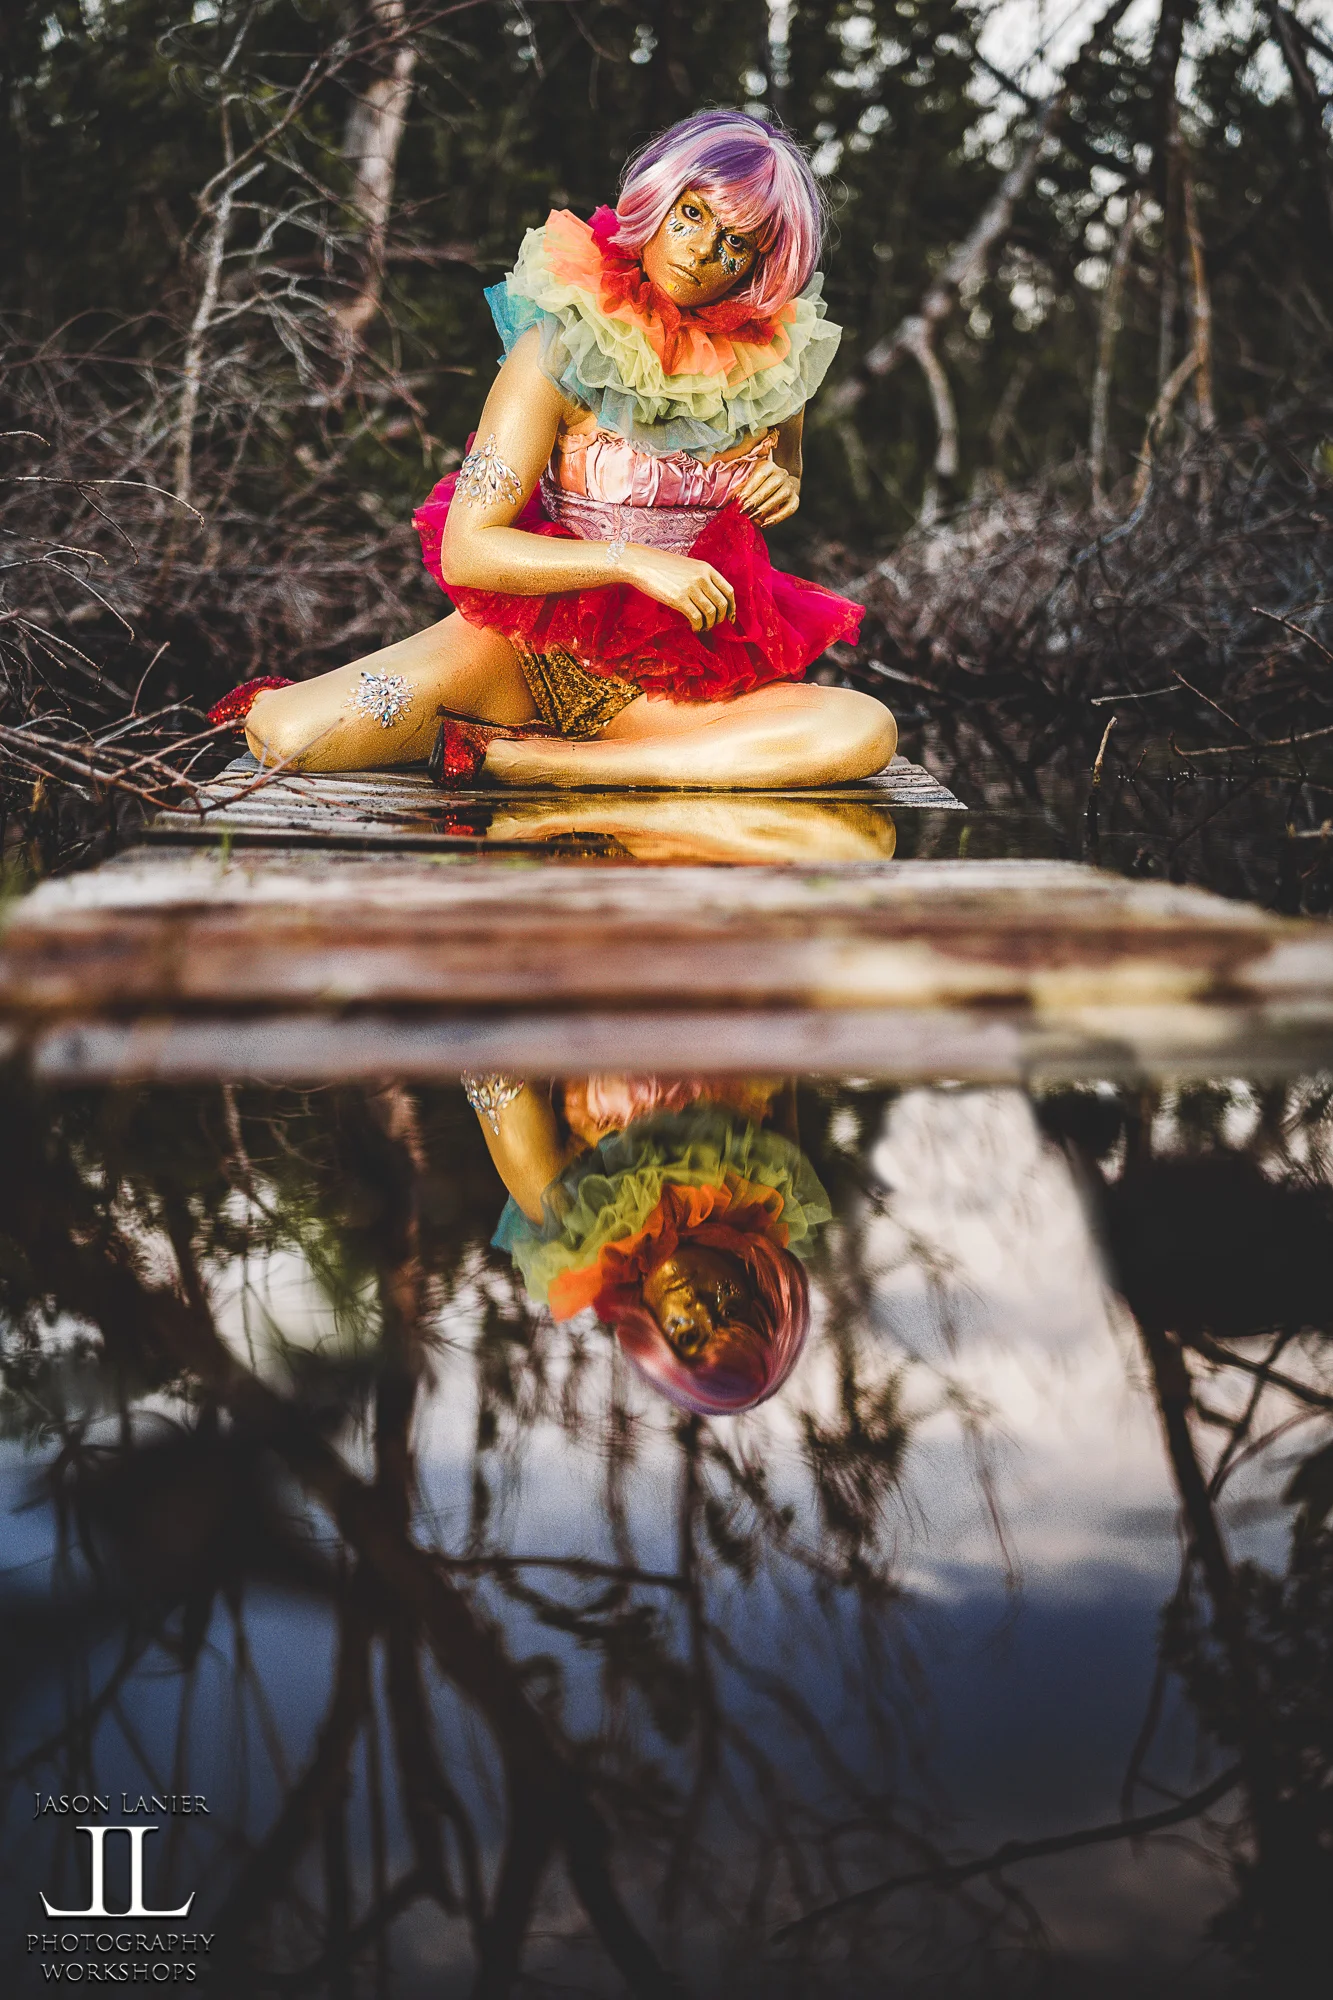
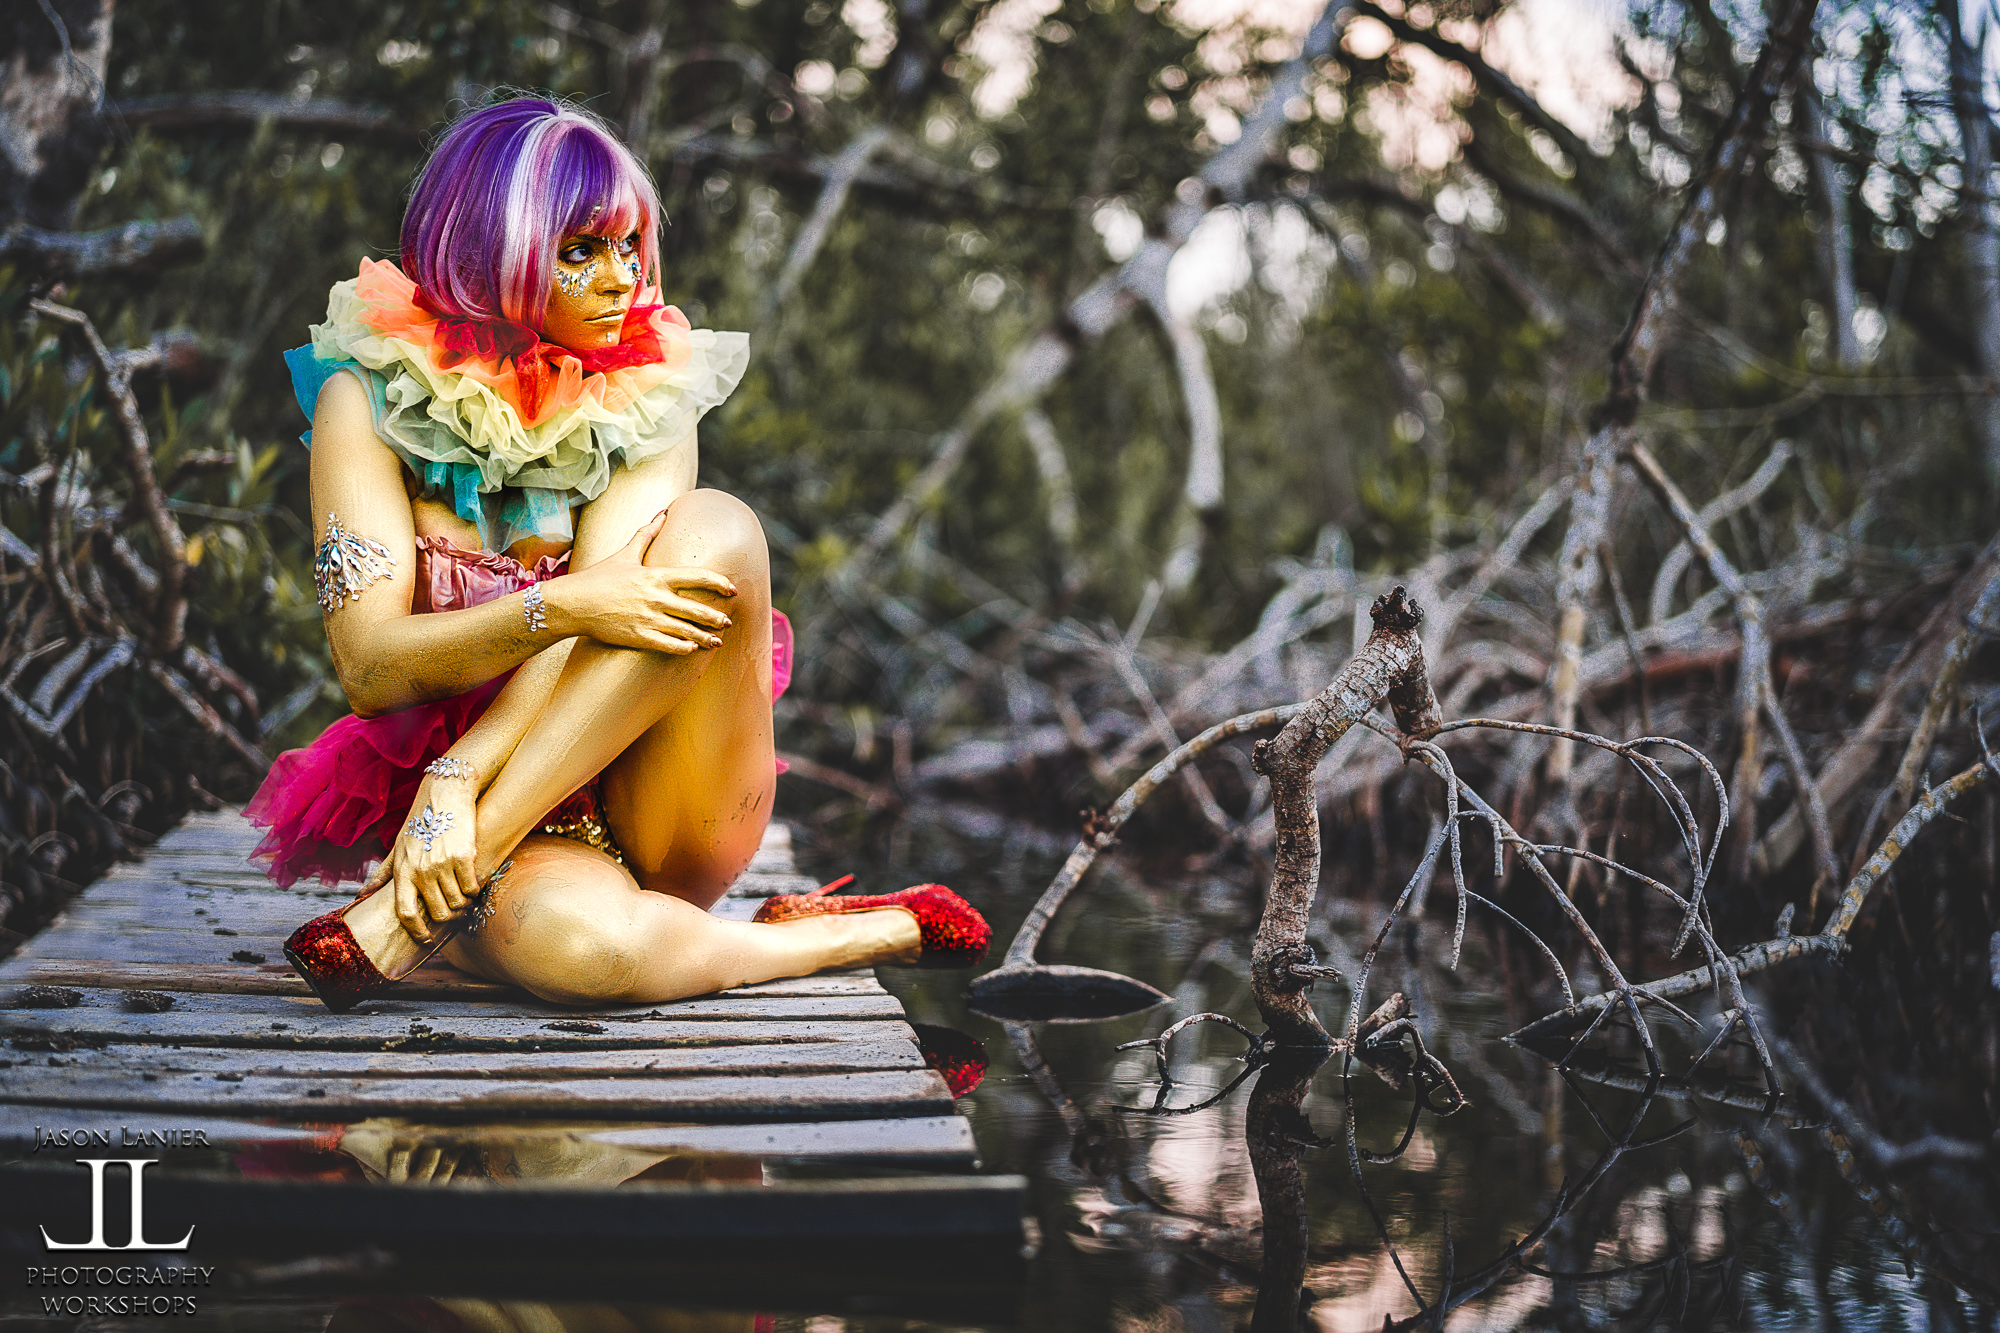
Join me for a shoot in the Florida Everglades where my Godox AD600 Pro Battery was FRIED and quit working on me. This was a crazy shoot where my muse Emily Rinaldo and I found ourselves shooting for a short time before the sun set on a dilapidated boardwalk in the swamp. This was also a shoot that resulted in me getting my legs eaten alive by chiggers that necessitated a visit to Urgent Care.
In this shoot I was using the Sony A7iii with the Sony 12-24mm, 24-70mm G Master, and Sony Zeiss 50mm f./1.4 lenses.
**Links to Gear:
*Sony A7iii- https://bhpho.to/30TJbej
*Sony 12-24mm- https://bhpho.to/30V4R9W
*Sony 24-70mm G Master- https://bhpho.to/30VO0E6
*Sony Zeiss 50mm- https://bhpho.to/312J6oY
*Godox AD600 Pro Flash- https://bhpho.to/30XUcv4
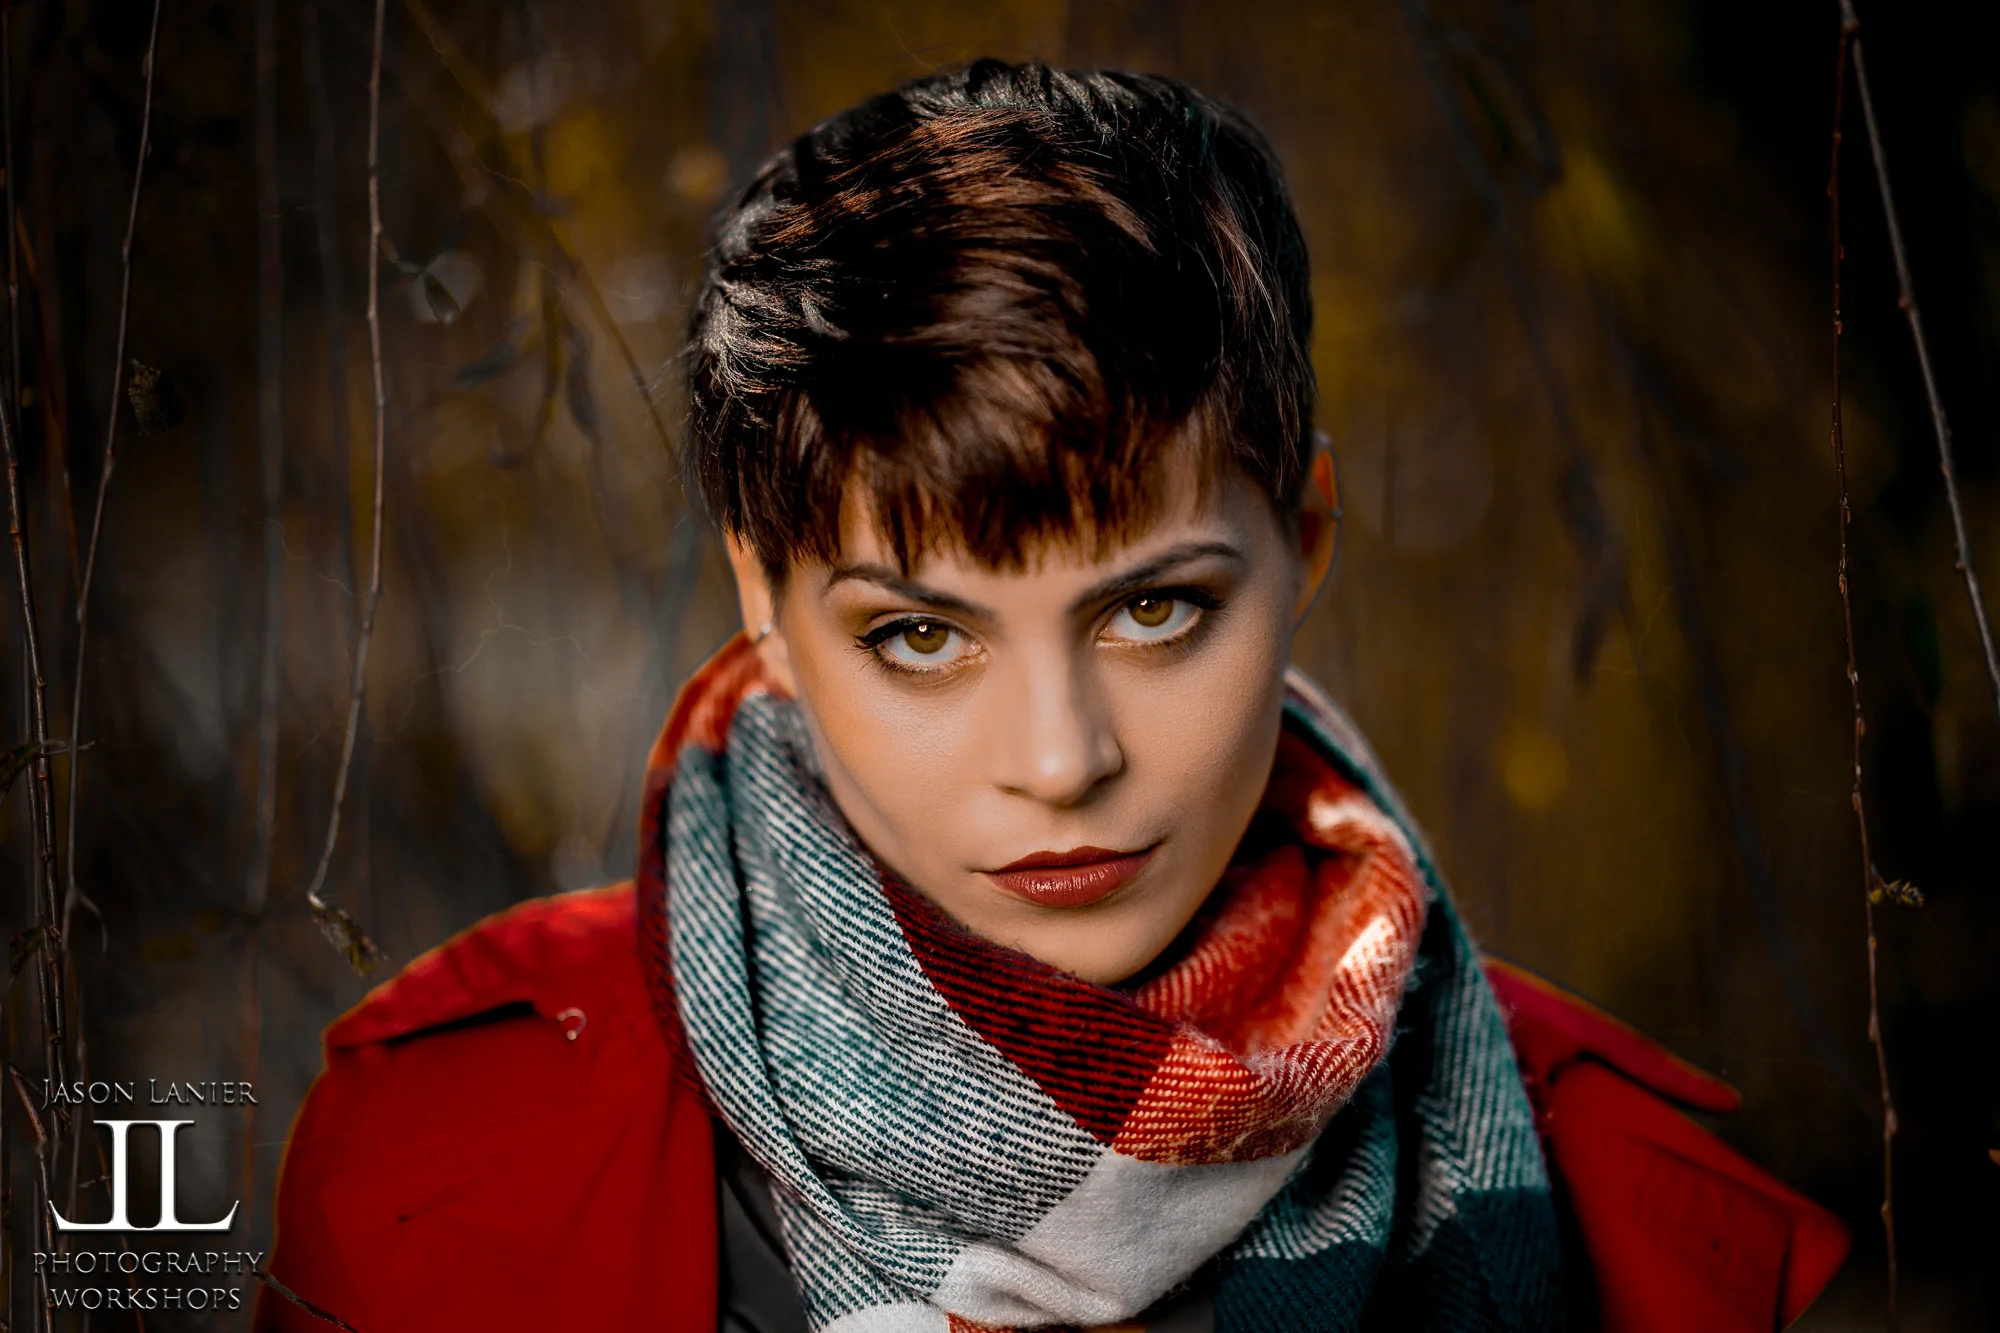
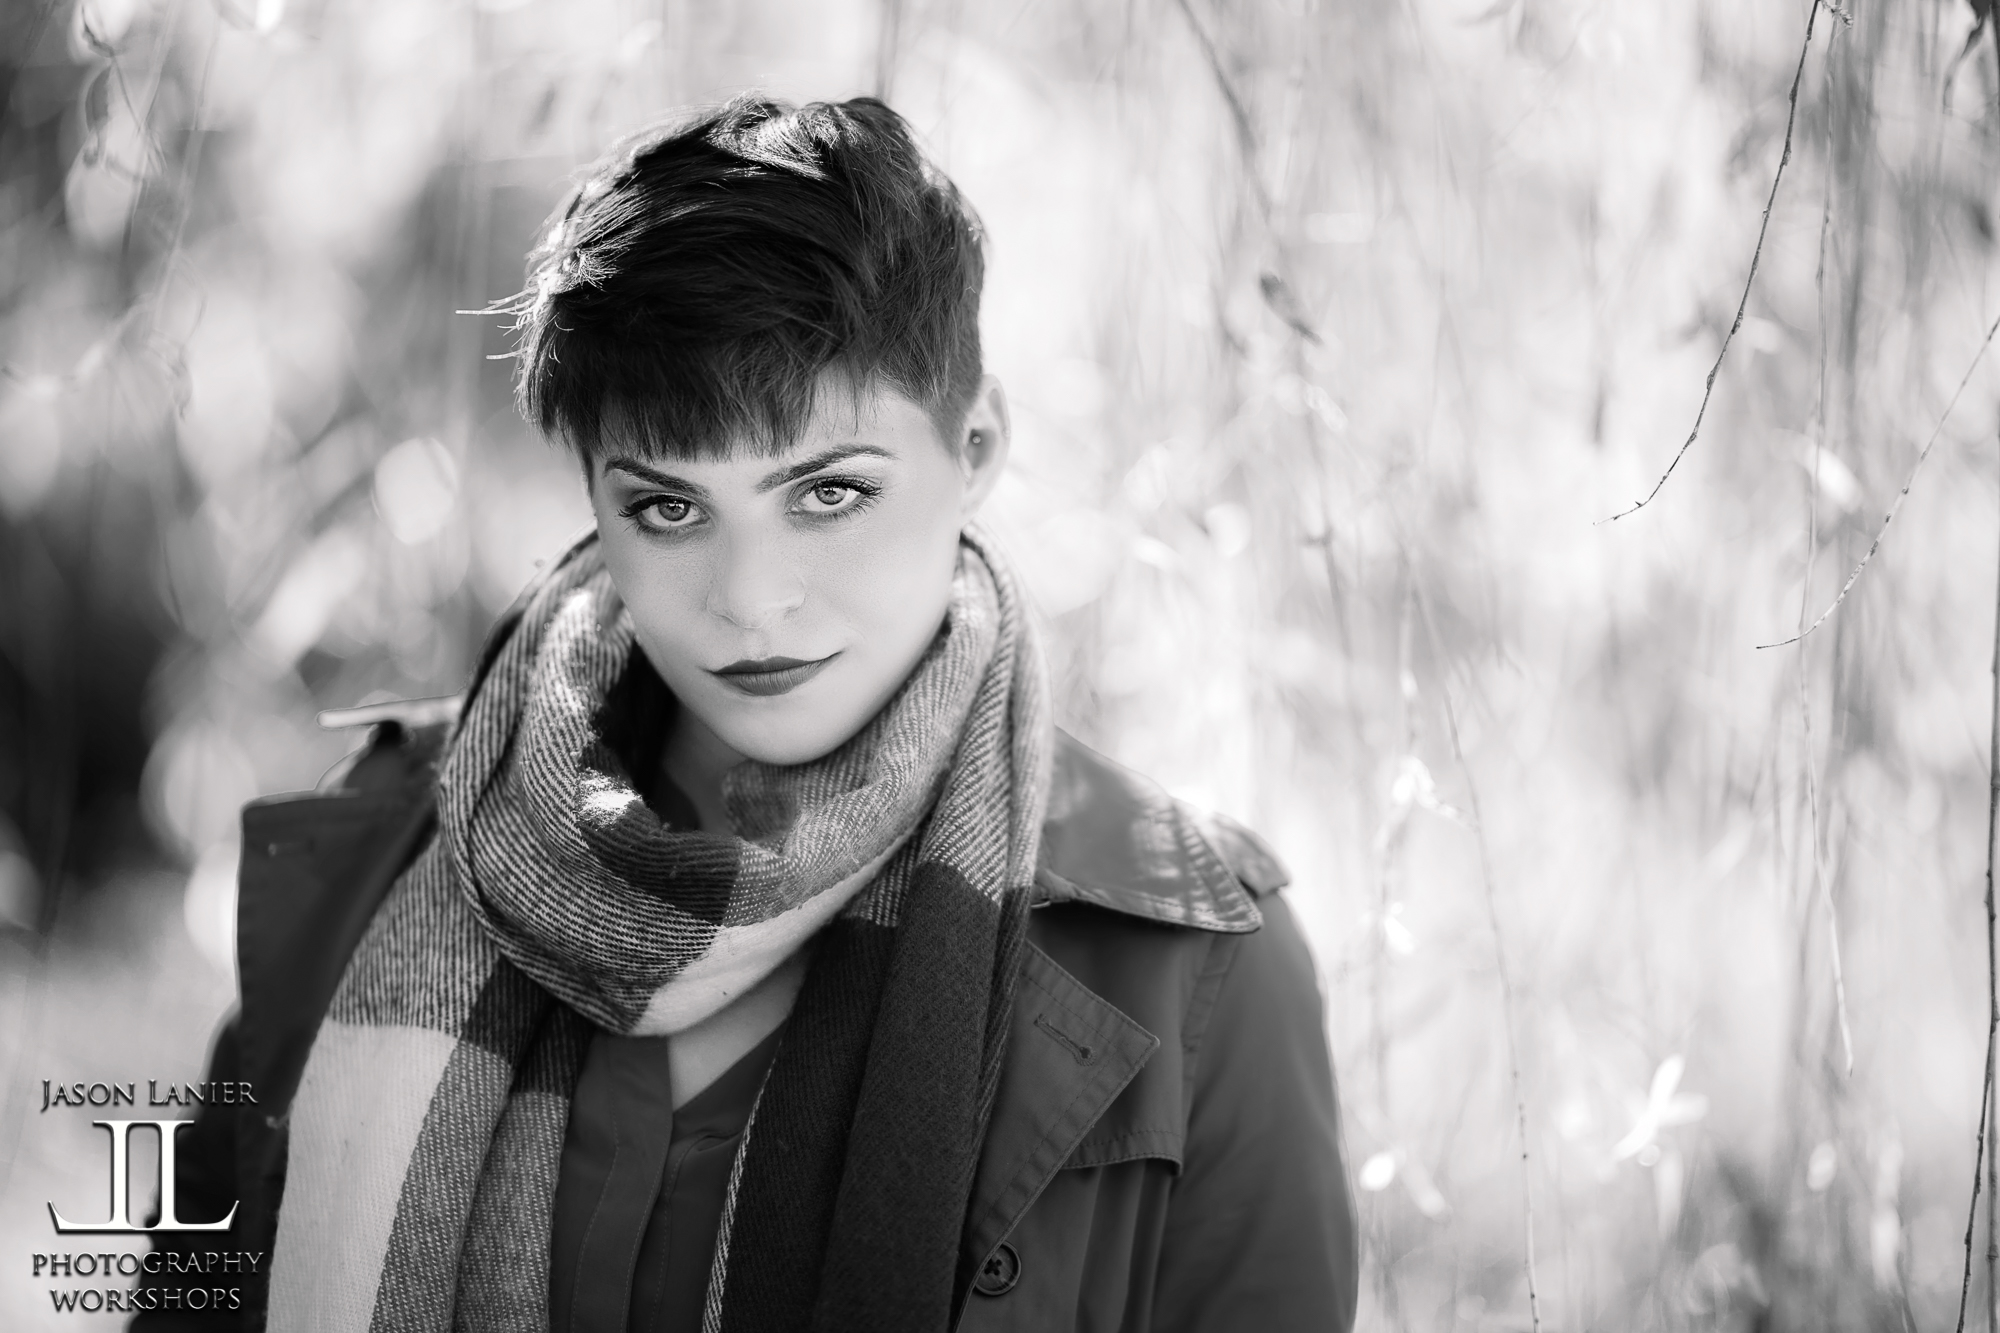
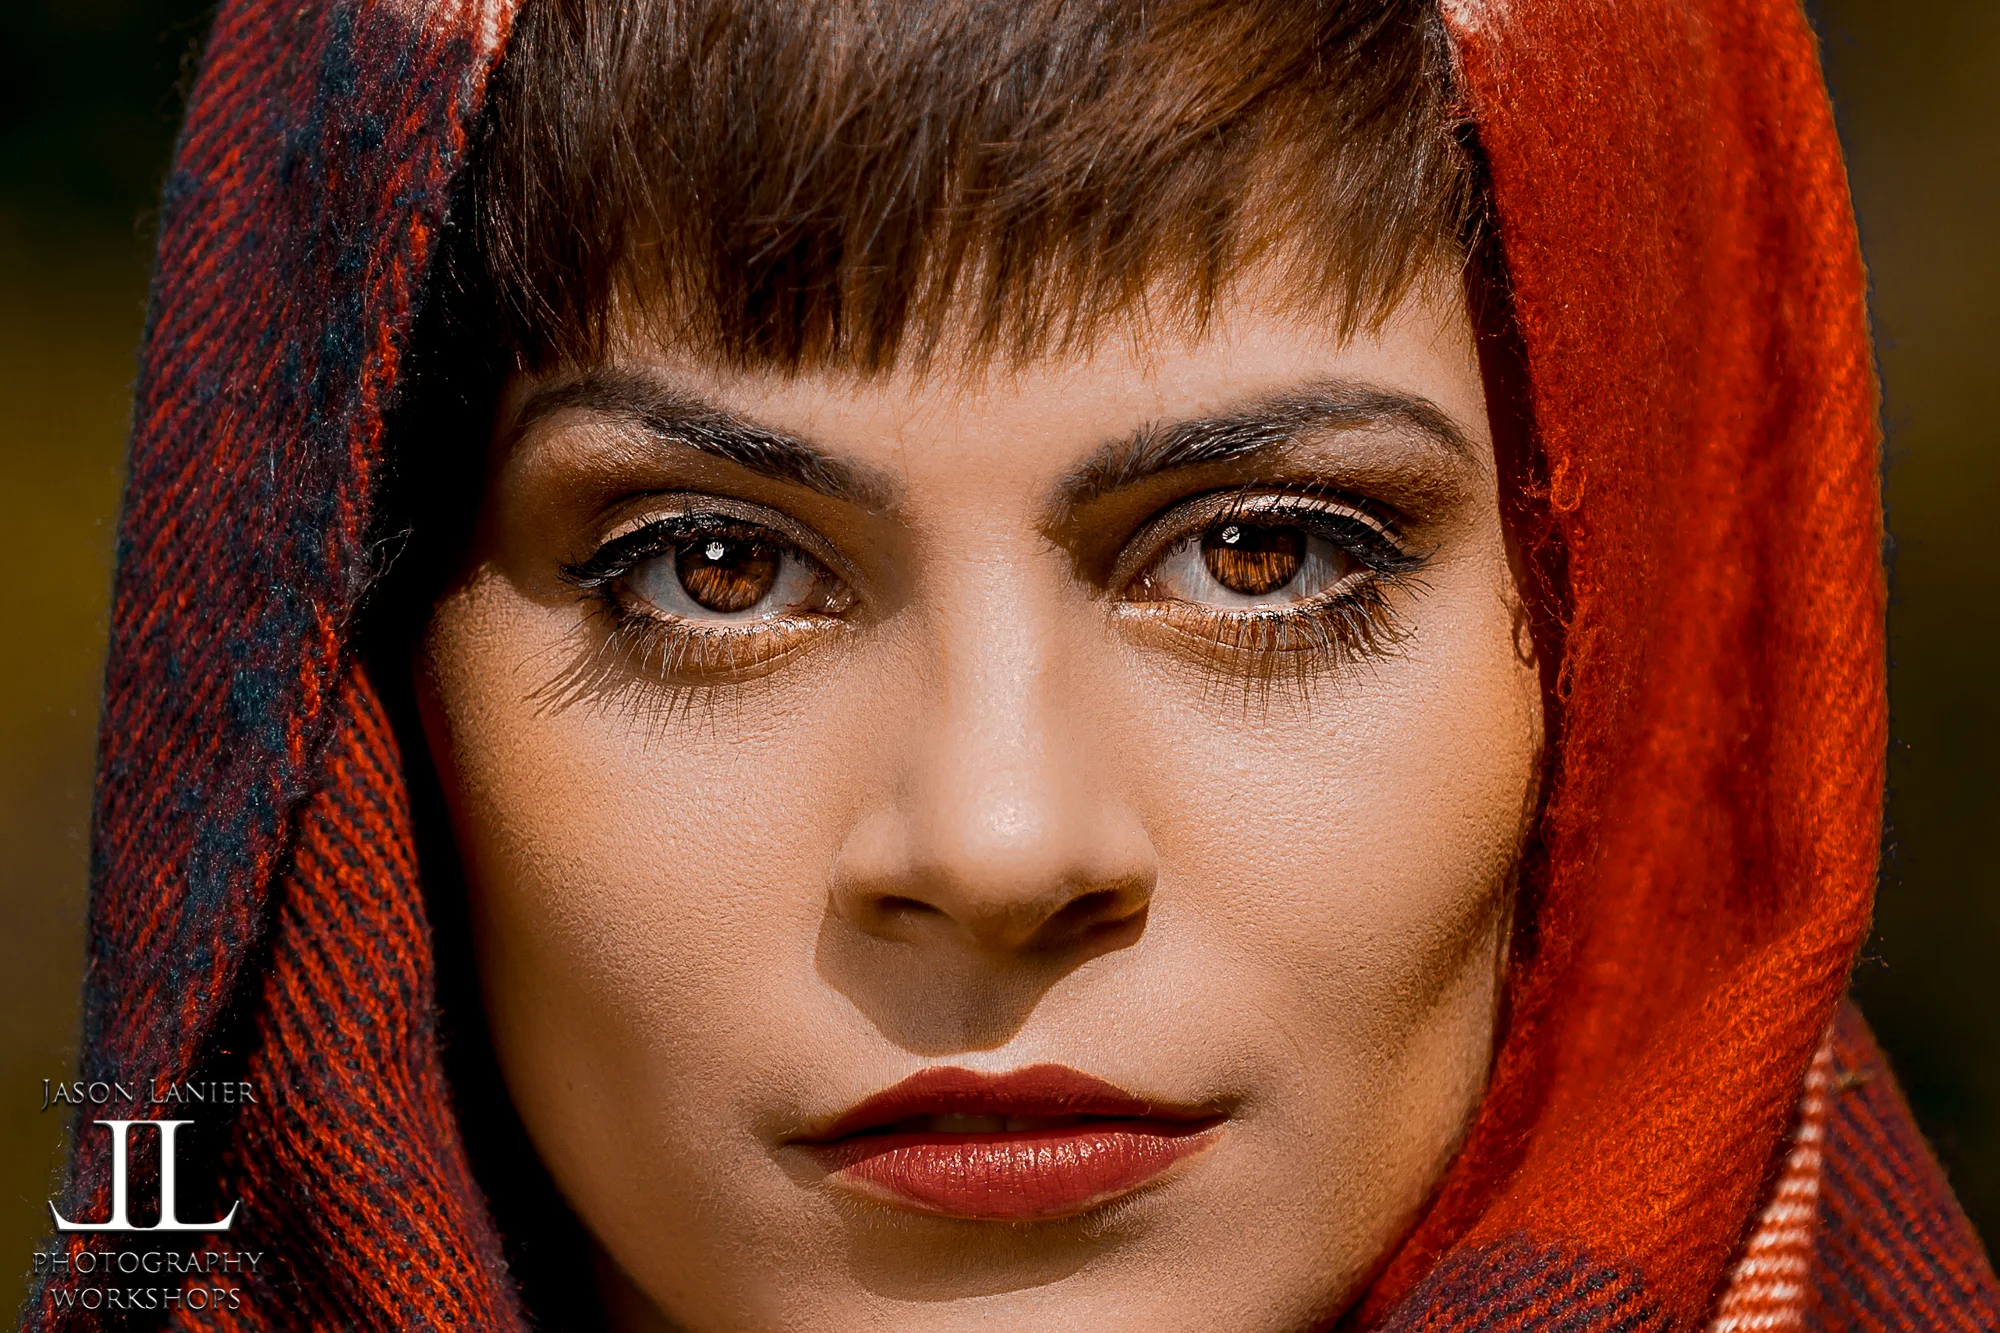
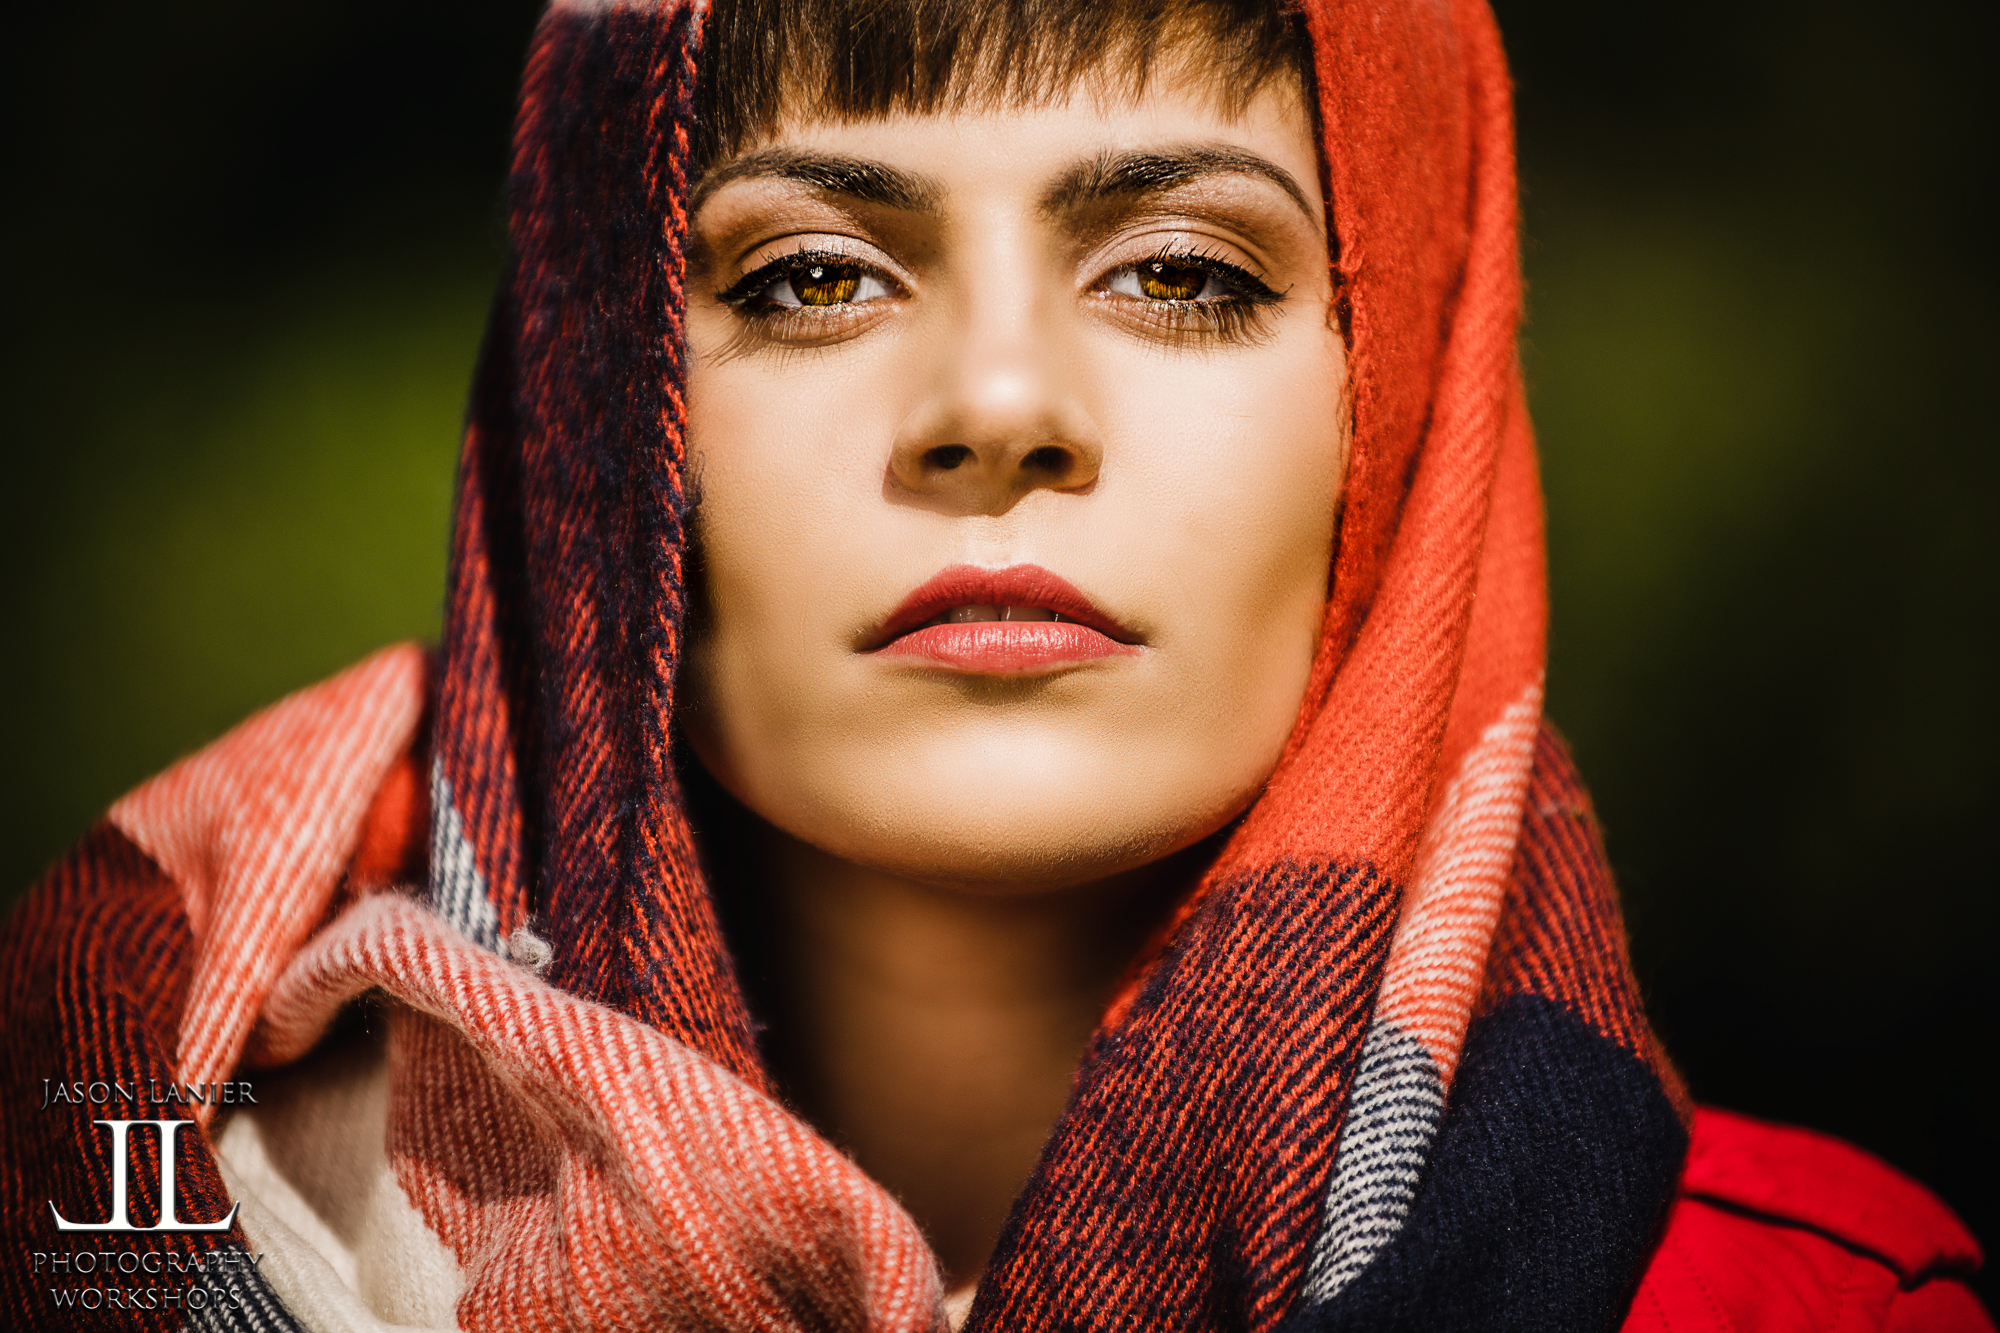
I was using the Godox AD600 Pro for only the second time with the Westcott Rapid Box XL. I placed the light in some bushes in the swamp area as he didn't have a c stand or lightstand with me. If the light had indeed gotten wet, or the battery was impacted by the environment I certainly would mention it and show it as I have done so in the past with other videos where I have broken gear. This wasn’t the case this time around. Below are the images taken during the shoot. Some with flash, the latter shots with natural light after the light failed.
During the shoot the light started beeping repeatedly and the fully charged battery completely died. Upon returning back to the hotel that night I left the battery charging overnight. Typically it takes about 2-3 hours to fully charge a battery like this one. The battery never took a charge.
Upon asking other users about this issue it appears to be a bigger issue not related to just my experience. I contacted Godox and asked for a replacement battery which they quickly sent.
I plan on trying the light and batteries out again to see if my experience is the same or better than what I experienced on this shoot.
We thank you in advance for watching and invite you to stick around and watch a few more videos while you're here. Don't forget to click on NOTIFICATIONS and SUBSCRIBE so you're updated every time we release a new video.
Thanks!
Jason
Cuba is always an amazing experience. I’ve been there many times by myself, with my family and with two photography groups.
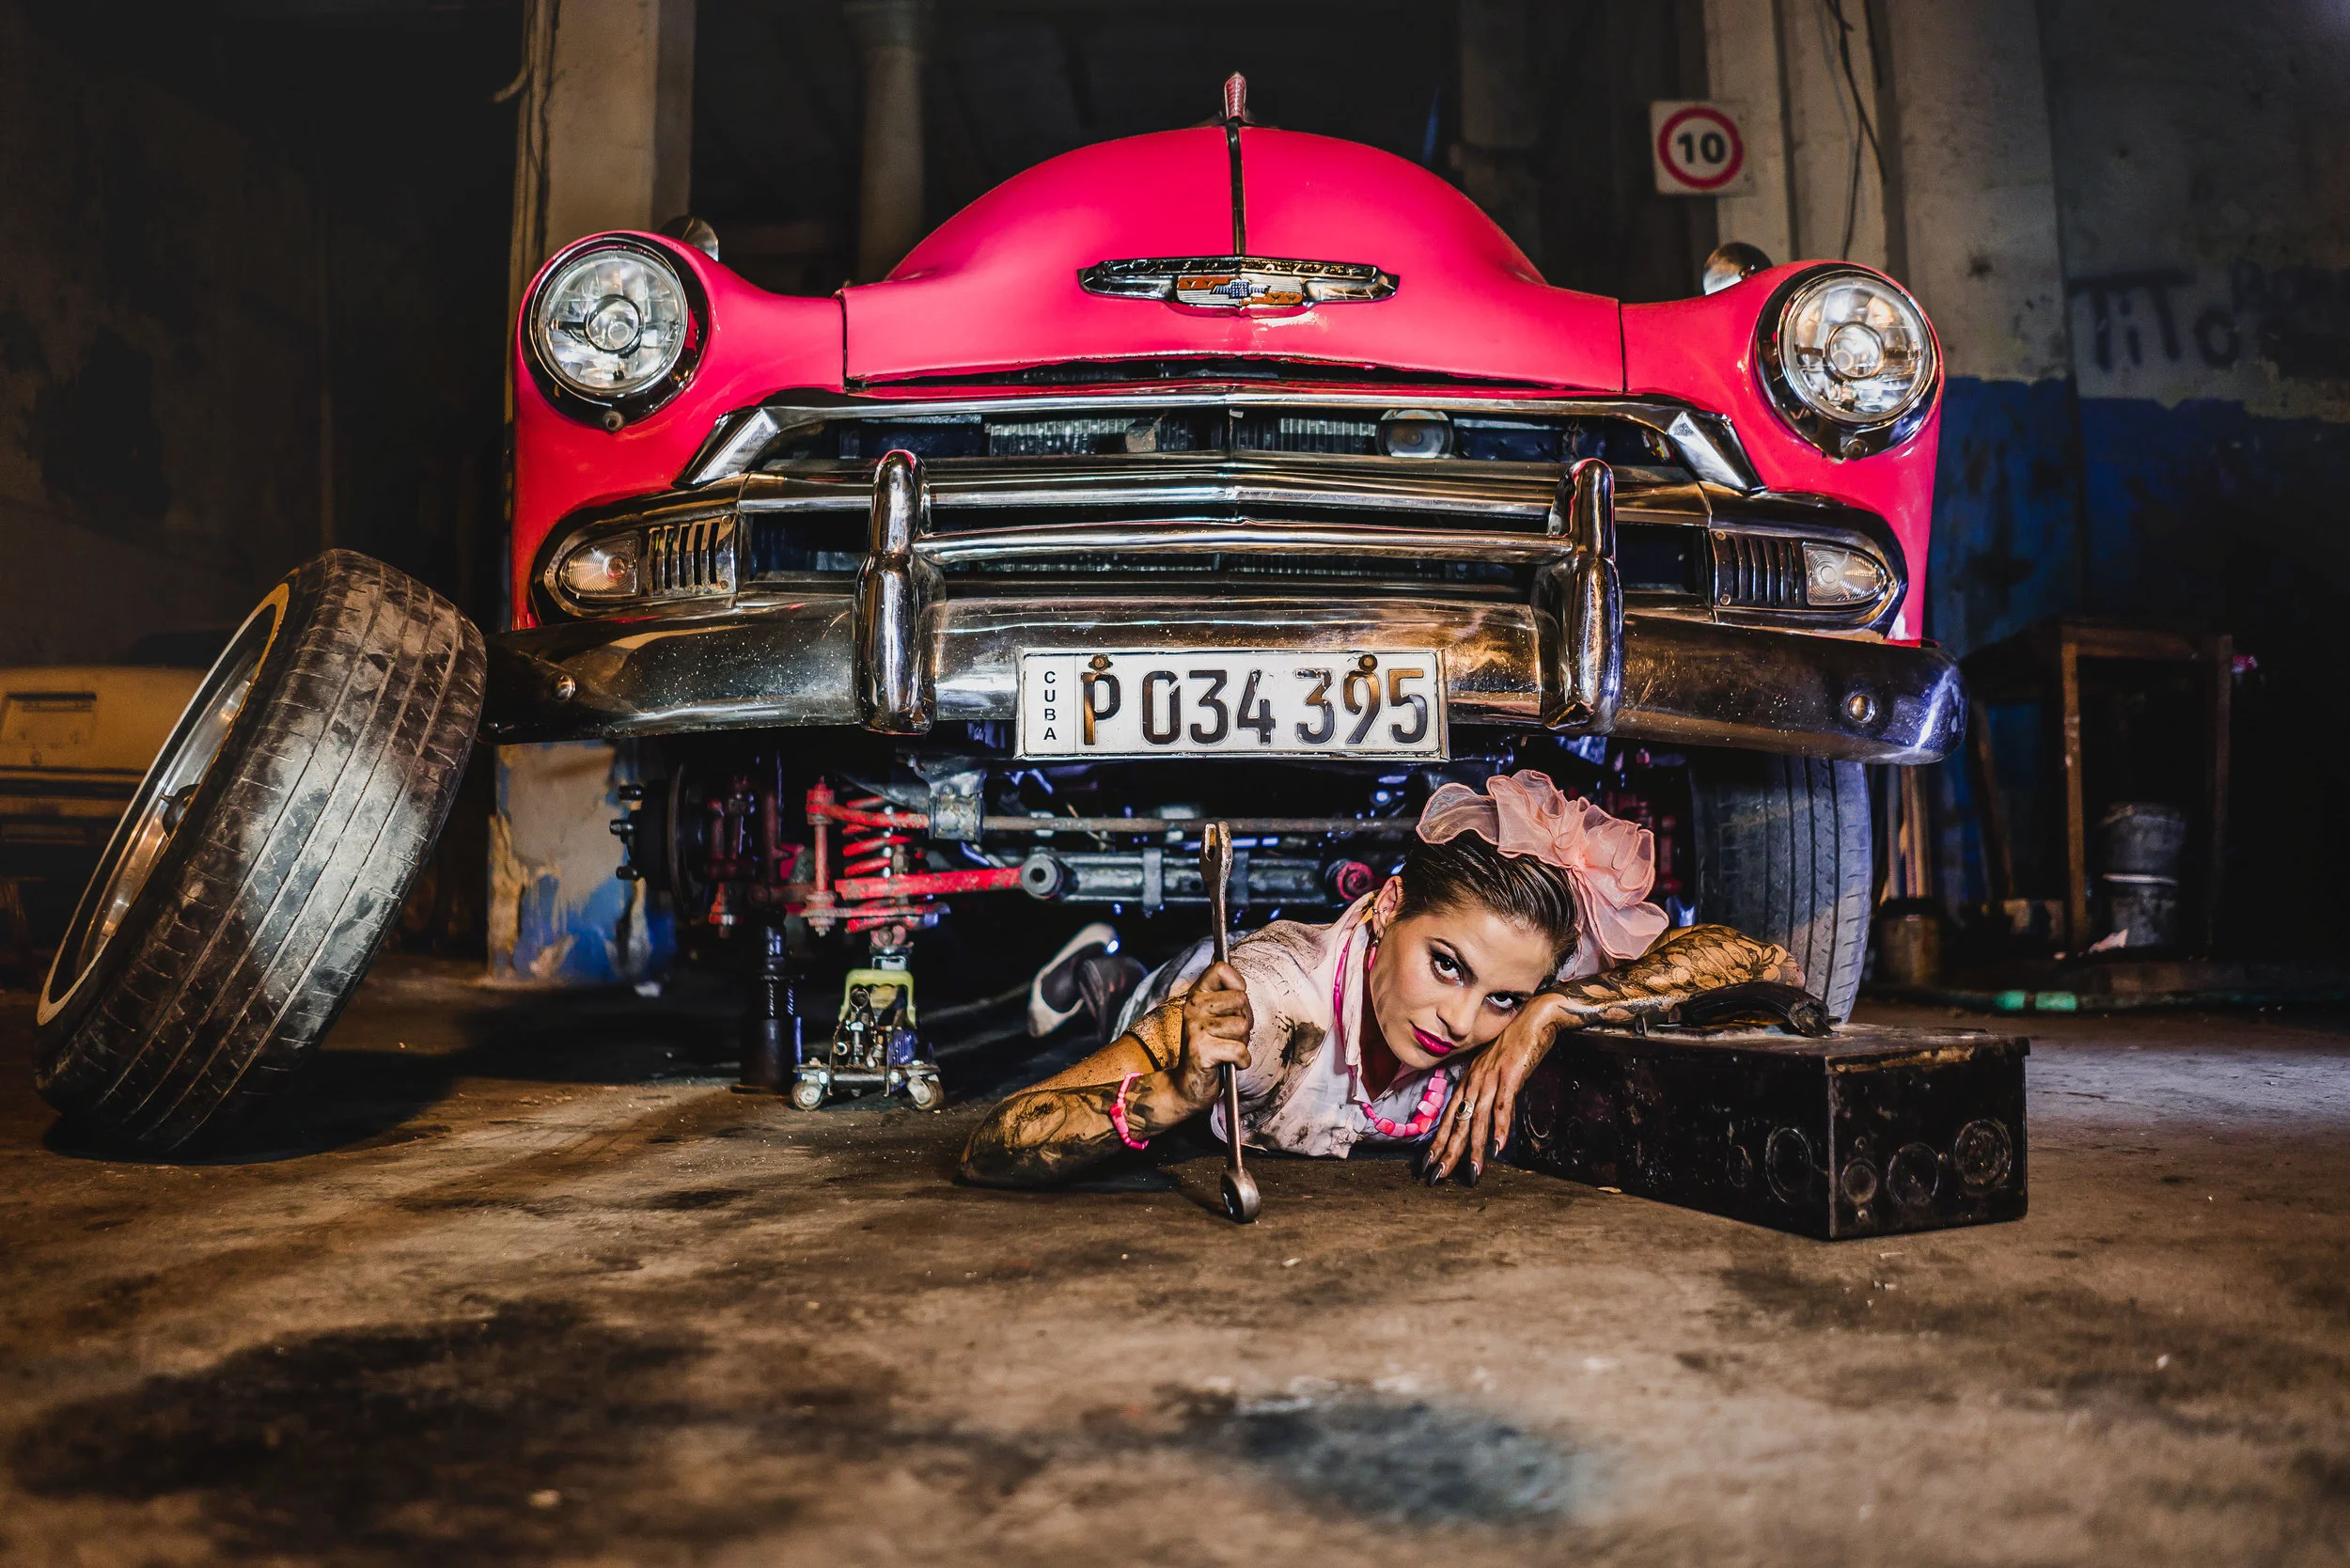
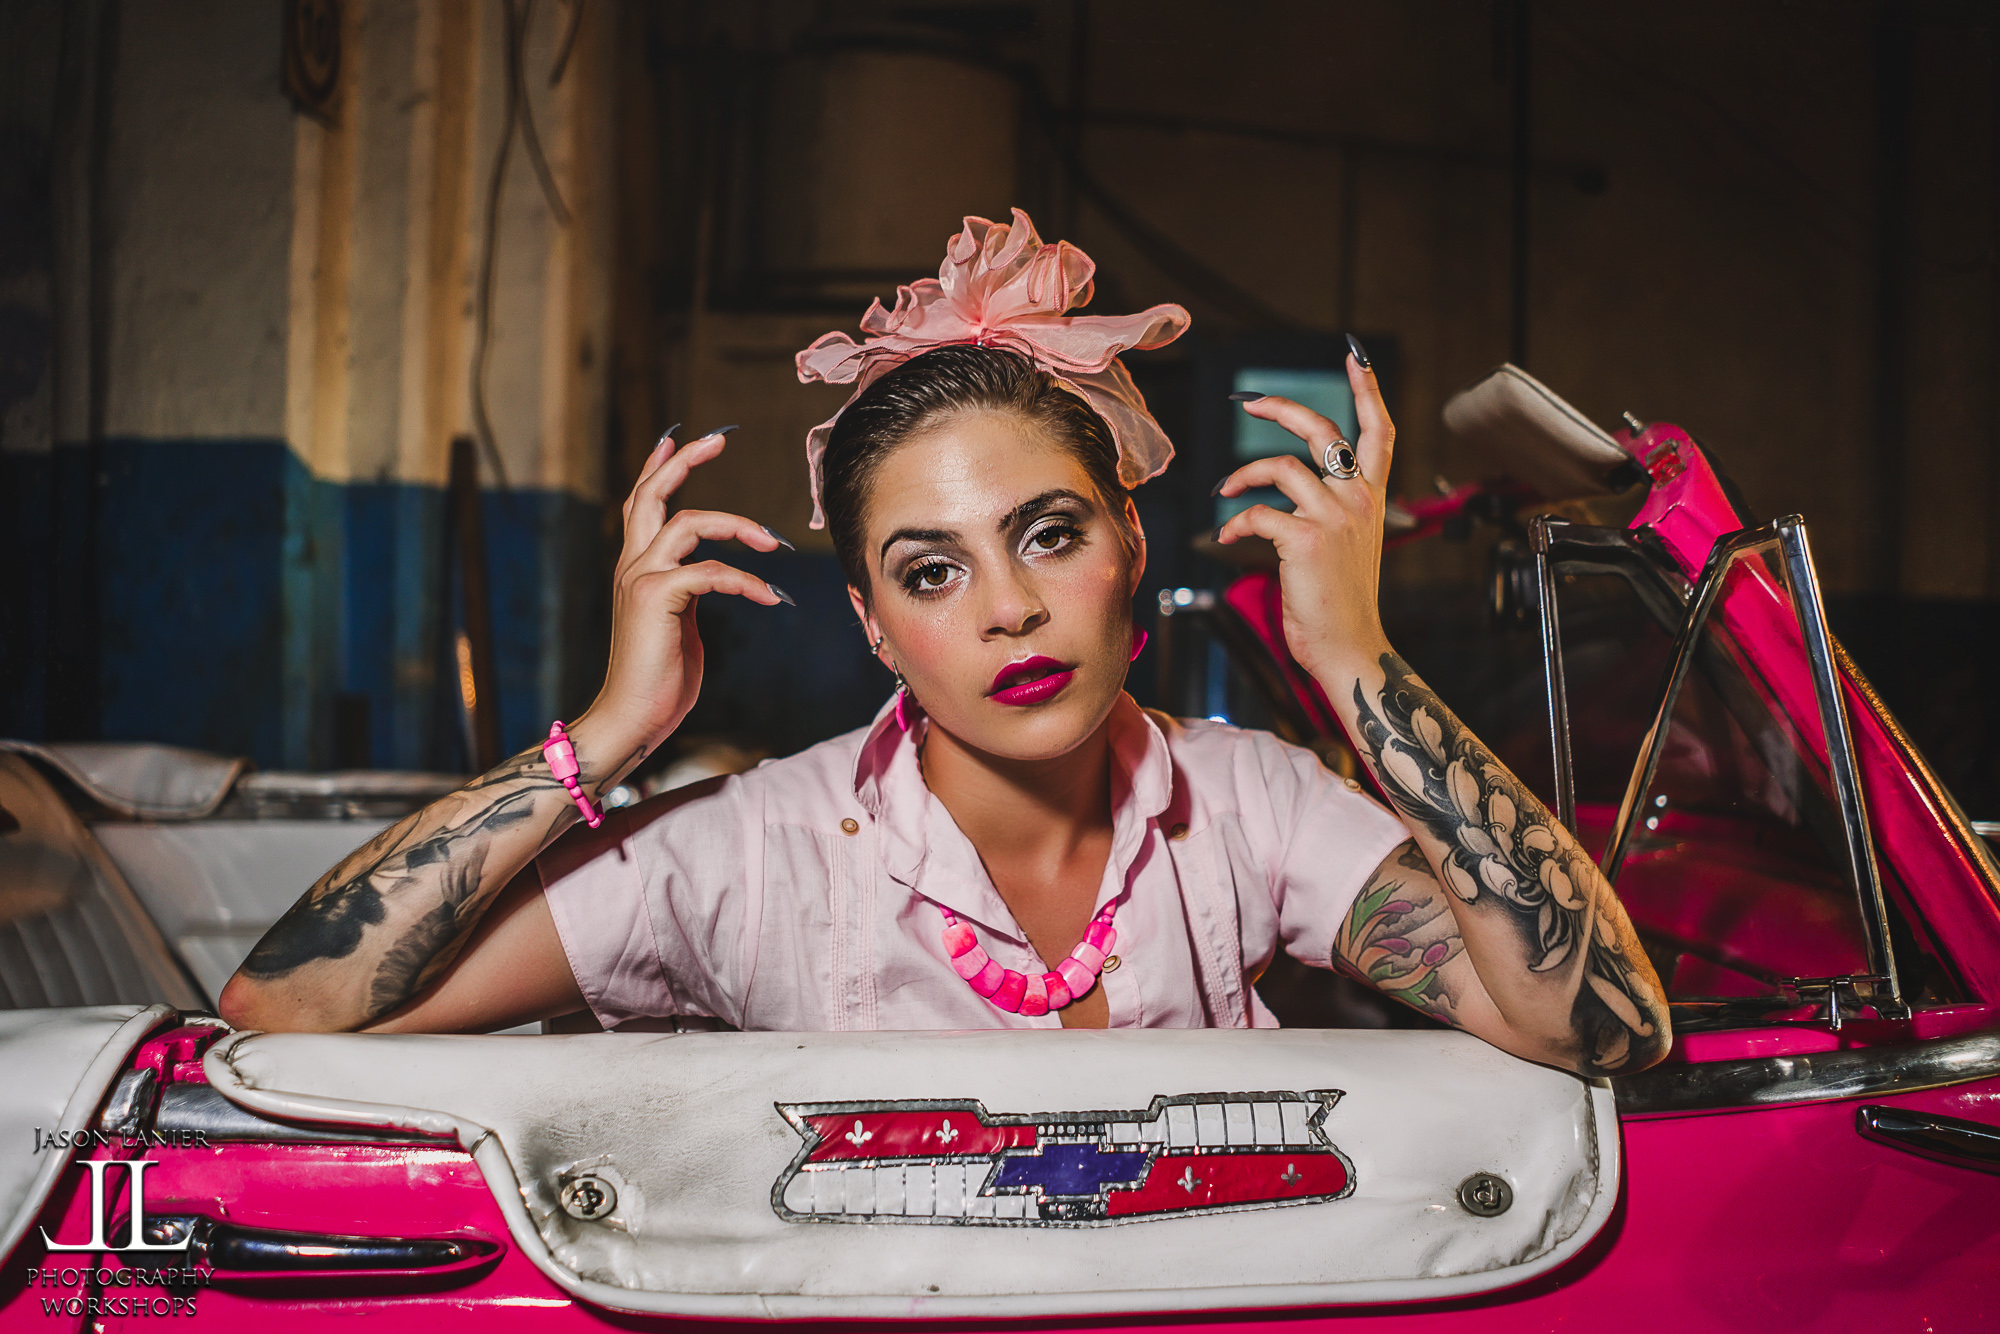
On my most recent trip there in 2019 we had the opportunity to shoot in a real mechanic’s garage in Havana. It all happened while we were walking down the street on our last day there as a group. We were heading towards the Feria which is the local shopping area for some souvenir shopping when we passed a garage with a 1951 Chevy inside that they were working on.
I walked inside and asked if we could shoot there in exchange for some dinero and they were very kind to oblige. Click the video below to watch the entire shoot!
So we continued down to the Feria, bought some wardrobe and accessories for Emily and returned with gear and a sense of creativity to do a shoot!
I planned on shooting with the Sony Zeiss 35mm f/1.4, but one of my workshop attendees named Sandy offered up her Sony FE 28mm f/2 lens, and I decided to give it a go!
This is a lens that I own and purchased 3 years ago. But for some reason I just never ended up using it. So when this opportunity to shoot with this lens came up I decided to go for it.
We pulled out 4 or 5 Rotolight Neo 2’s and lit this place UP! I did the shoot using the Sony A7Riii and ended up using the 28mm for the entire shoot. Below are the images taken:
**Links to Gear**
*Sony A7Riii-
*Sony FE 28mm f/2 lens
*Rotolight- for more information about Rotolight please visit www.jasonlanier.com/rotolight
A BIG thanks to Andrew Balerud for filming this shoot, Emily Holmes for helping with make up and lighting, and to my workshop attendees for joining me on this epic adventure. I can’t tell you how much we appreciate your support.
Lastly, PLEASE give a follow to Emily Rinaldo my amazing model and muse who always knocks it out of the park. You can find her at www.instagram.com/em.explores
Thanks!
Jason
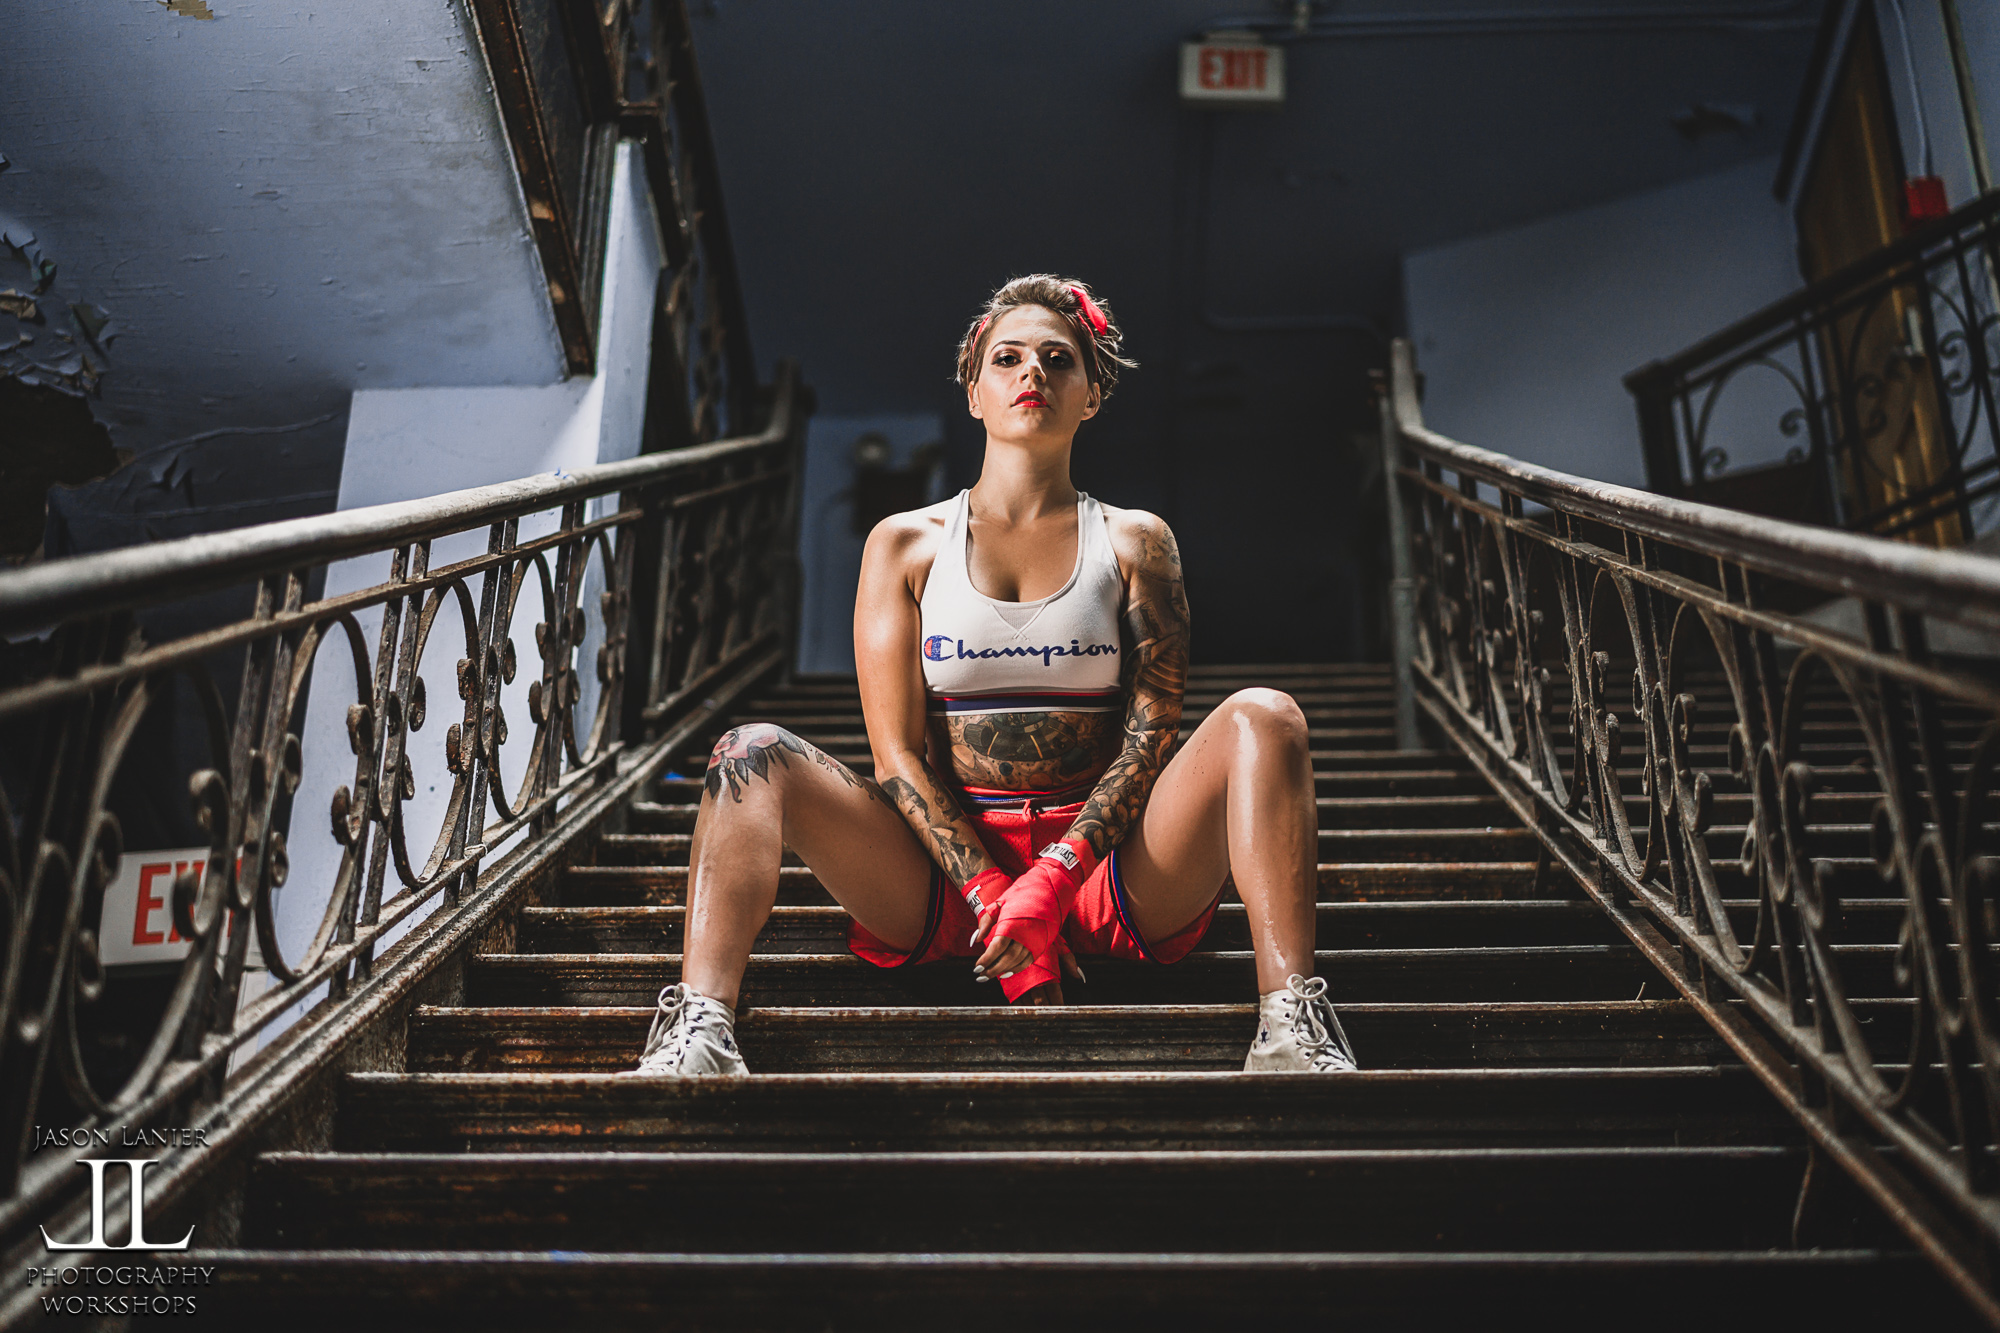
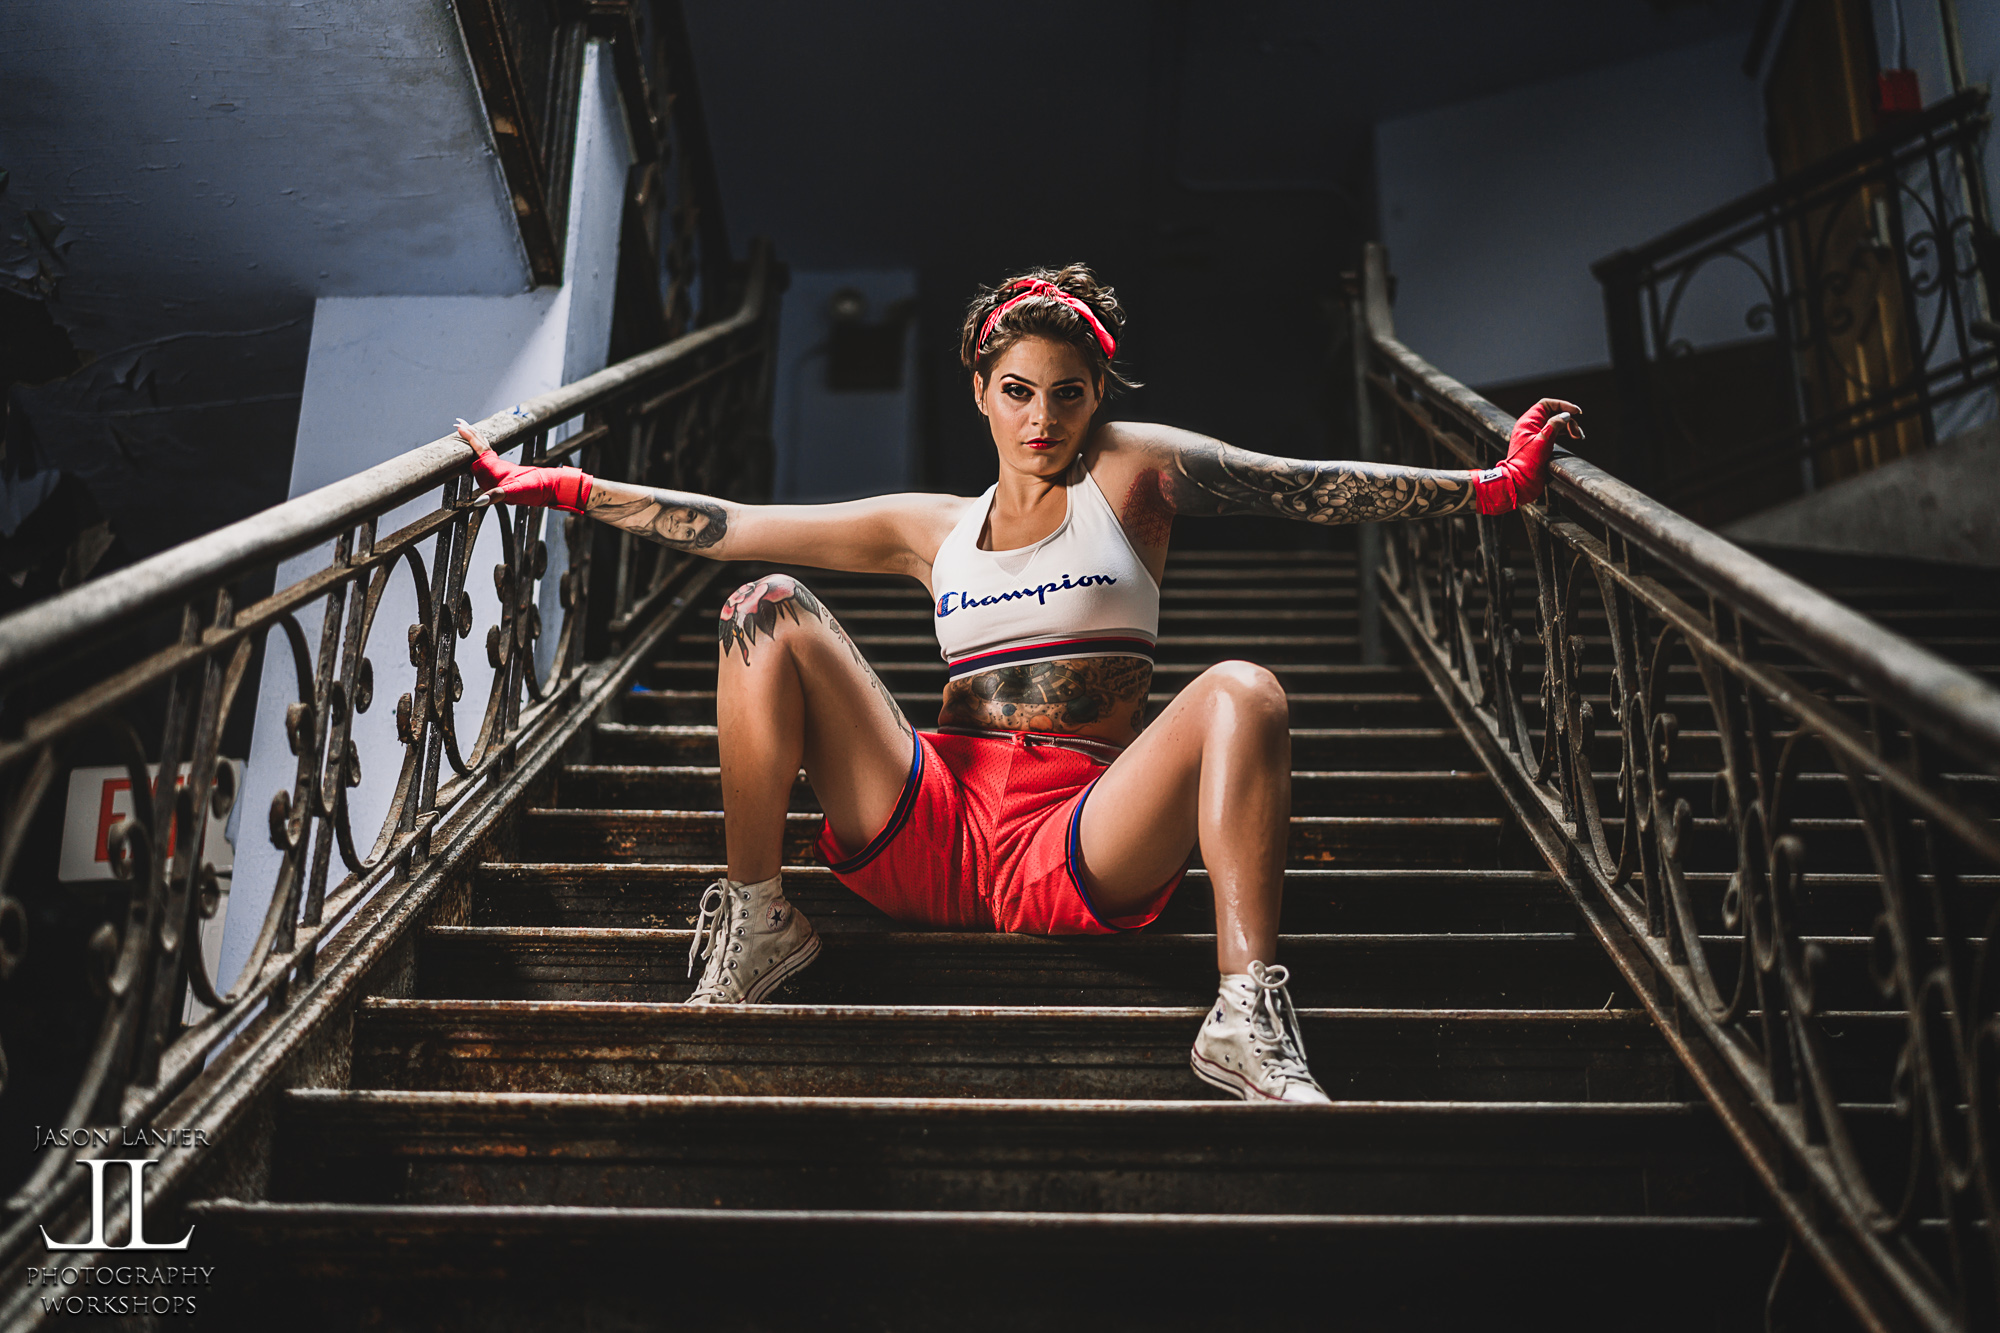
WOW! To say that my experience at Blue Horizon Boxing Arena was epic is a true understatement. My protege Emily and I were in town for a workshop that we had planned in Philadelphia. Emily’s Urbex buddy John Hall @jhal10 reminded her of a place he’d been called the Blue Horizon. He told us that there was some sort of a secret way to get inside of there and that if we tried hard enough, we’d be able to find the man inside who could let us in.
To see the complete experience in 3 parts, Urban Exploration, shoot with a Workshop Group, and the portrait session of Emily, please watch the video by clicking below!
So we knocked on the door for about 10 minutes, patiently waiting until a man opened the door. After paying the man for the opportunity to shoot there, we proceeded to start to explore this magnificent structure that was built as a private estate back in the 1800’s and then converted into a legendary boxing arena in 1961.
One thing that Emily and I share is the love for Urban Exploration. We didn’t even know if anyone was even going to answer the door to this place let alone be able to to shoot there. But since we were in we set out to explore this place for as long as we could. Below are some of the images from the Urbex shoot shot with the Canon 11-24mm lens as well as the Sony 90mm macro.
The Blue Horizon has only been vacant since 2010, but the amount of wear and tear at this property is just insane. I love taking macro shots at Urbex locations because it can really tell the story of a place. It’s easy to get carried away with wide angle shots in urbex locations, but don’t forget the details too my friends.
We asked the man taking care of the place if we could bring a group back. We negotiated a price and then came back the following day with our workshop group. The joy in being able to bring other photographers, many of whom have never been in an urbex place like this before, is just incredibly rewarding. After some instruction they proceeded to map out their own places in the building where they wanted to shoot with the models we brought and then proceeded to shoot them with our guidance.
We wrapped up the session with a group shoot in the center ring. WOW! What an experience. We had two models named Mae and Lauren who played the part of warriors fighting in the middle of the ring. The real trick was trying to recreate the lighting that would have been present during a prize fight. We put a Rotolight on top of a boom on a C stand and illuminated the ladies as they put on a show of might. You HAVE to watch the video to see one of their epic battles stitched together in 156 frames shot at 20fps on the Sony A9. Below is just one of the stills:
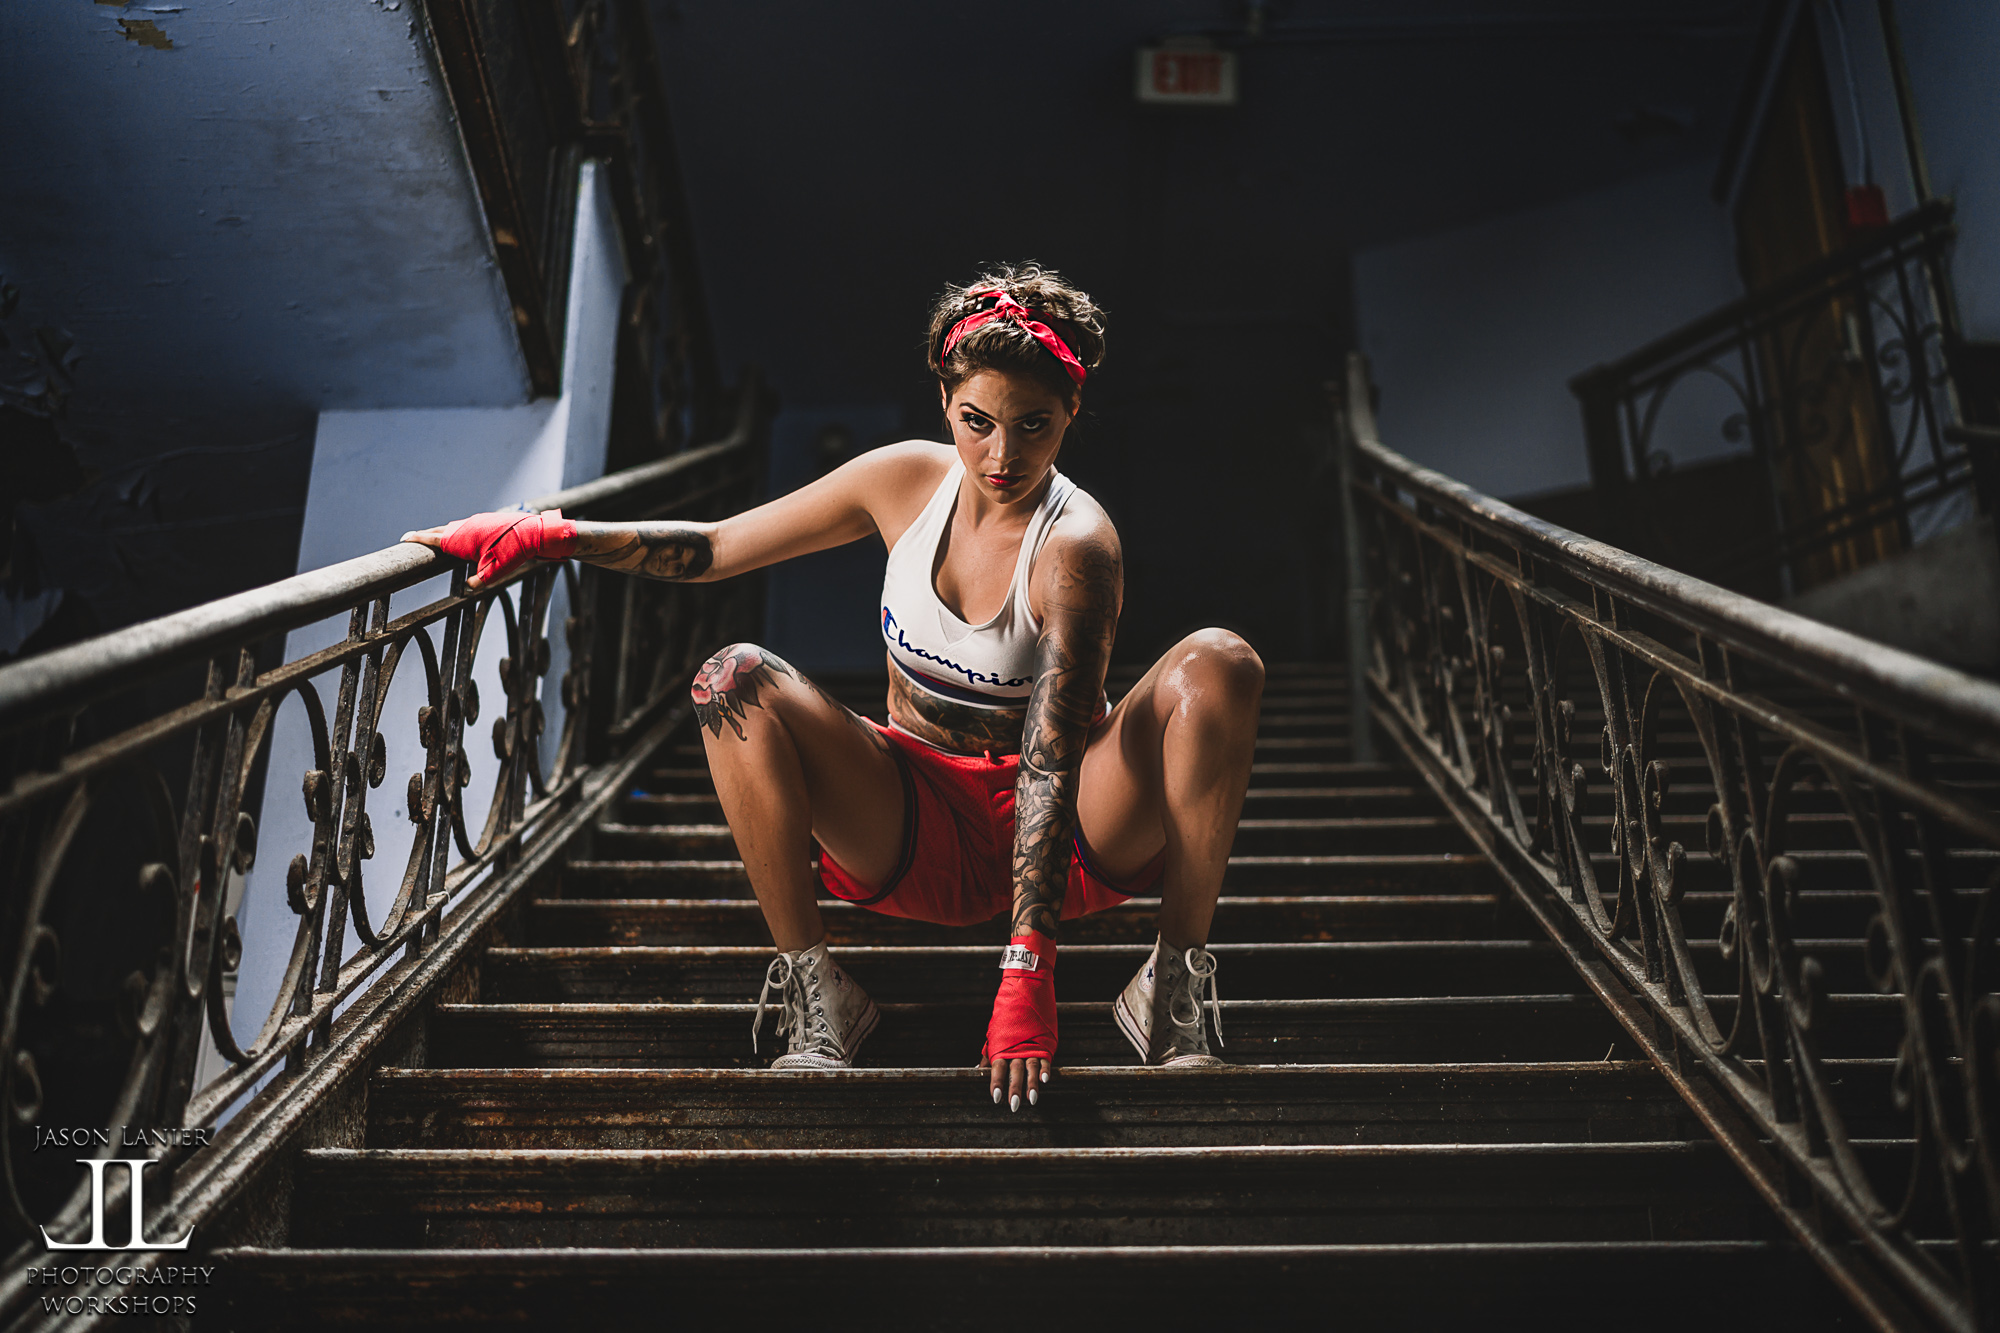
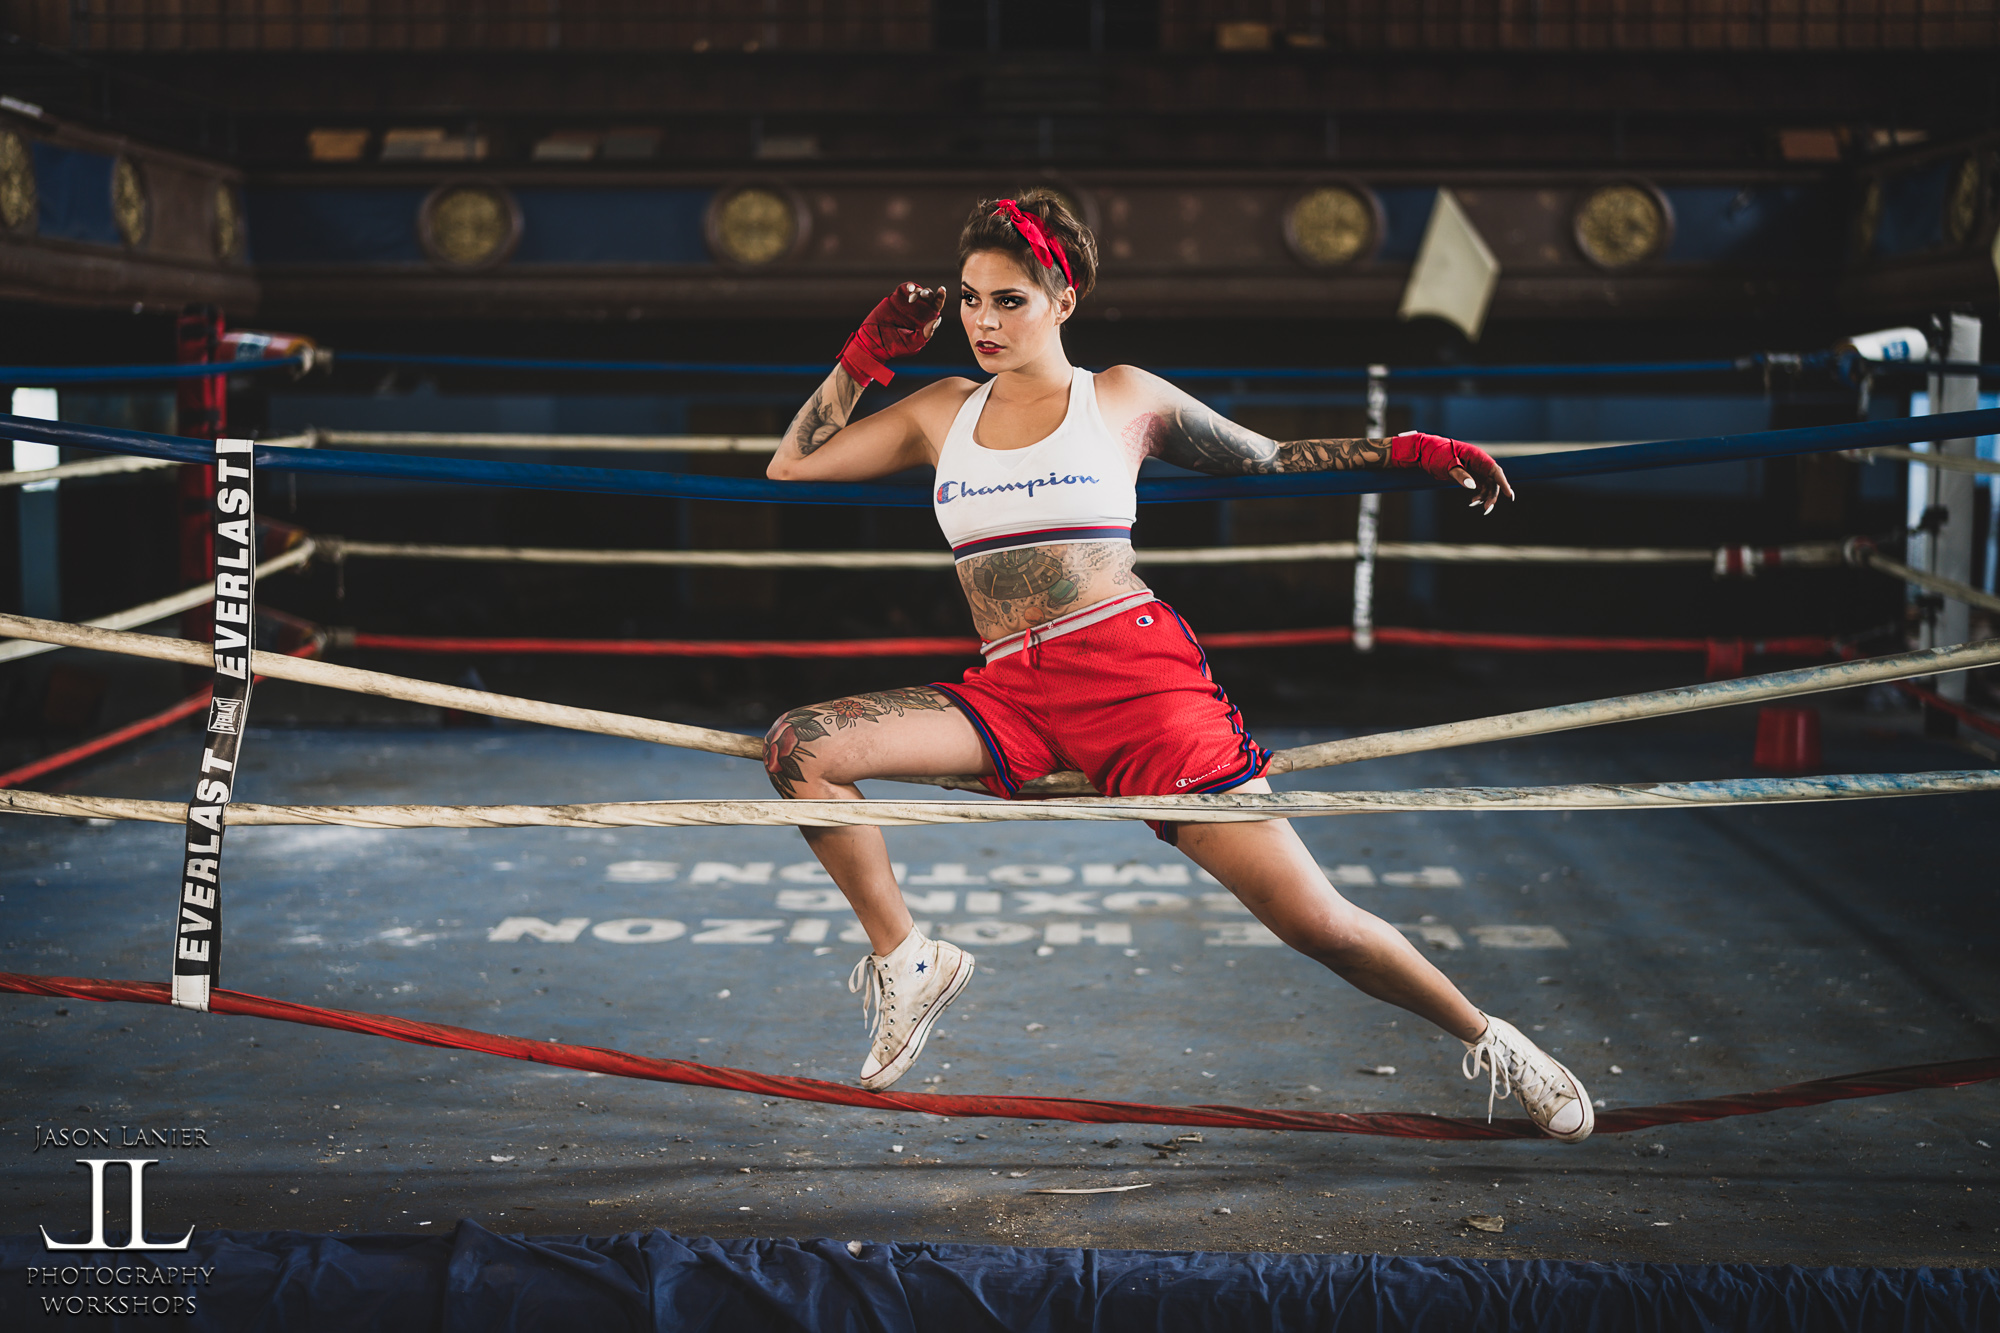
Following our workshop group we reached out to our man on the inside once again and asked him if we could come back for one more shoot with just Emily and I. For the right price he agreed and we returned with two helpers for quite the shoot.
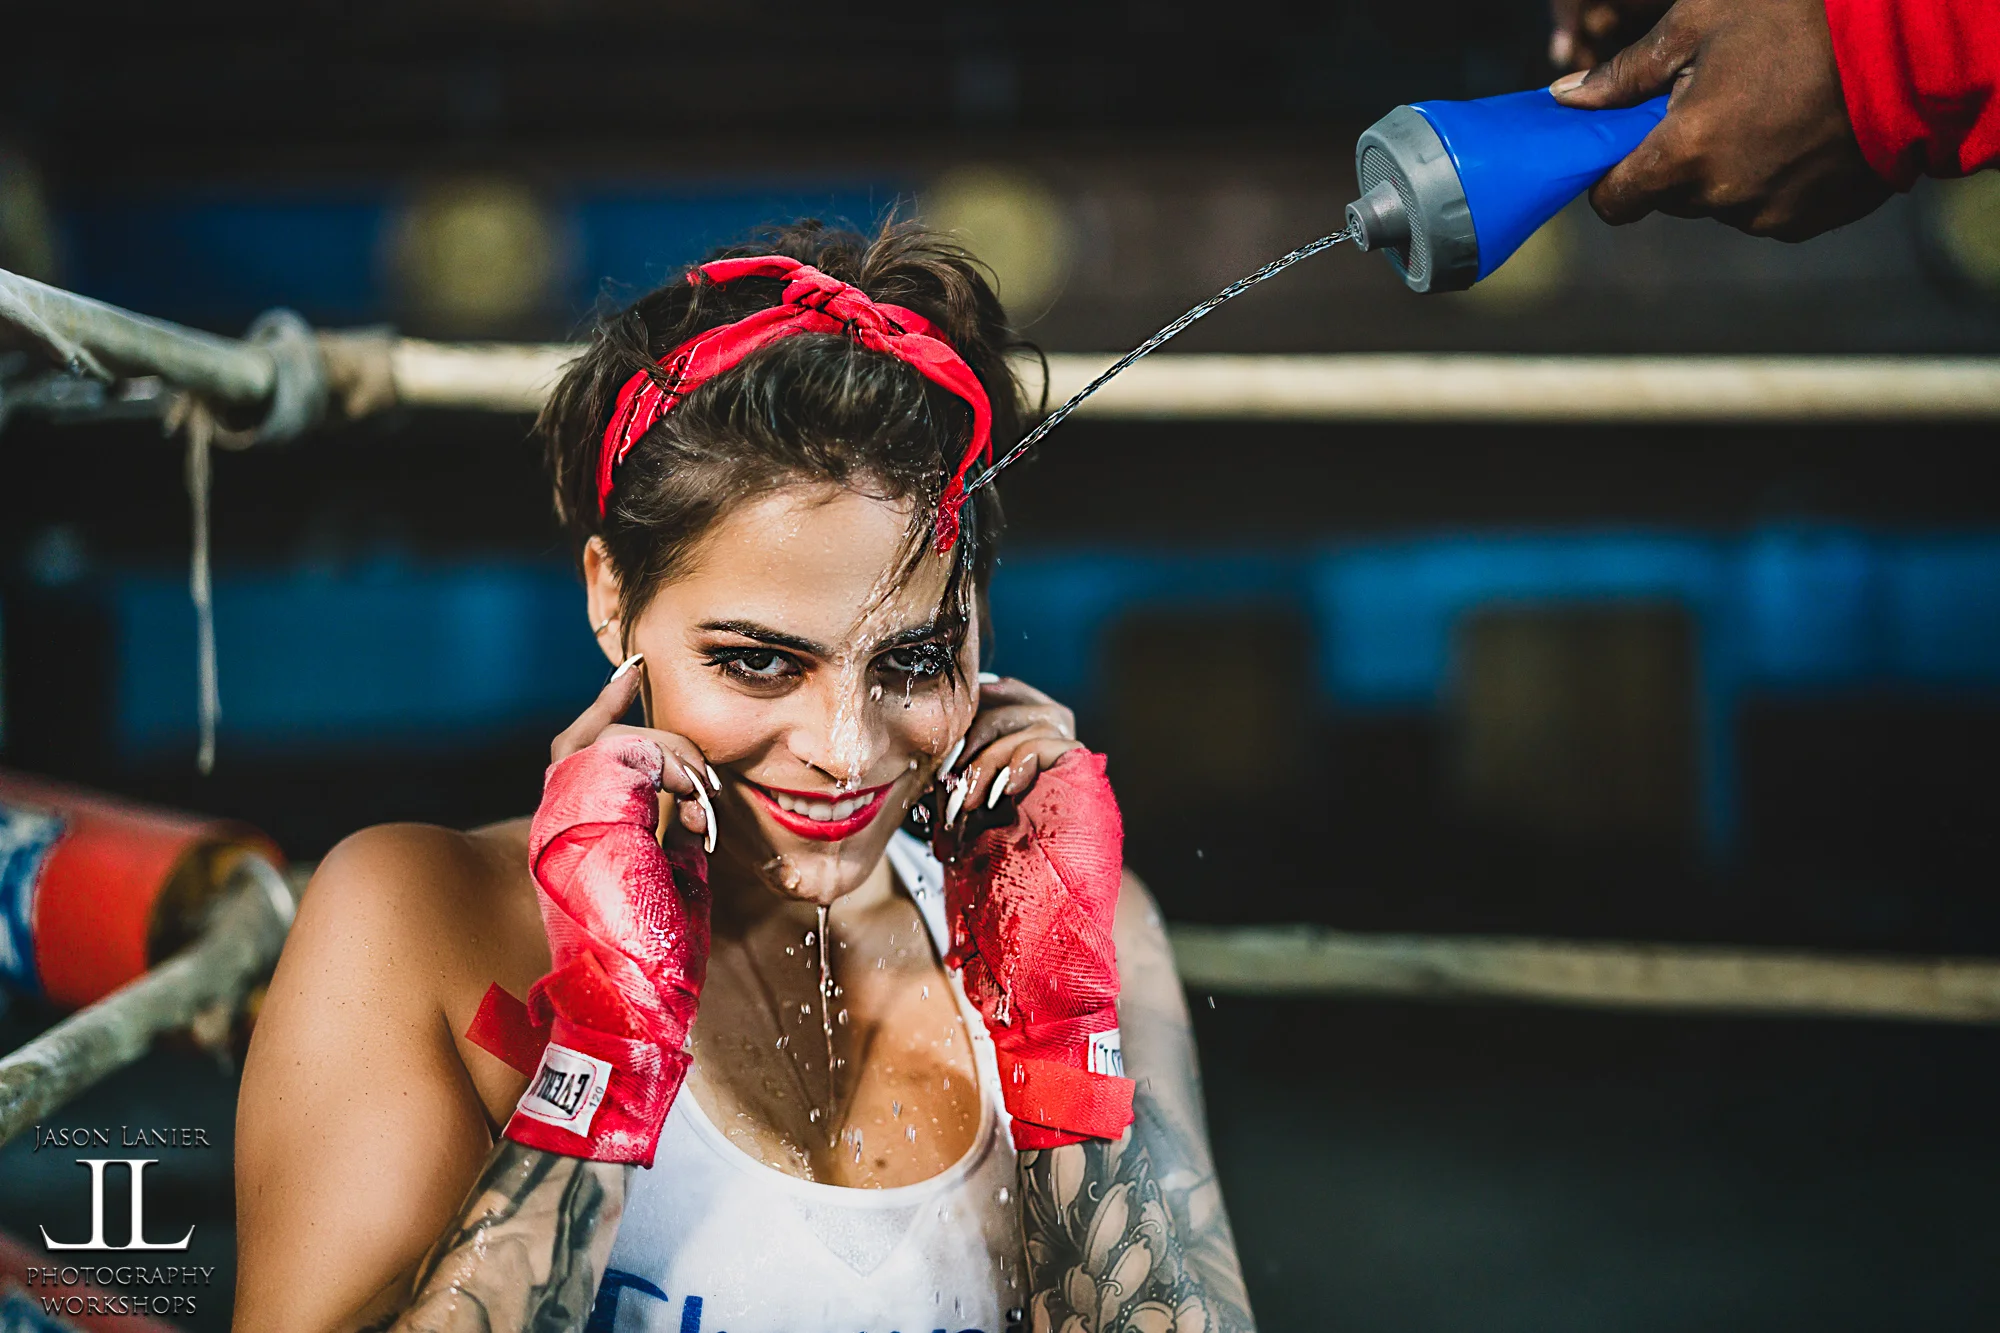
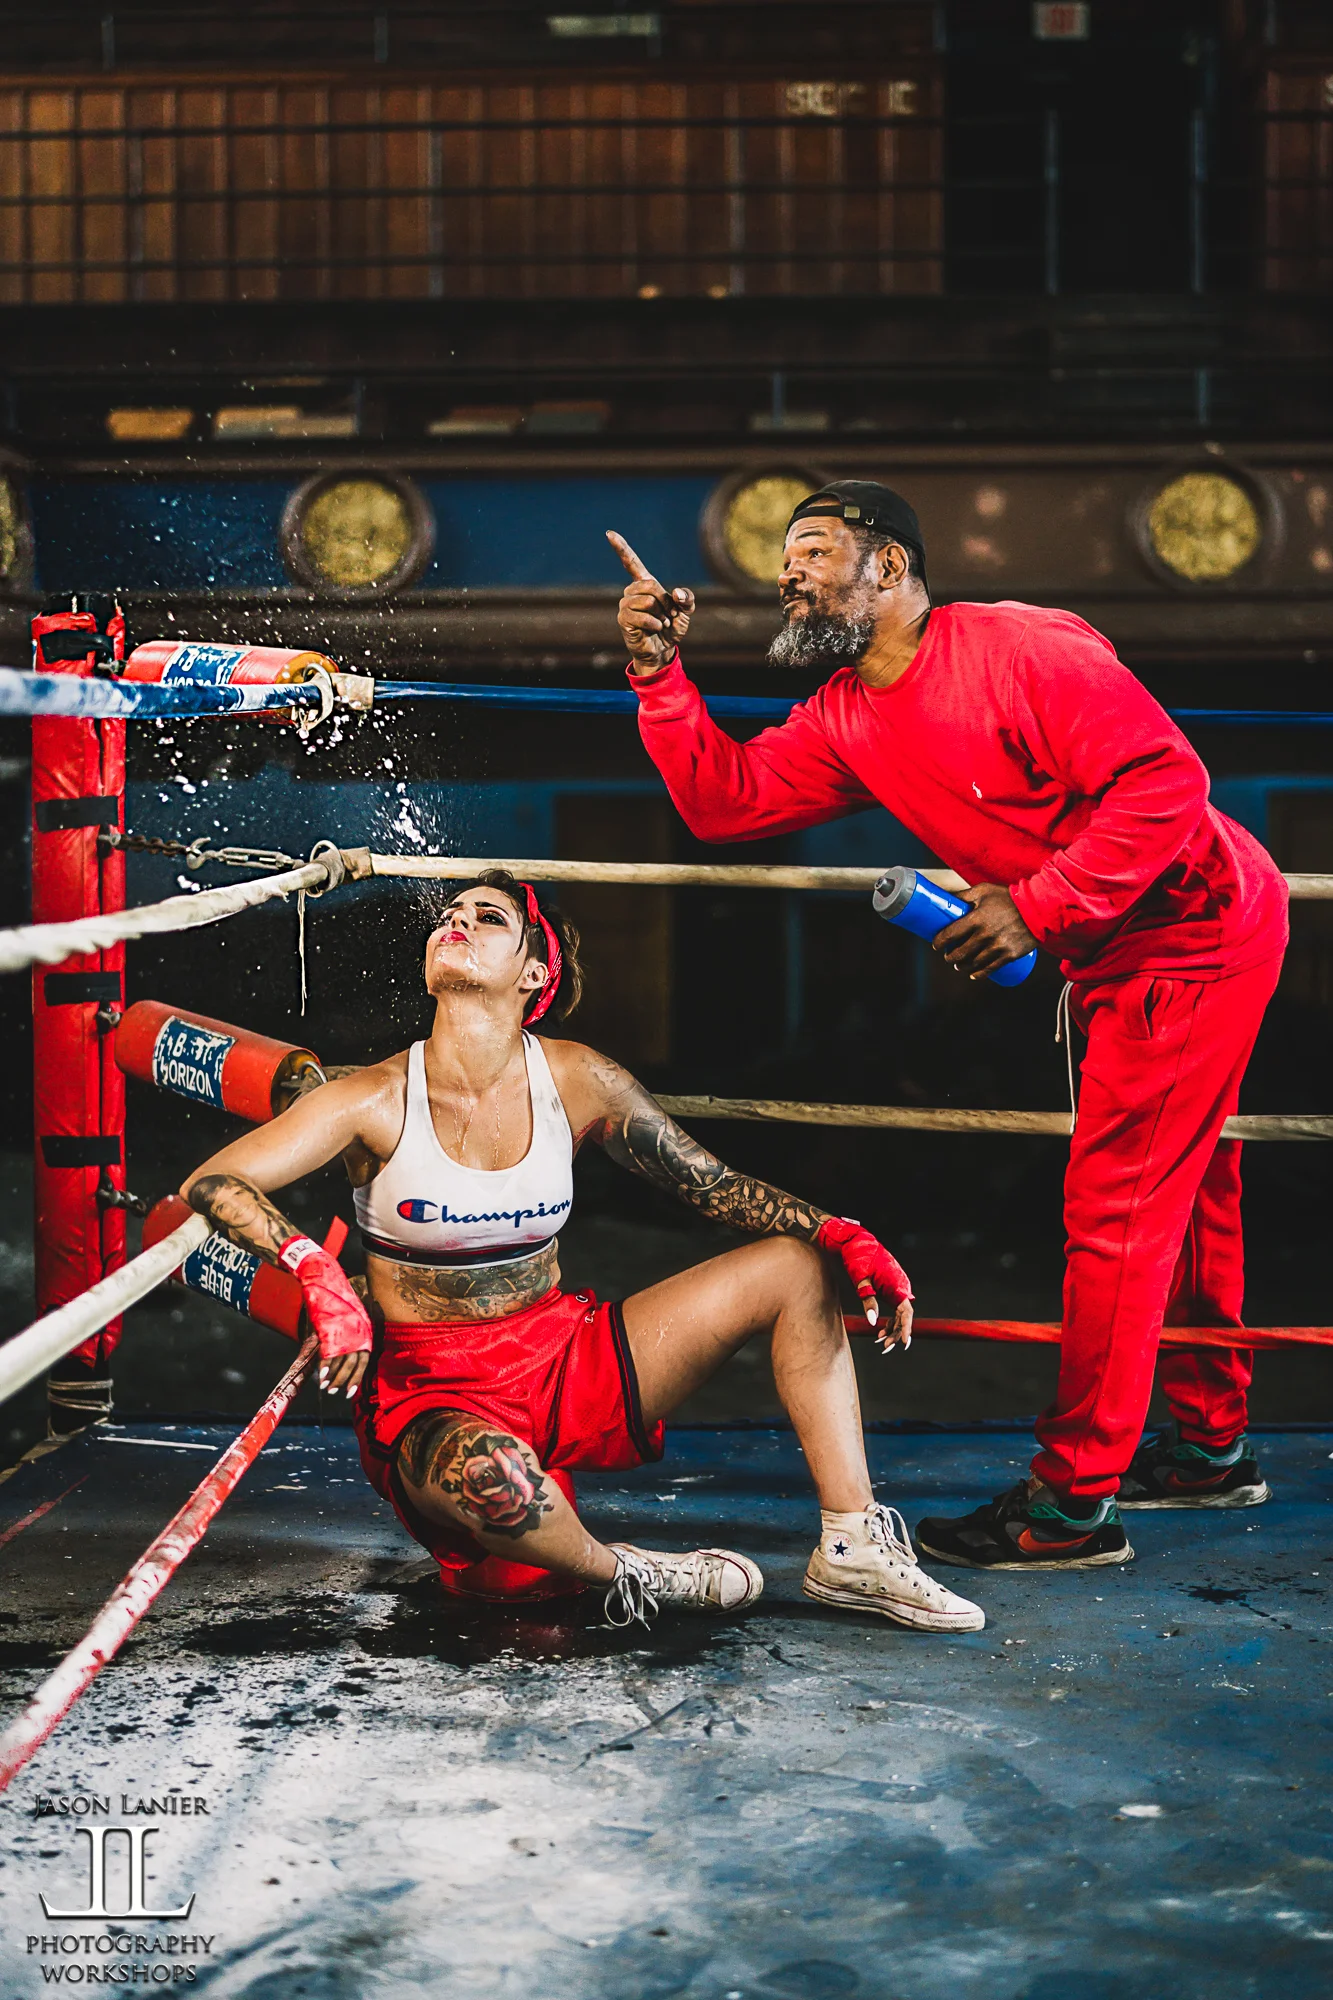
One of the things that made this shoot so awesome was that one of the helpers was a former boxer who actually fought at the Blue Horizon named Thomas Woods. He went 7-1 in his 8 bouts there and it was a thrill to have him accompany us for the shoot. He’s one of my followers and we actually ended up including him in the shoot playing the part of Emily’s trainer. Being that this was our third time at the Blue Horizon we knew some of the best spots to shoot at and using the Rotolight Anova Pro 2 we did an amazing shoot together. Below are some of the shots from the shoot:
What made this shoot so amazing was using the current technology of today to story tell. When you watch the video you’ll see how fun it was to get Emily and Thomas to act out scenes and for me to be able to capture them at 20FPS using LED lighting with Rotolight. It truly was an incredible experience.
I can’t thank my protege Emily enough for everything she did and continues to do to make this such a remarkable experience. This video really shows her depth not only as a model and assistant, but as a photographer as well. Below are some of her images taken at the Blue Horizon:
We can’t thank you enough for following us, supporting us, and giving your precious time to our efforts here at Jason Lanier Photography. The experience at the Blue Horizon was unforgettable and I’m so grateful to the workshop attendees who joined us as well as Erik Rosa and Clif Lowry for taking the time to volunteer and assist with what we did down there.
Don’t forget to click on subscribe and notifications so you’re updated every time we release a new video.
THANK YOU! We couldn’t do this without you.
Sincerely,
Jason and Emily
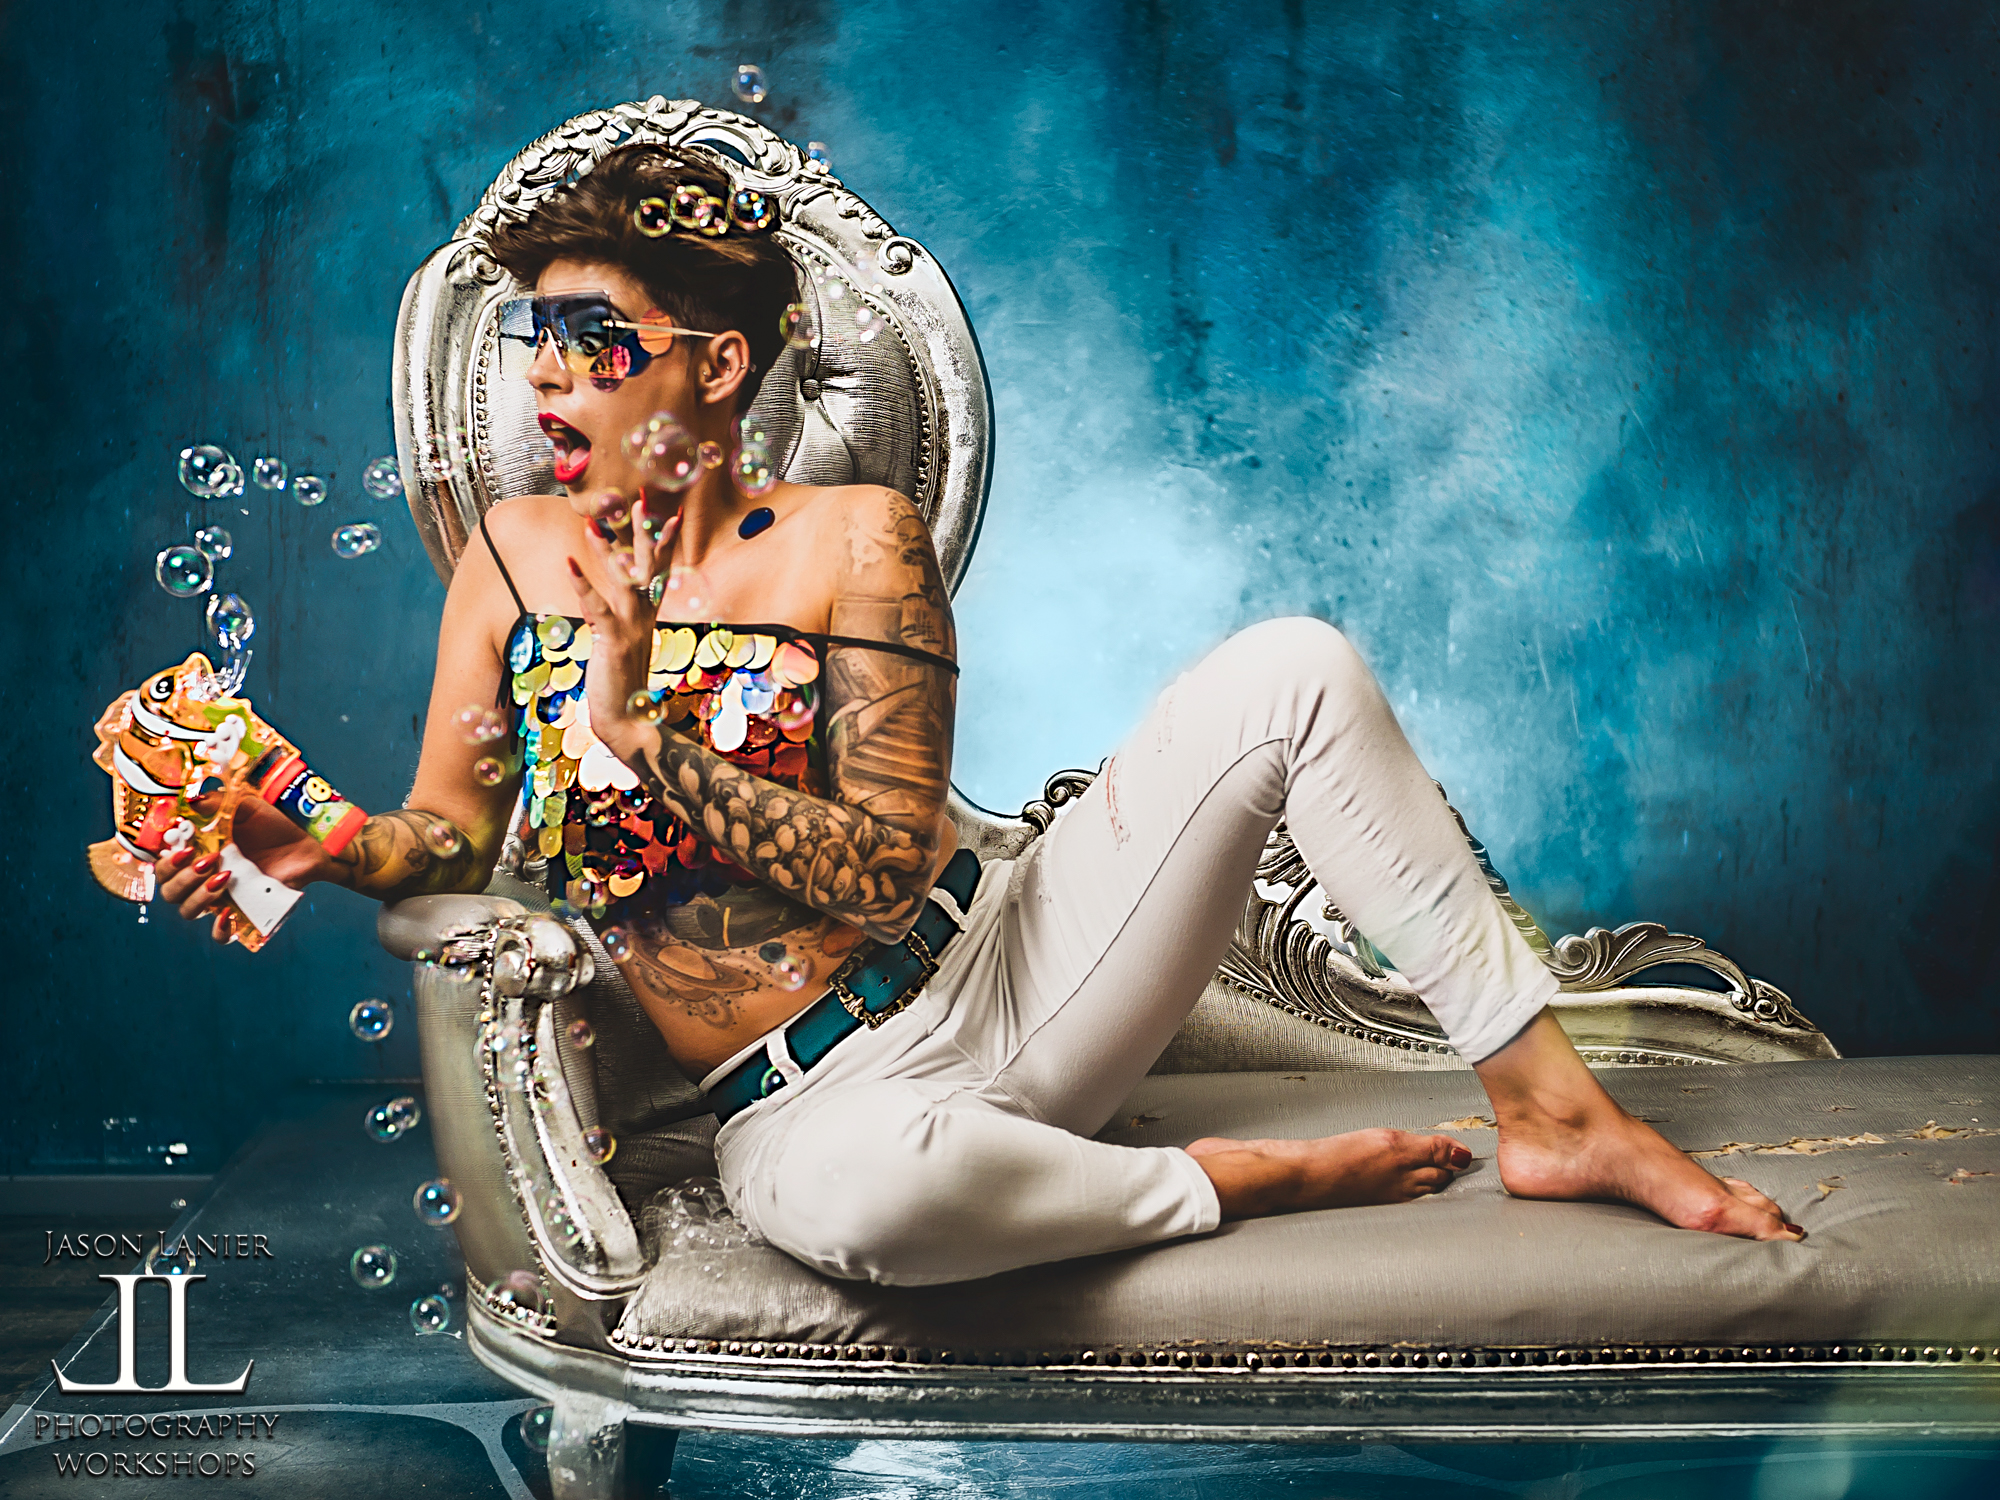
Join Jason Lanier for a shoot inside of a studio in Los Angeles where he and his model/assistant make it rain BUBBLES! PLEASE THUMBS UP, SHARE, LEAVE A COMMENT AND SUBSCRIBE!!
In this video Jason and Emily use simple bubble blowing guns they purchased on the street to make some very dynamic and fun results that landed one of the pics on the back cover of April 2019 Digital Photo Magazine!
This video contains tips on how to shoot with flash, how to pose while standing and sitting down, and what angles of light a photographer can utilize to optimize results.
In this shoot Jason used the Olympus E-M1 Mark ii body with the Olympus 25mm f/1.2 lens. Lighting used was the Rotolight Aeos inside of a 7 foot parabolic as the key light with a Rotolight Aeos in the back as a rim light for certain images.
The bubbles? Well, those were just purchased on the streets of Los Angeles!
**Links to Gear**
*Rotolight- to check out the lighting system used by Jason and to save big on exclusive bundles please visit:
Here are the images from the shoot:
We thank you for stopping by to check out our videos and invite you to listen to our podcast, Jason Lanier Unfiltered, by visiting:
Thanks in advance for subscribing and for clicking on NOTIFICATIONS so you're updated every time a new video is released.
Thanks!
Jason Lanier Photography
Welcome to the Canon Project Part #3- in this episode we look at how the Canon EOS R performs with LED lighting. This all takes place at a workshop I taught for the Georgia Professional Photographers of America at the North Georgia Tech College in March 2019.
This shoot represented the demonstration portion of the workshop where I was helping the attendees understand how to blend and balance artificial lighting with the available ambient lighting to create results that mimic what Hollywood does with their lighting set ups.
So what does it mean to blend and balance light to match ambient settings? This is a subject that some photographers struggle a little bit to understand and I’m hoping that the blog article and especially the video help to explain it for people who are eager to learn.
In essence this is the process of bringing down the power of your artificial lighting and pulling up the exposure in your camera to make the two exposure levels blend and balance together. This usually means increasing your ISO while turning down the power on your flash or LED light. To see the demonstration of this please check out the video to see how it’s done.
Below are images taken with the Rotolight Aeos using the Canon EOS R with the
RF 50mm f/1.2 and RF 28-70mm f/2 lenses.
Below are images taken with the Rotolight Neo 2 using the Canon EOS R with the RF 50mm f/1.2 lens.
So how did the Canon perform in this shoot? It did really well. I did most of the shoot using the Canon RF 50mm f/1.2 and a few using the RF 28-70mm f/2. I’m really impressed with the sharpness of these lenses and as to be expected the camera performed great with the Rotolight system as all the mirrorless cameras do. Can you use the Rotolights with non mirroress systems? Of course you can, but they perform the best with mirrorless cameras thanks to WYSIWYG (What you see is what you get).
I really liked the colors coming out of the Canon EOS R as I have with all of the shoots we have coming out. So drop a comment down below and let me know what you think!
To see the entire Canon Project videos please visit:
www.jasonlanier.com/canonproject
**LINKS TO GEAR**
*Canon EOS R- https://bhpho.to/2FPwh7P
*Canon RF 50mm f/1.2- https://bhpho.to/2FUvfr5
*Canon RF 28-70mm f/2- https://bhpho.to/2FCH9pI
**ROTOLIGHT PRODUCTS**
During the month of April 2019 there is a HUGE sale on the Rotolight Neo 2 and the Rotolight Aeos. If you visit www.rotolight.com/jasonoffers you can get significant savings off of these two lights plus free batteries and free shipping.
If you are viewing this AFTER April 2019 you can still receive a discount on all rotolight products visiting www.rotolight.com and after selecting your products, use the promo code: JASONLANIER10 to get 10% off all products and accessories as well as free shipping to most countries around the world.
I really hope this video helps photographers out there. Thank you in advance for watching and thanks for being here!
If you haven't already make sure to check out Parts 1 and 2 of the Canon project where we review the Canon EOS R in natural light and strobe shooting scenarios.
Jason
I’ve been a professional photographer for a decade as of this month. I shot my first paid wedding at the end of March 2007 which set me off on my career path to leave the hotel industry as an executive and to bring me to where I’m at today.
I’m writing this blog post and did the accompanying video to talk about the subject of reigniting the love and fun of photography.
When you’ve been doing photography professionally for a decade you sometimes need to challenge yourself to do things to keep that professional passion alive.
One of the most important things you can do is remember WHY you got into this in the first place. For me personally, I got into photography because it allowed me to express what I was feeling inside. It gave me the chance to to create what I see inside of my head. And honestly it gave me the chance to lead a fulfilling and FUN life!
Over the years there have been some who have suggested that I have too much fun. Or that if I acted in a more serious manner they would be able to take me more seriously. To that I say…
I got into photography for my life. For the adventure it would provide me. And I recommend others do the same.
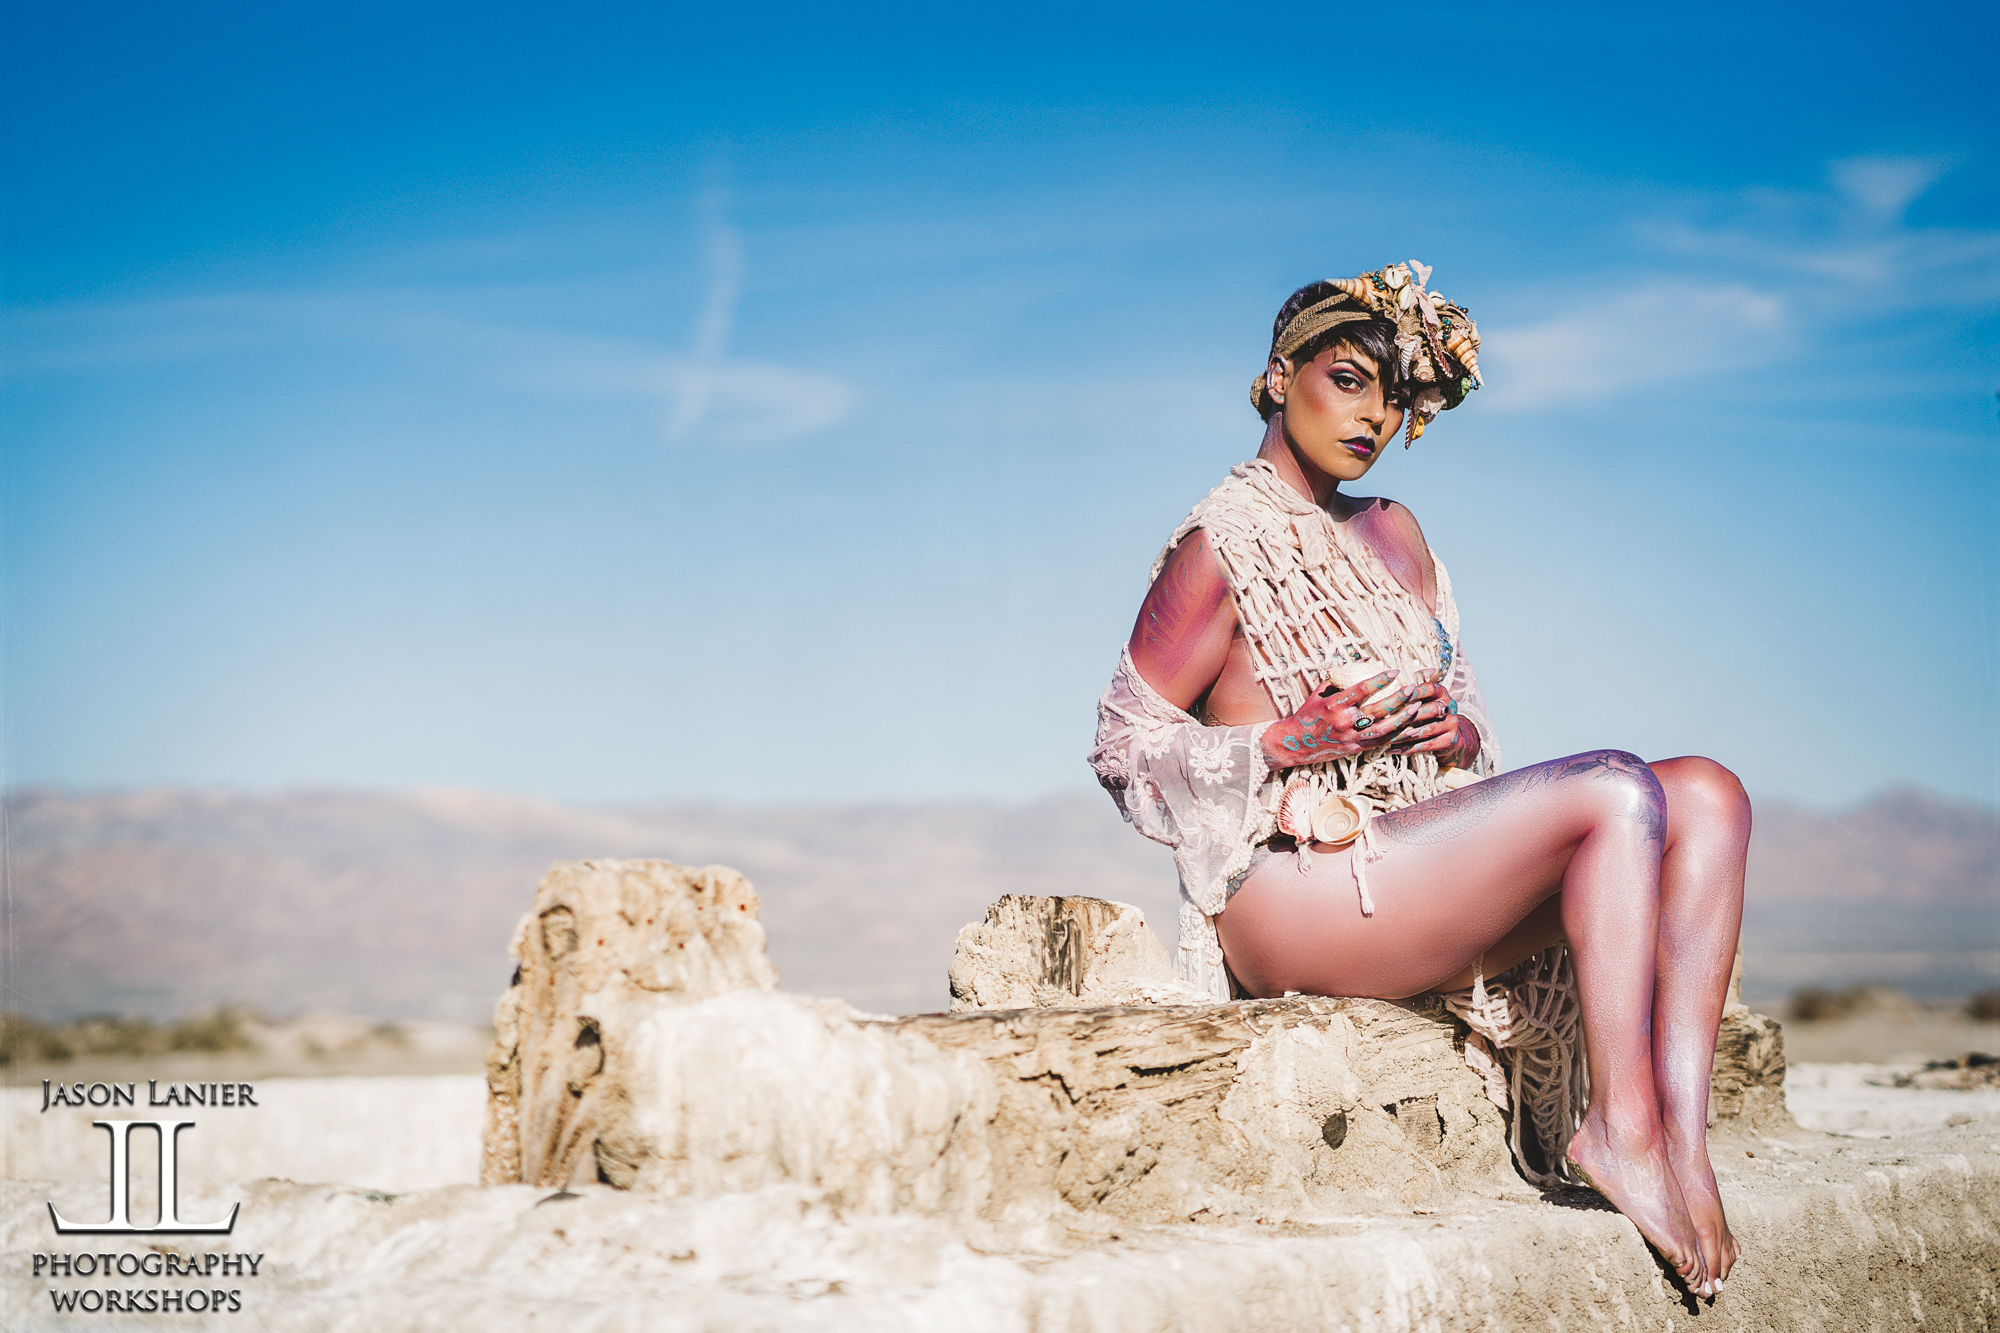
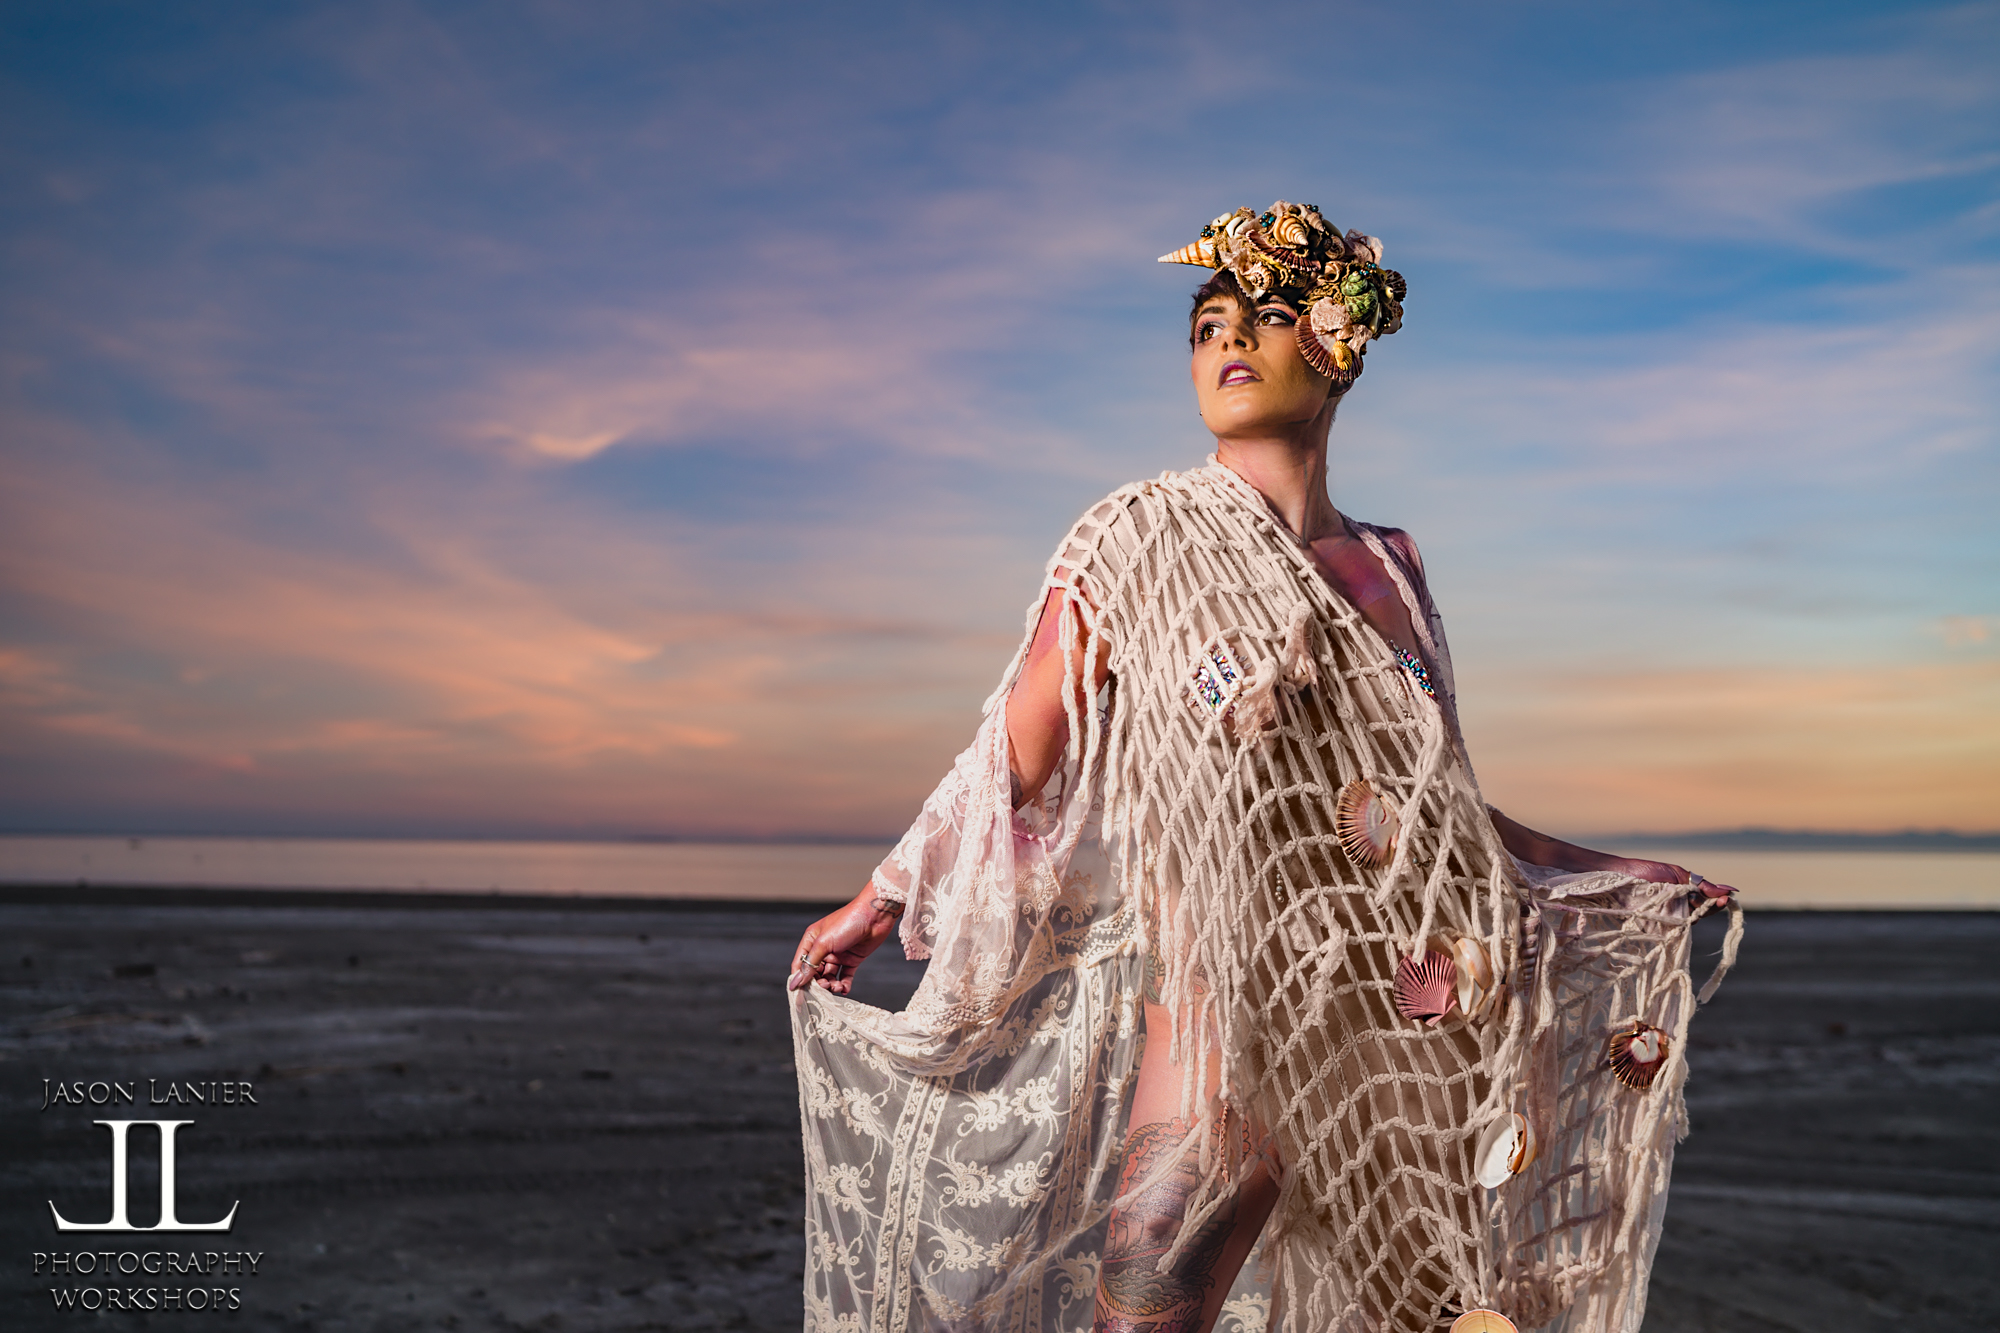
I bring all of this up for the Salton Sea shoot because it truly was fun. It exemplifies a true love of photography and fun that we experience on our shoots. We did the shoot using natural light during the day and LED lighting after the sun went down. The Salton Sea is SO crazy that it’s just a blast to shoot at all times.
Emily (on Instagram at @em.explores) did a great job with the styling as usual and the shots bore that out. We even found an old boat down by the water where we shot that really tied the entire thing together.
The gear for the shoot was the Sony A7Riii using a variety of lenses including the 35mm, 50mm, 85mm and the 135mm. For a complete breakdown of the gear please click below:
***Links to Gear***
*Sony A7Riii- https://bhpho.to/2zu1lJu
*Sony Zeiss 35mm- https://bhpho.to/2tSBXeF
*Sony Zeiss 50mm- https://bhpho.to/2FmytlK
*Sony G Master 85mm- https://bhpho.to/2oNCFF2
*Sony Zeiss 135mm- https://bhpho.to/2FXHYrU
*Sony LAEA4 Adapter- https://bhpho.to/2IAPzi5
I’m so grateful for Emily for doing such a great job on the shoot and I appreciate all of you stopping by to check out the page!
Thanks!
Jason
Welcome to Part 2 of the Canon Project, a series of videos related to our time using the Canon EOS R. In Part 2 we showcase a workshop and shoot we did in Helen, Georgia in conjunction with an event we were doing for PPA (Professional Photographers of America) for their Georgia Chapter (GPPA).
**Links to Gear Used in This Shoot**
*Canon EOS R- https://bhpho.to/2U8W4Cd
*Canon RF 28-70mm lens- https://bhpho.to/2FCH9pI
*Godox AD 600 Pro- https://bhpho.to/2FH9gnu
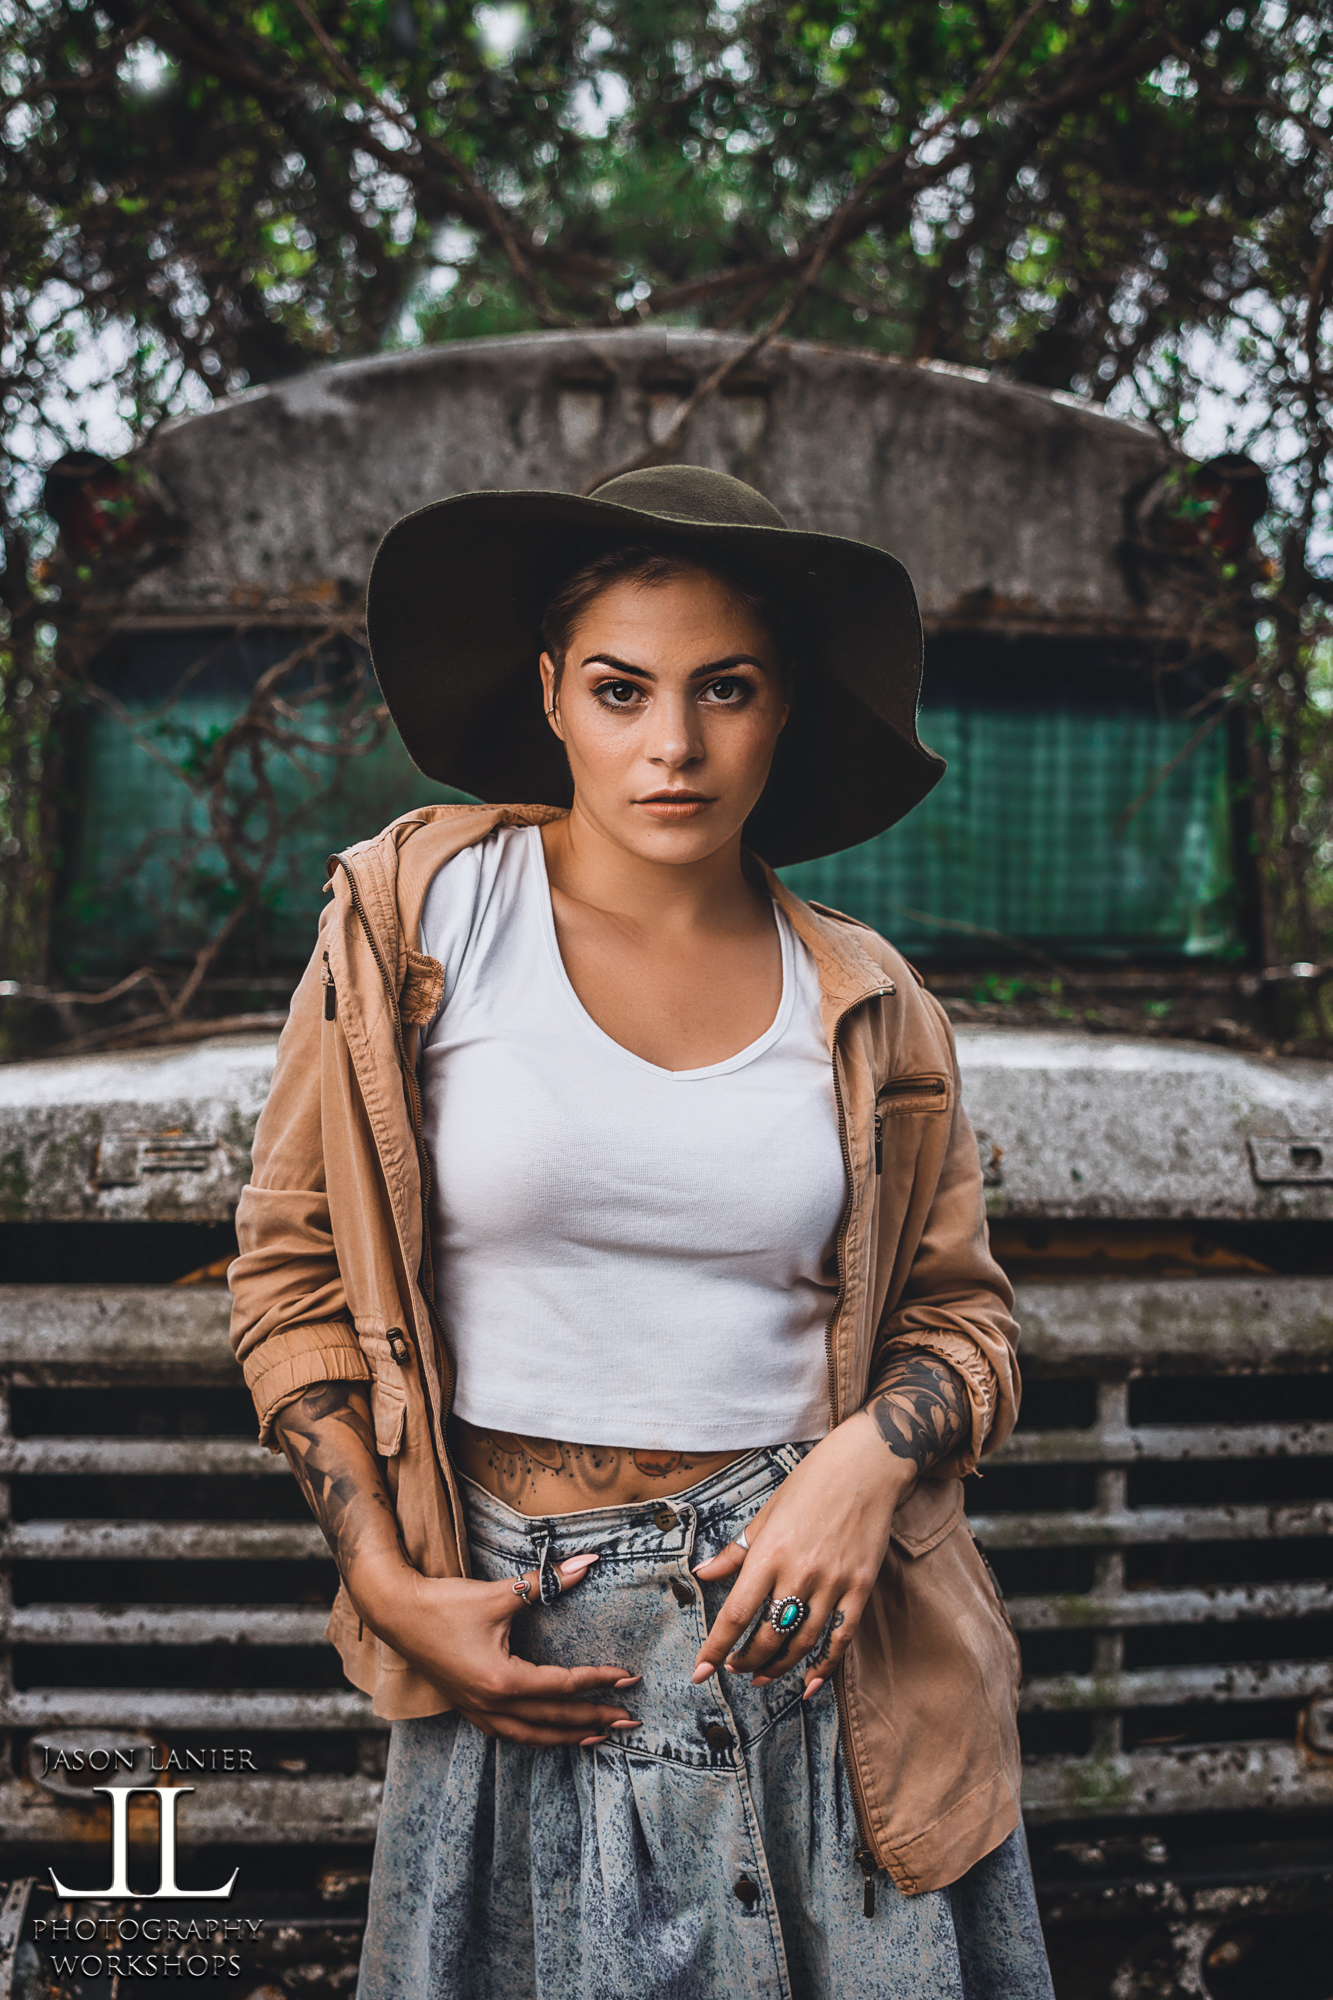
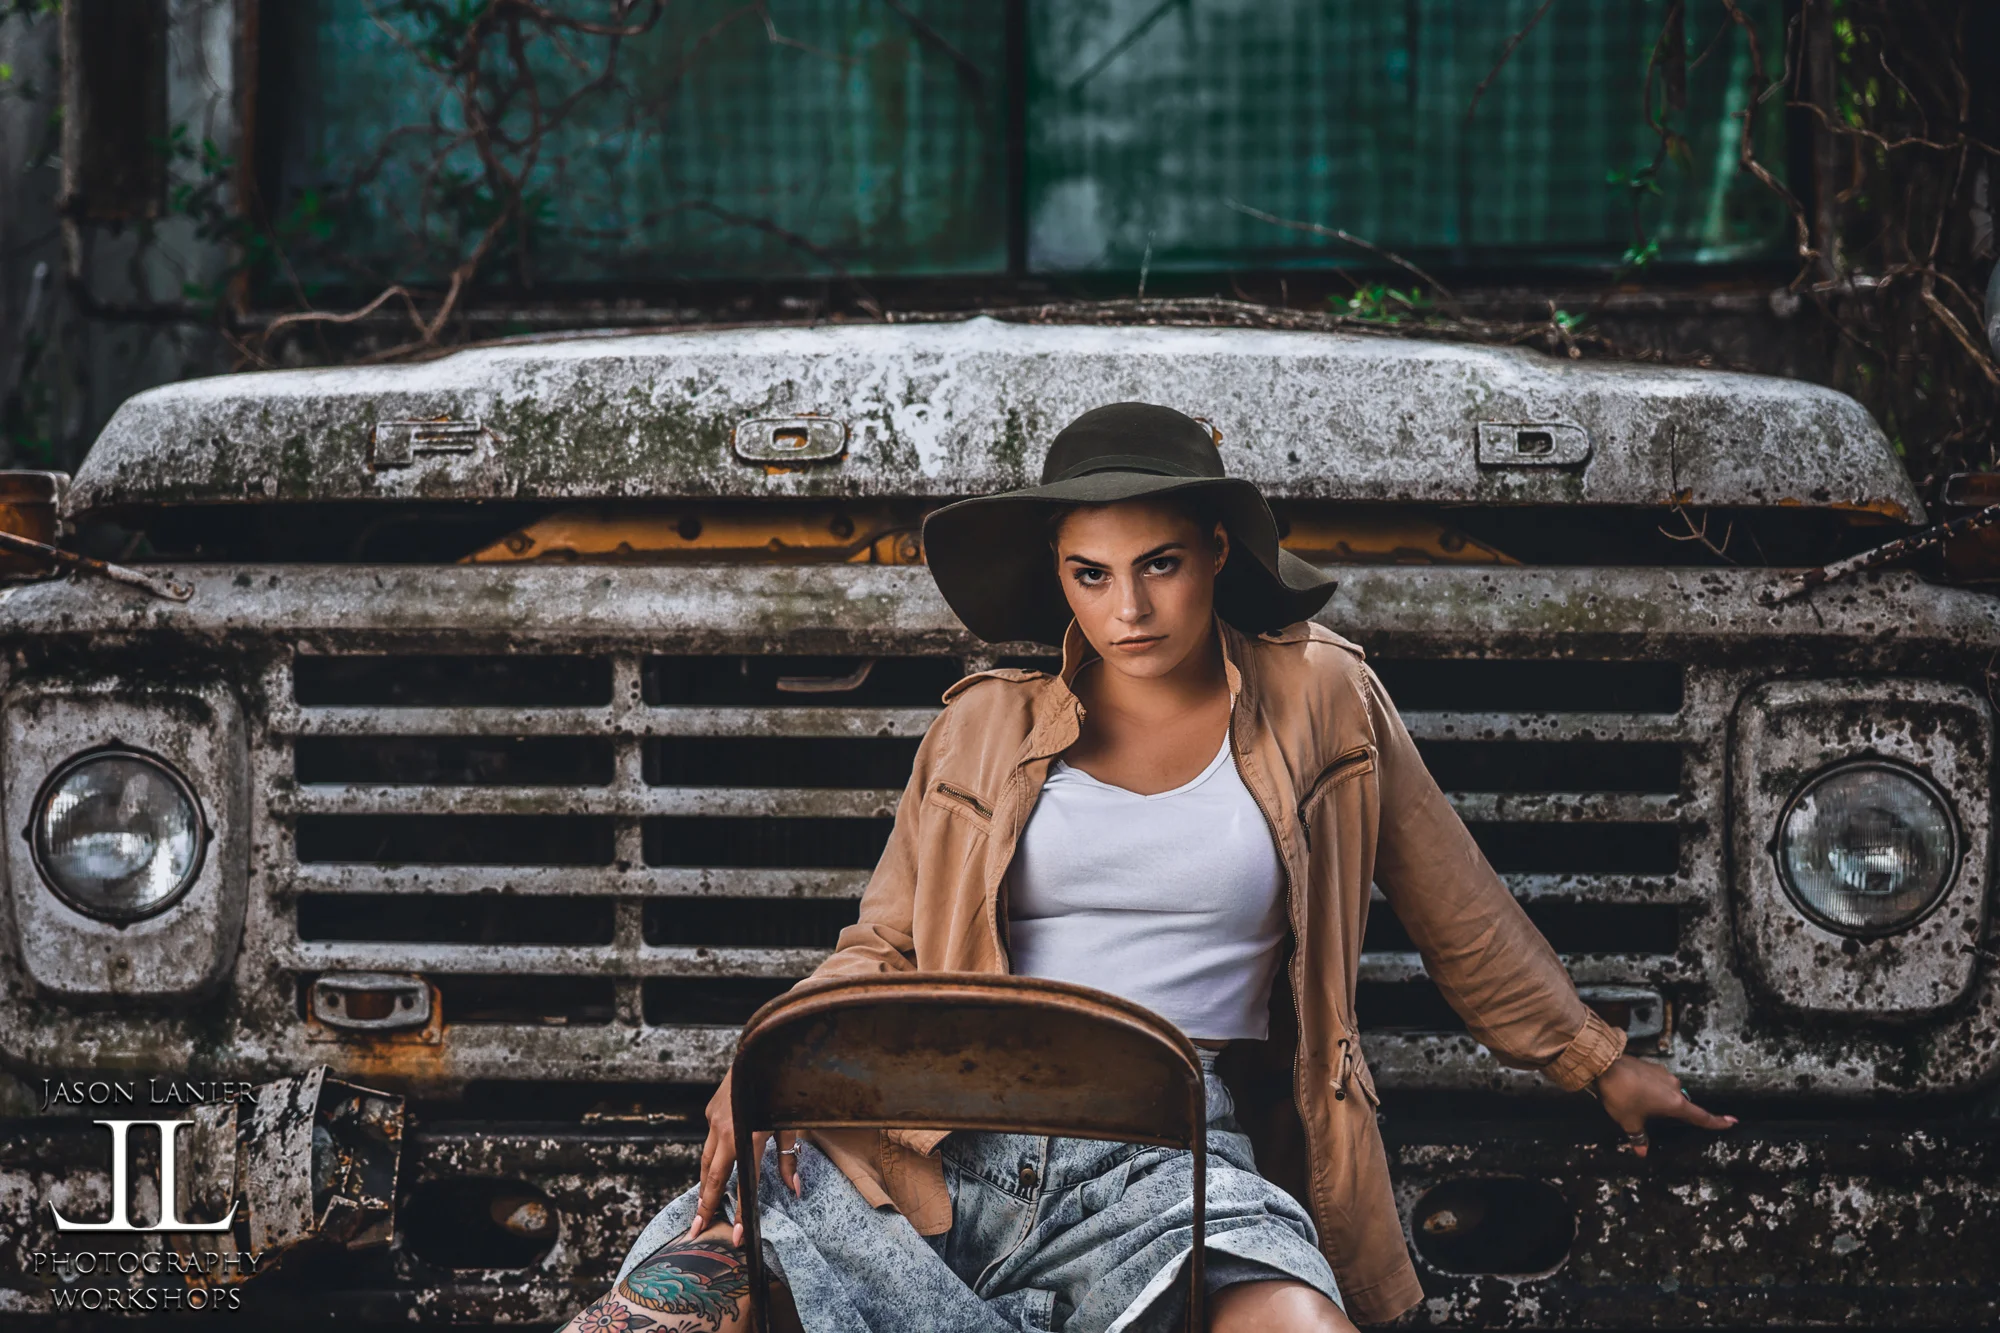
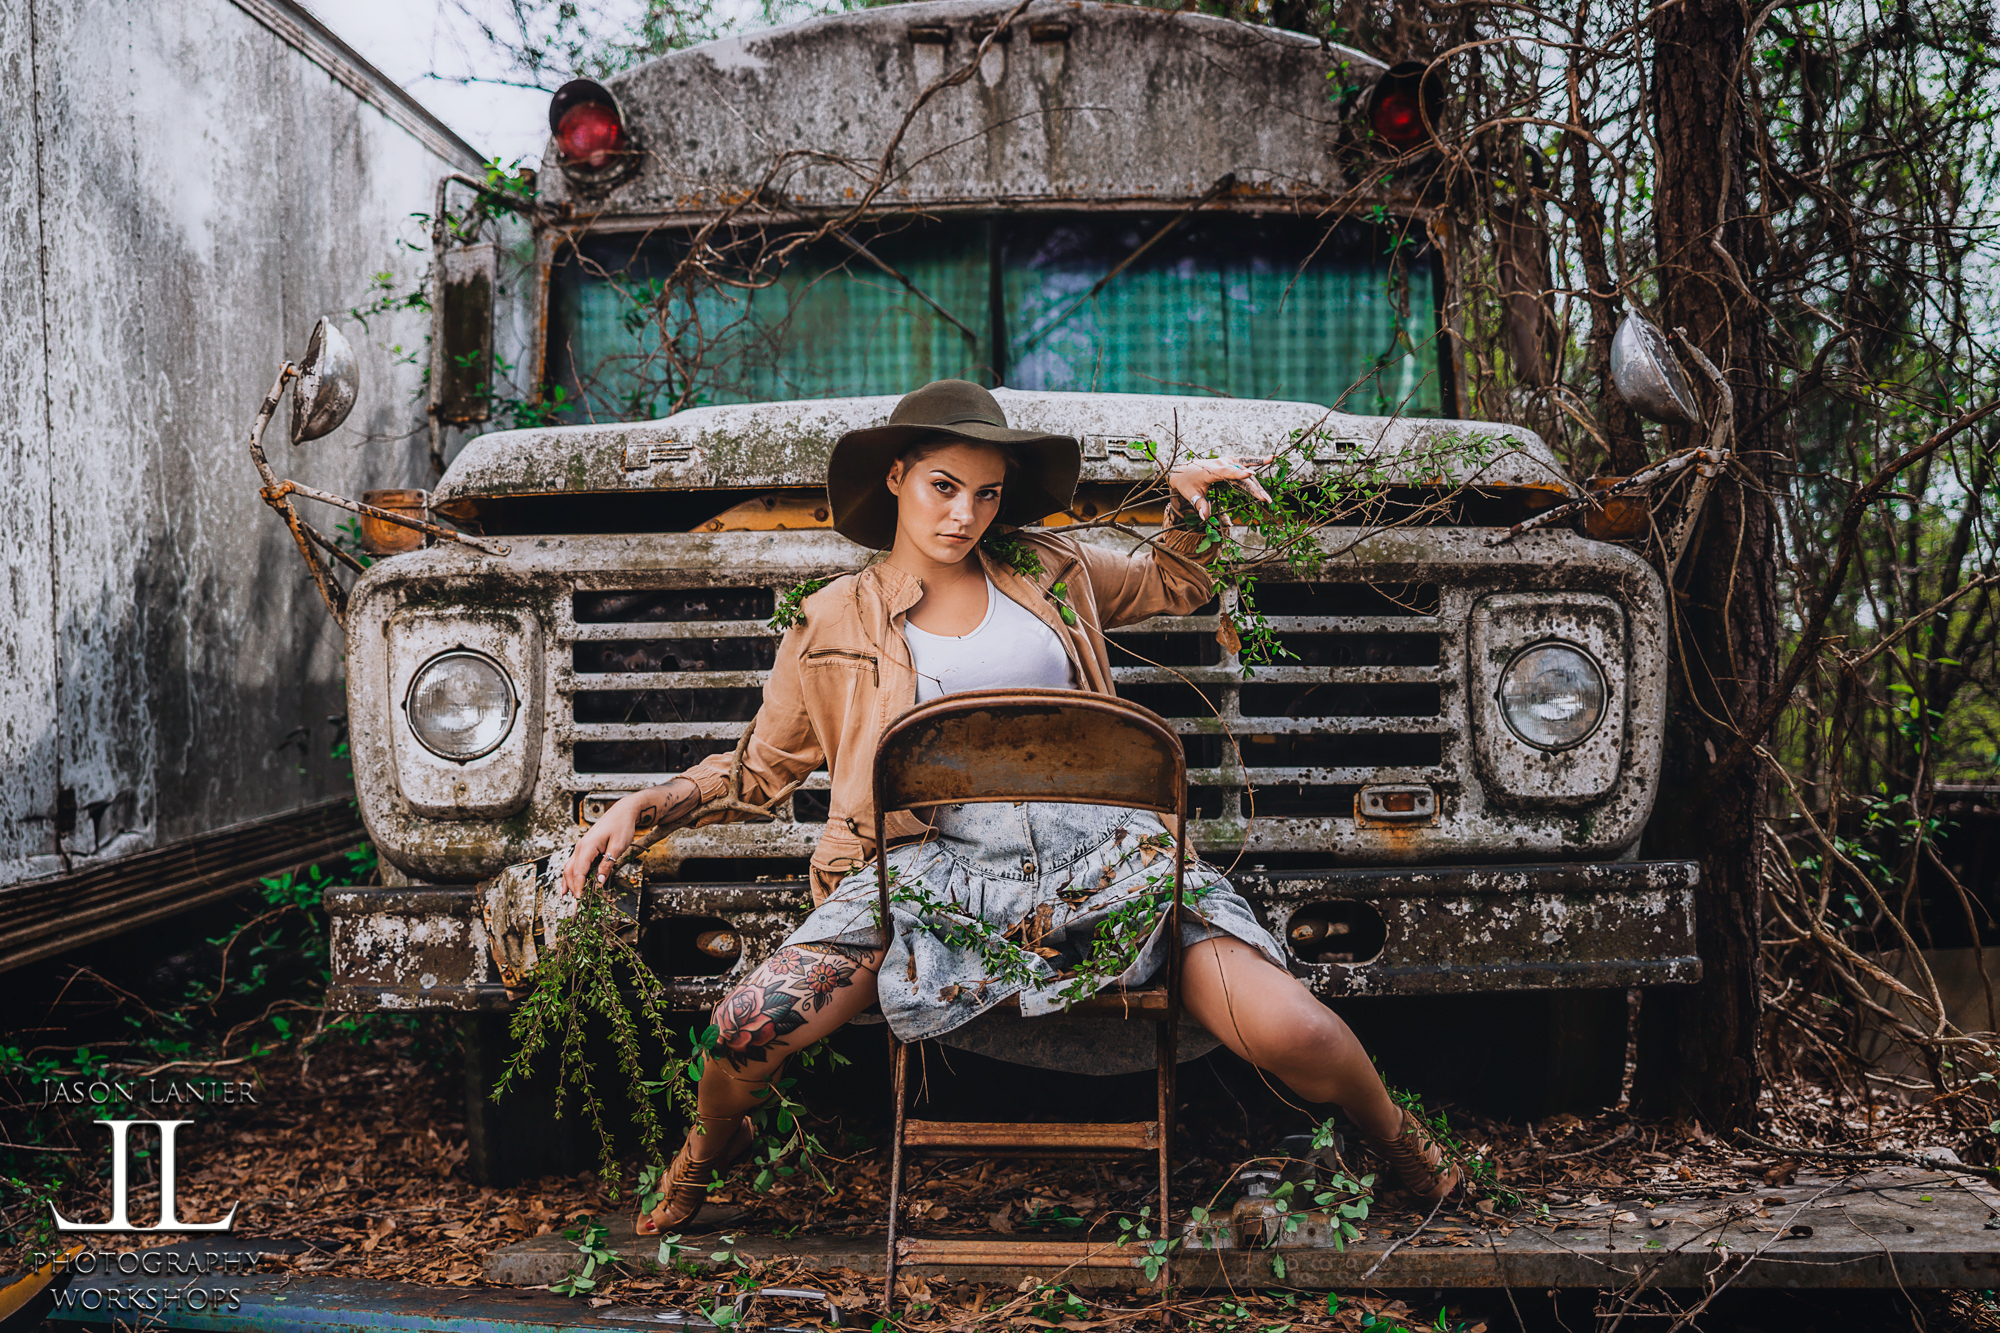
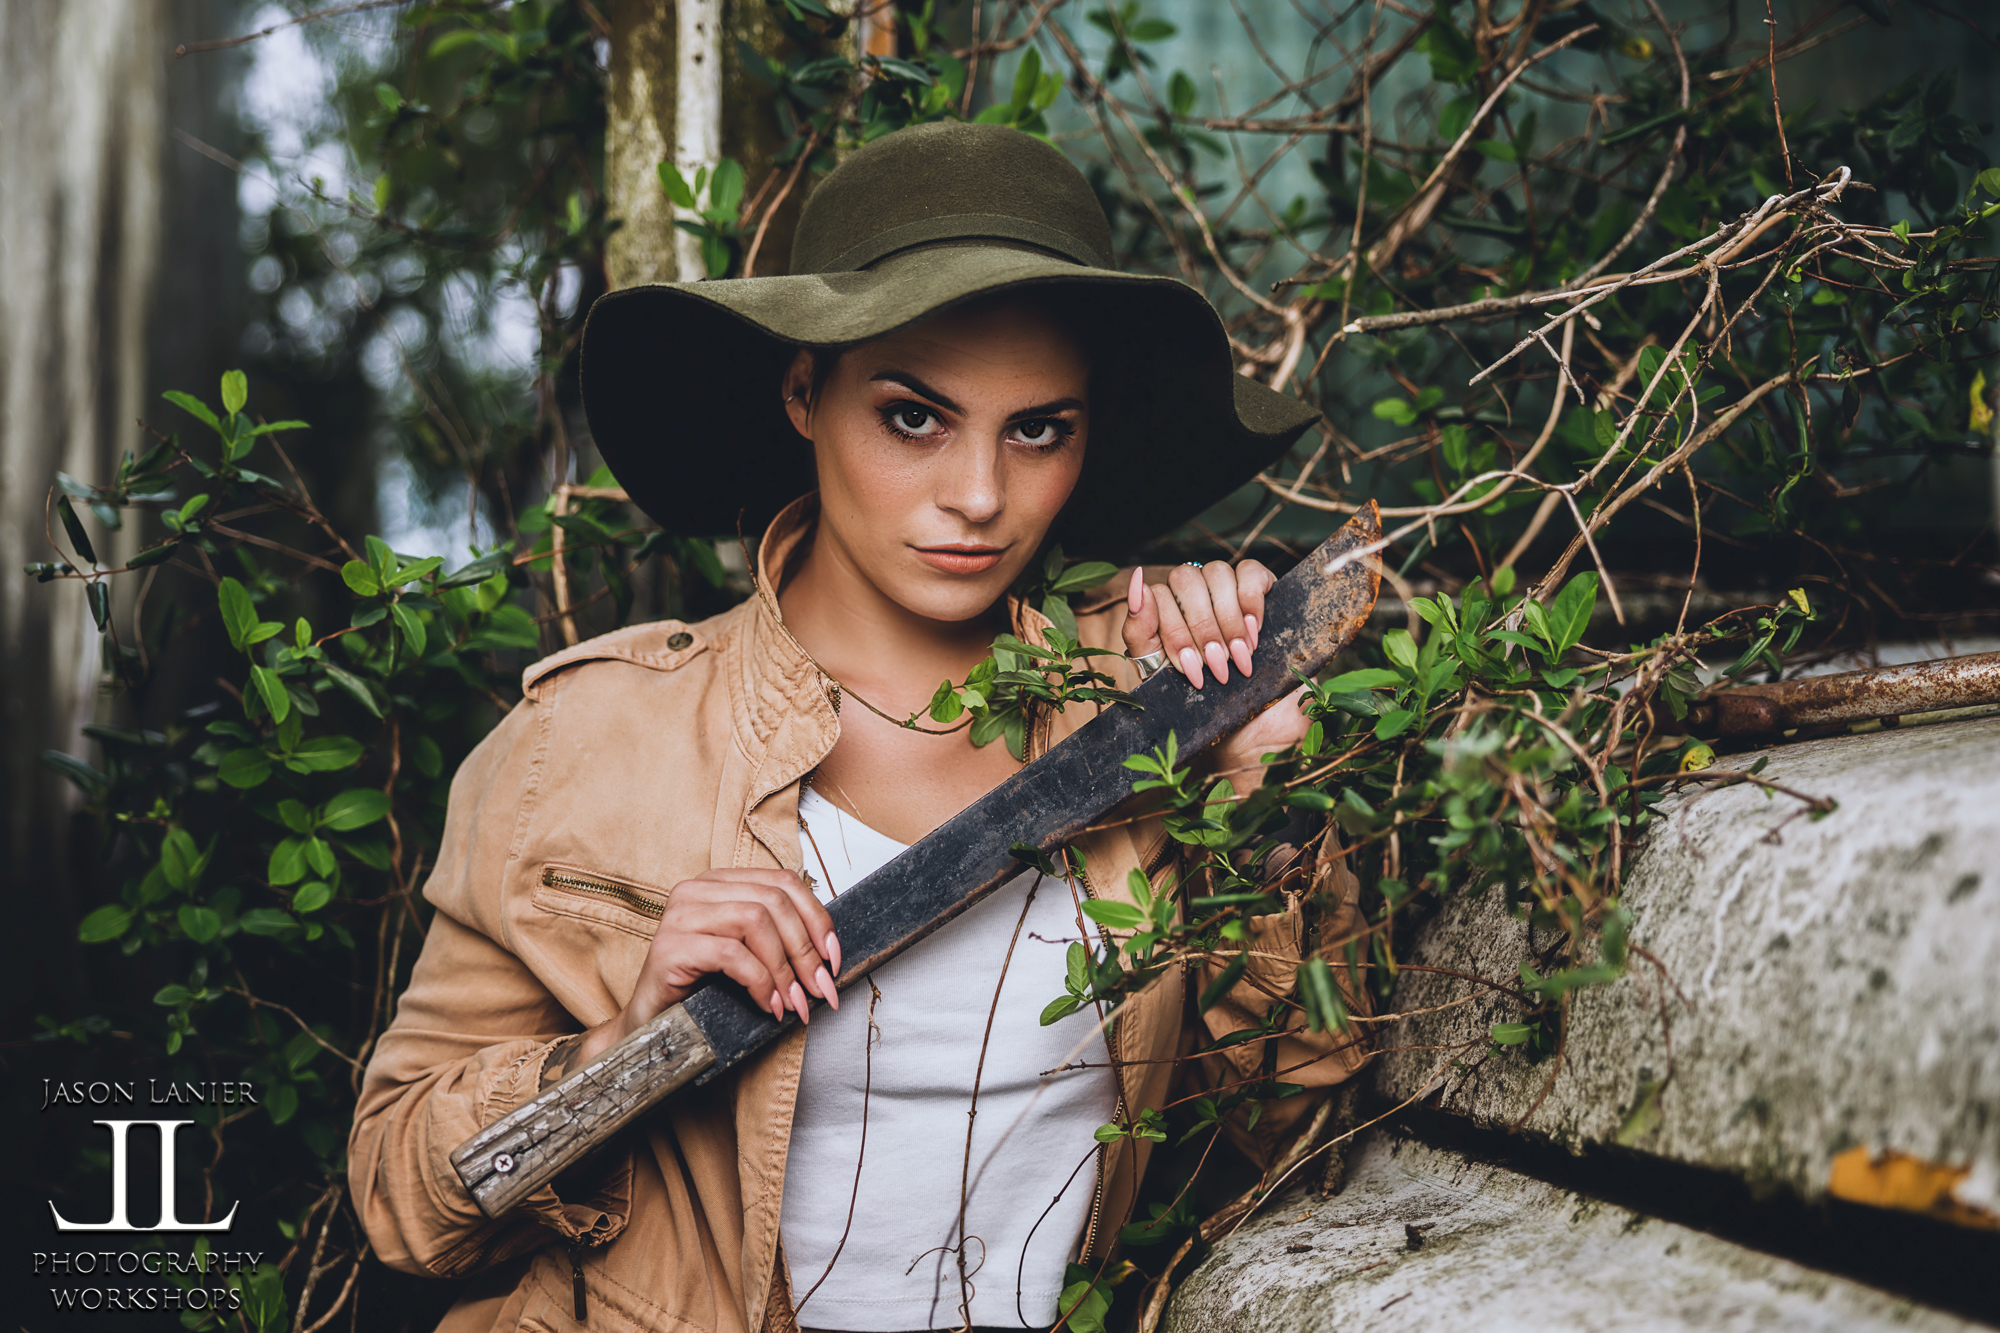
The location for this video was the Bus Graveyard which is a REALLY cool place to shoot. This was Day 3 of our 4 day workshop that I was teaching for the PPA members and on this day the group asked me to demonstrate a shoot from start to finish as well as give them a heads up on how I recorded my Youtube videos.
So, that’s what my Assistant/Muse Emily and I did! You can follow her on Instagram at www.instagram.com/em.explores
For this shoot we used the Canon EOS R with the RF 28-70mm lens. A lens that quickly found it’s way into my creative heart. It’s one of my favorite lenses on the planet at this point.
But we just didn’t shoot in a cool location with a great model and a new camera/lens. We also wanted to illustrate the difference that using flash can make when shooting in conditions that aren’t ideal for lighting. There is nothing better than the best natural light. But that' only exists for about 1 hour a day. And that’s only if it happens to be facing the direction that you want to shoot.
So sometimes you need to have the ability to ADD light to your scenes to be able to capture what you or your clients want or need to create. Sometimes we don’t have the luxury of picking the time when we shoot. Sometimes we have to make our own light.
In this video I show the difference between the two, demonstrating images side by side showing images taken with flash vs. images taken with natural light. Take a look for yourself by checking out the images below:
The images with flash have much more light and color. Because color = light in the world of photography. I purposely chose to make this Part 2 of the project because Part 1 shows a natural light shoot done correctly which has plenty of color and light. But that’s only because it was shot at the ideal time of day.
Below are images from the shoot:
For this shoot I have to say the Canon EOS R did exceptionally well. Focus wasn’t as fast as I’m used to with my Sony cameras, but for a portrait session like this one it was more than fine. The color rendering and effect on skin tones is really nice.
And that LENS. WOW, the RF 28-70mm f/2 is just a pleasure to shoot. There will be people who complain about it’s size and weight. But for me if you want awesome results you shoot awesome glass. And that’s one thing that Canon has done right with their mirrorless system. They are bringing out ultra professional, high grade glass. Far better than the offerings made by the Nikon Z system and far better than what Sony brought out when it first rolled out it’s mirrorless cameras.
The Canon also did much better shooting flash than the Nikon Z. It didn’t require me to do anything special to shoot in HSS (High Speed Sync) mode which was great since all of these images were taken in HSS with the exception of the natural light shot.
I truly hope you enjoy the content. If you missed Part 1 of the Canon Project which is a Natural Light Shoot done in Death Valley using the RF 24-105mm lens, you can check it out now by clicking below:
Thank you so much for watching and make sure to check out our upcoming parts of the Canon Project where we explore things like Black Light, LED, LED flash and more! We thank you for joining us and invite you to click on NOTIFICATIONS and the SUBSCRIBE button on my Youtube Channel.
See you next time!
Jason
2019 has been a fun year for me so far. While I’m a long time Sony user I’ve been able to try out many of the new mirrorless cameras that are hitting the marketplace. I’m a big believer in mirrorless cameras .and have been for years. This year alone I’ve already tried out the Nikon Z7 and the Olympus OMD ii. So now it was Canon’s turn.
Partnering with B&H Photo I am able to try out gear for longer than a 1 time shoot. That’s critical for this experiment. See, I’m not a big believer at all in the concept of getting a camera in your hands for 1 day, trying it out, and then compiling a review and assessment on that camera.
It takes longer. To really know a camera you need to do at least 4 or 5 shoots with it. You have to use it over an extended period of time. You have to get to know what you really love about it and what you really hate about it.
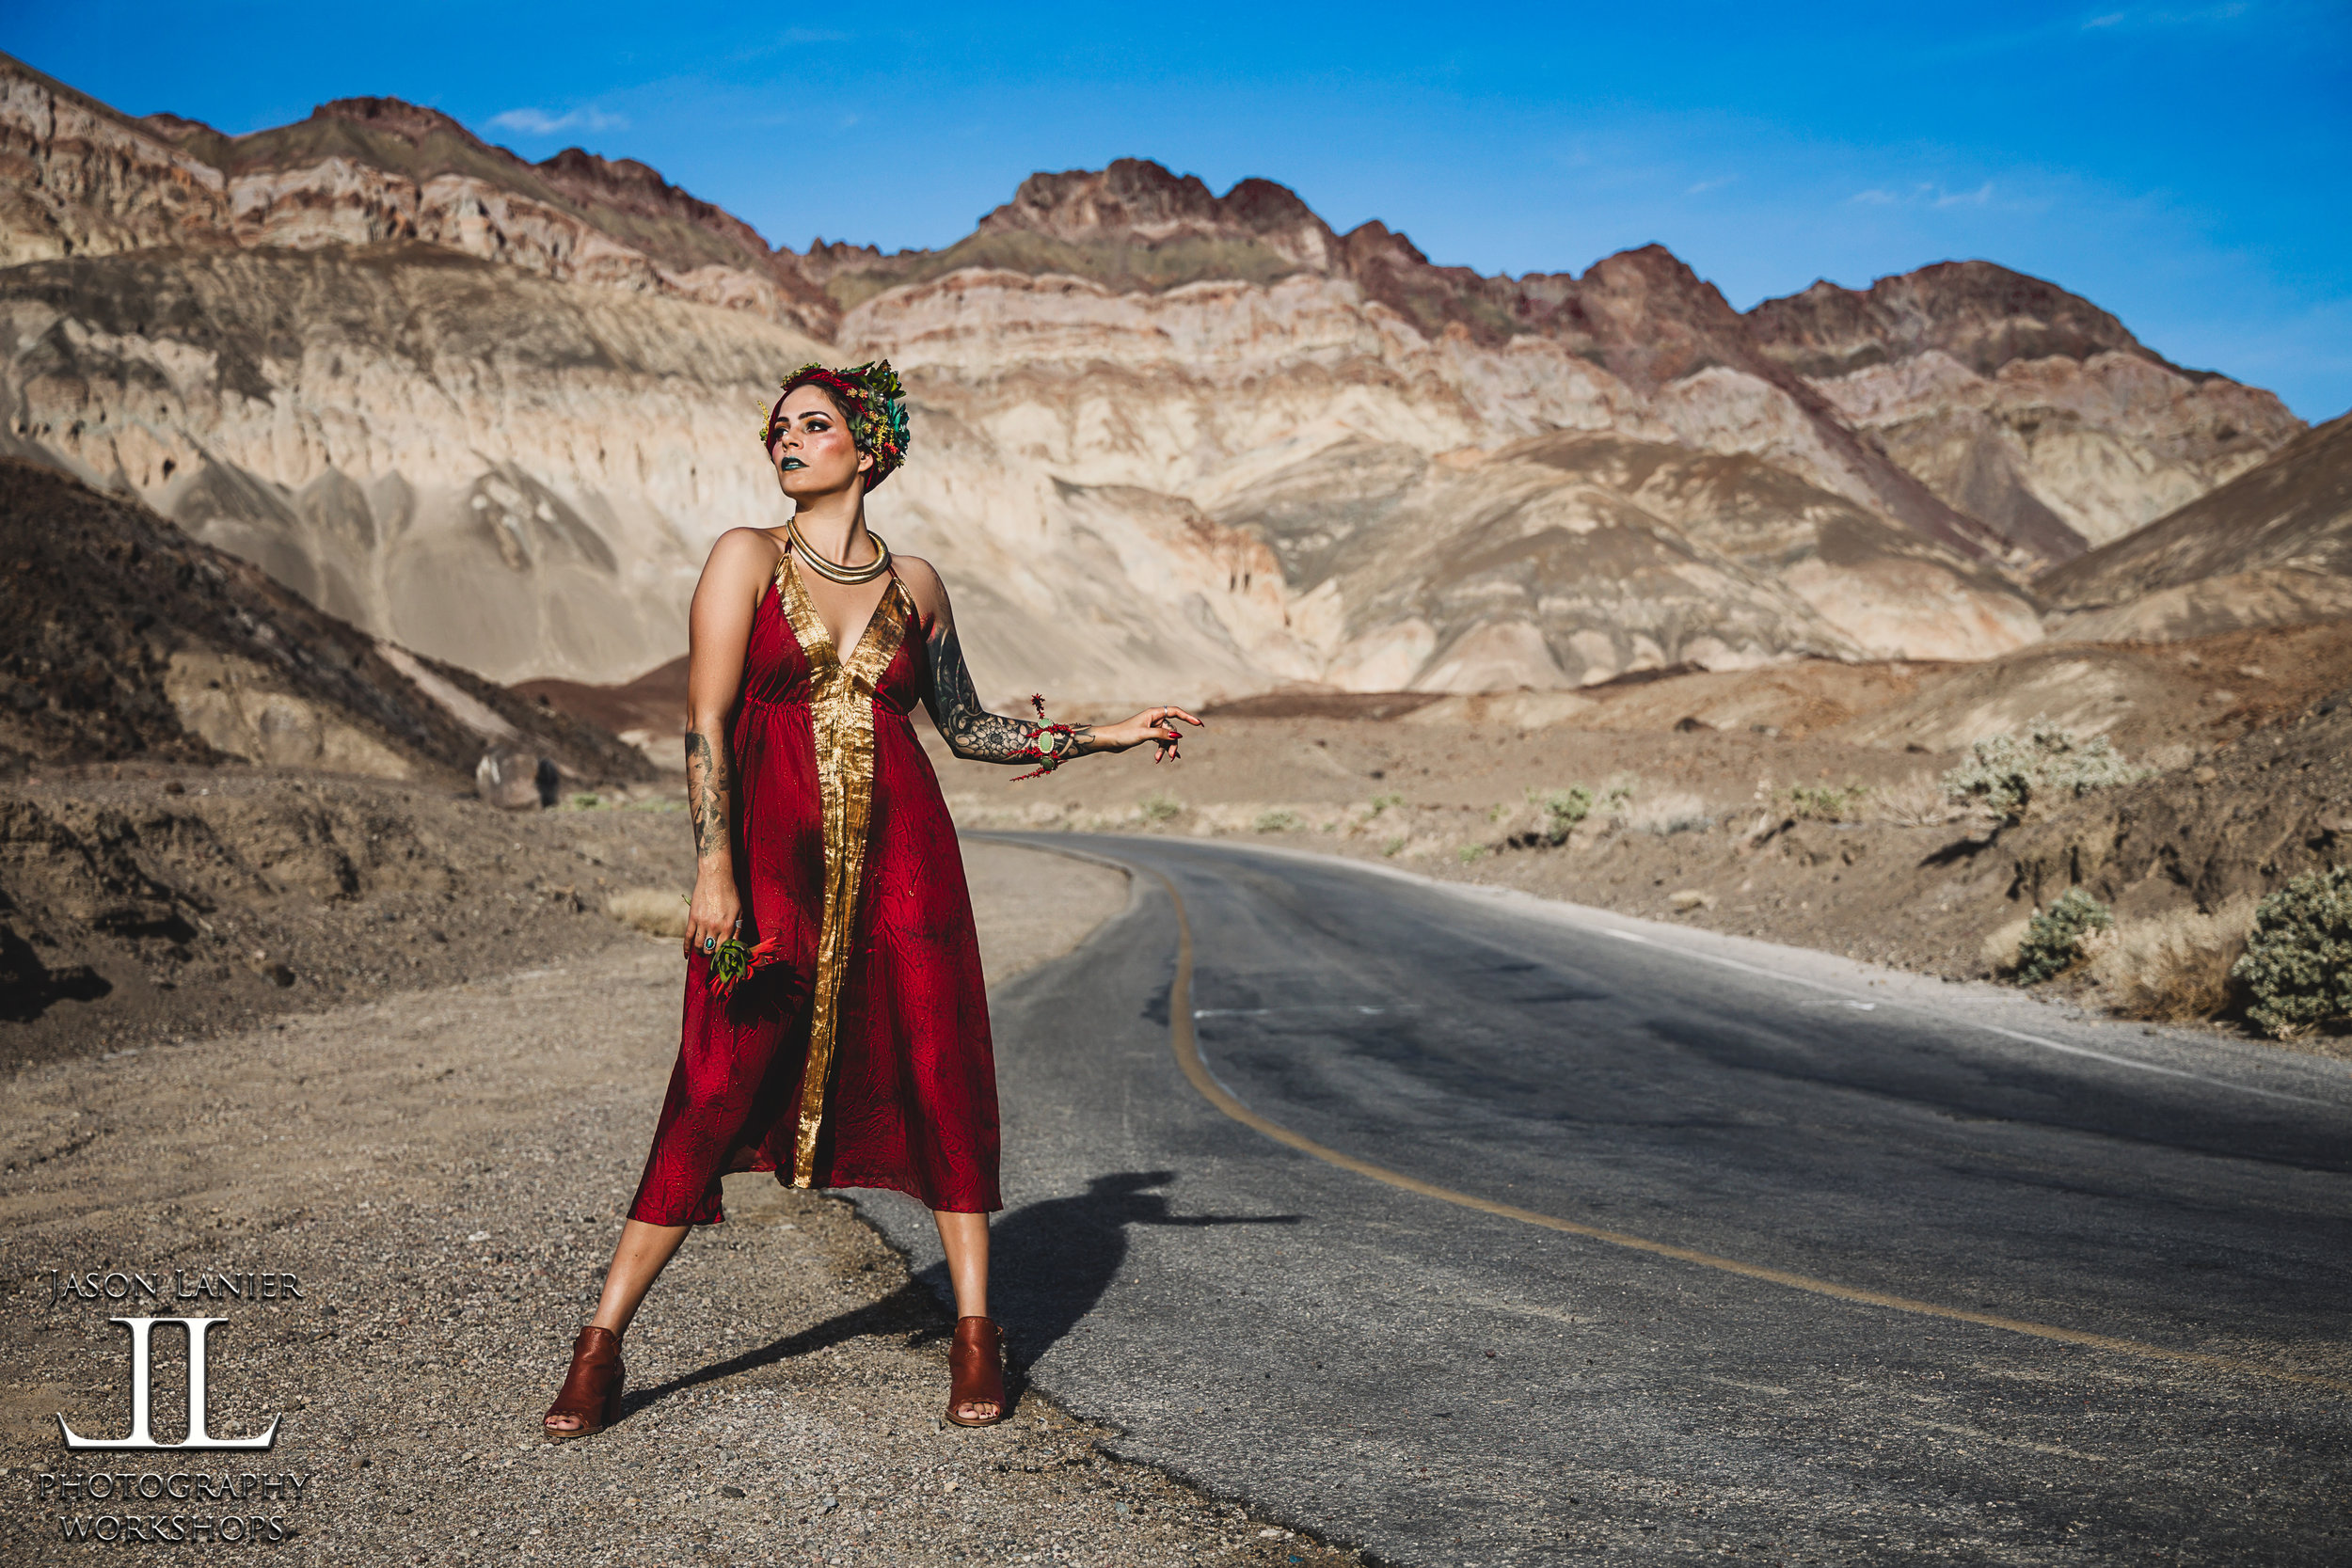
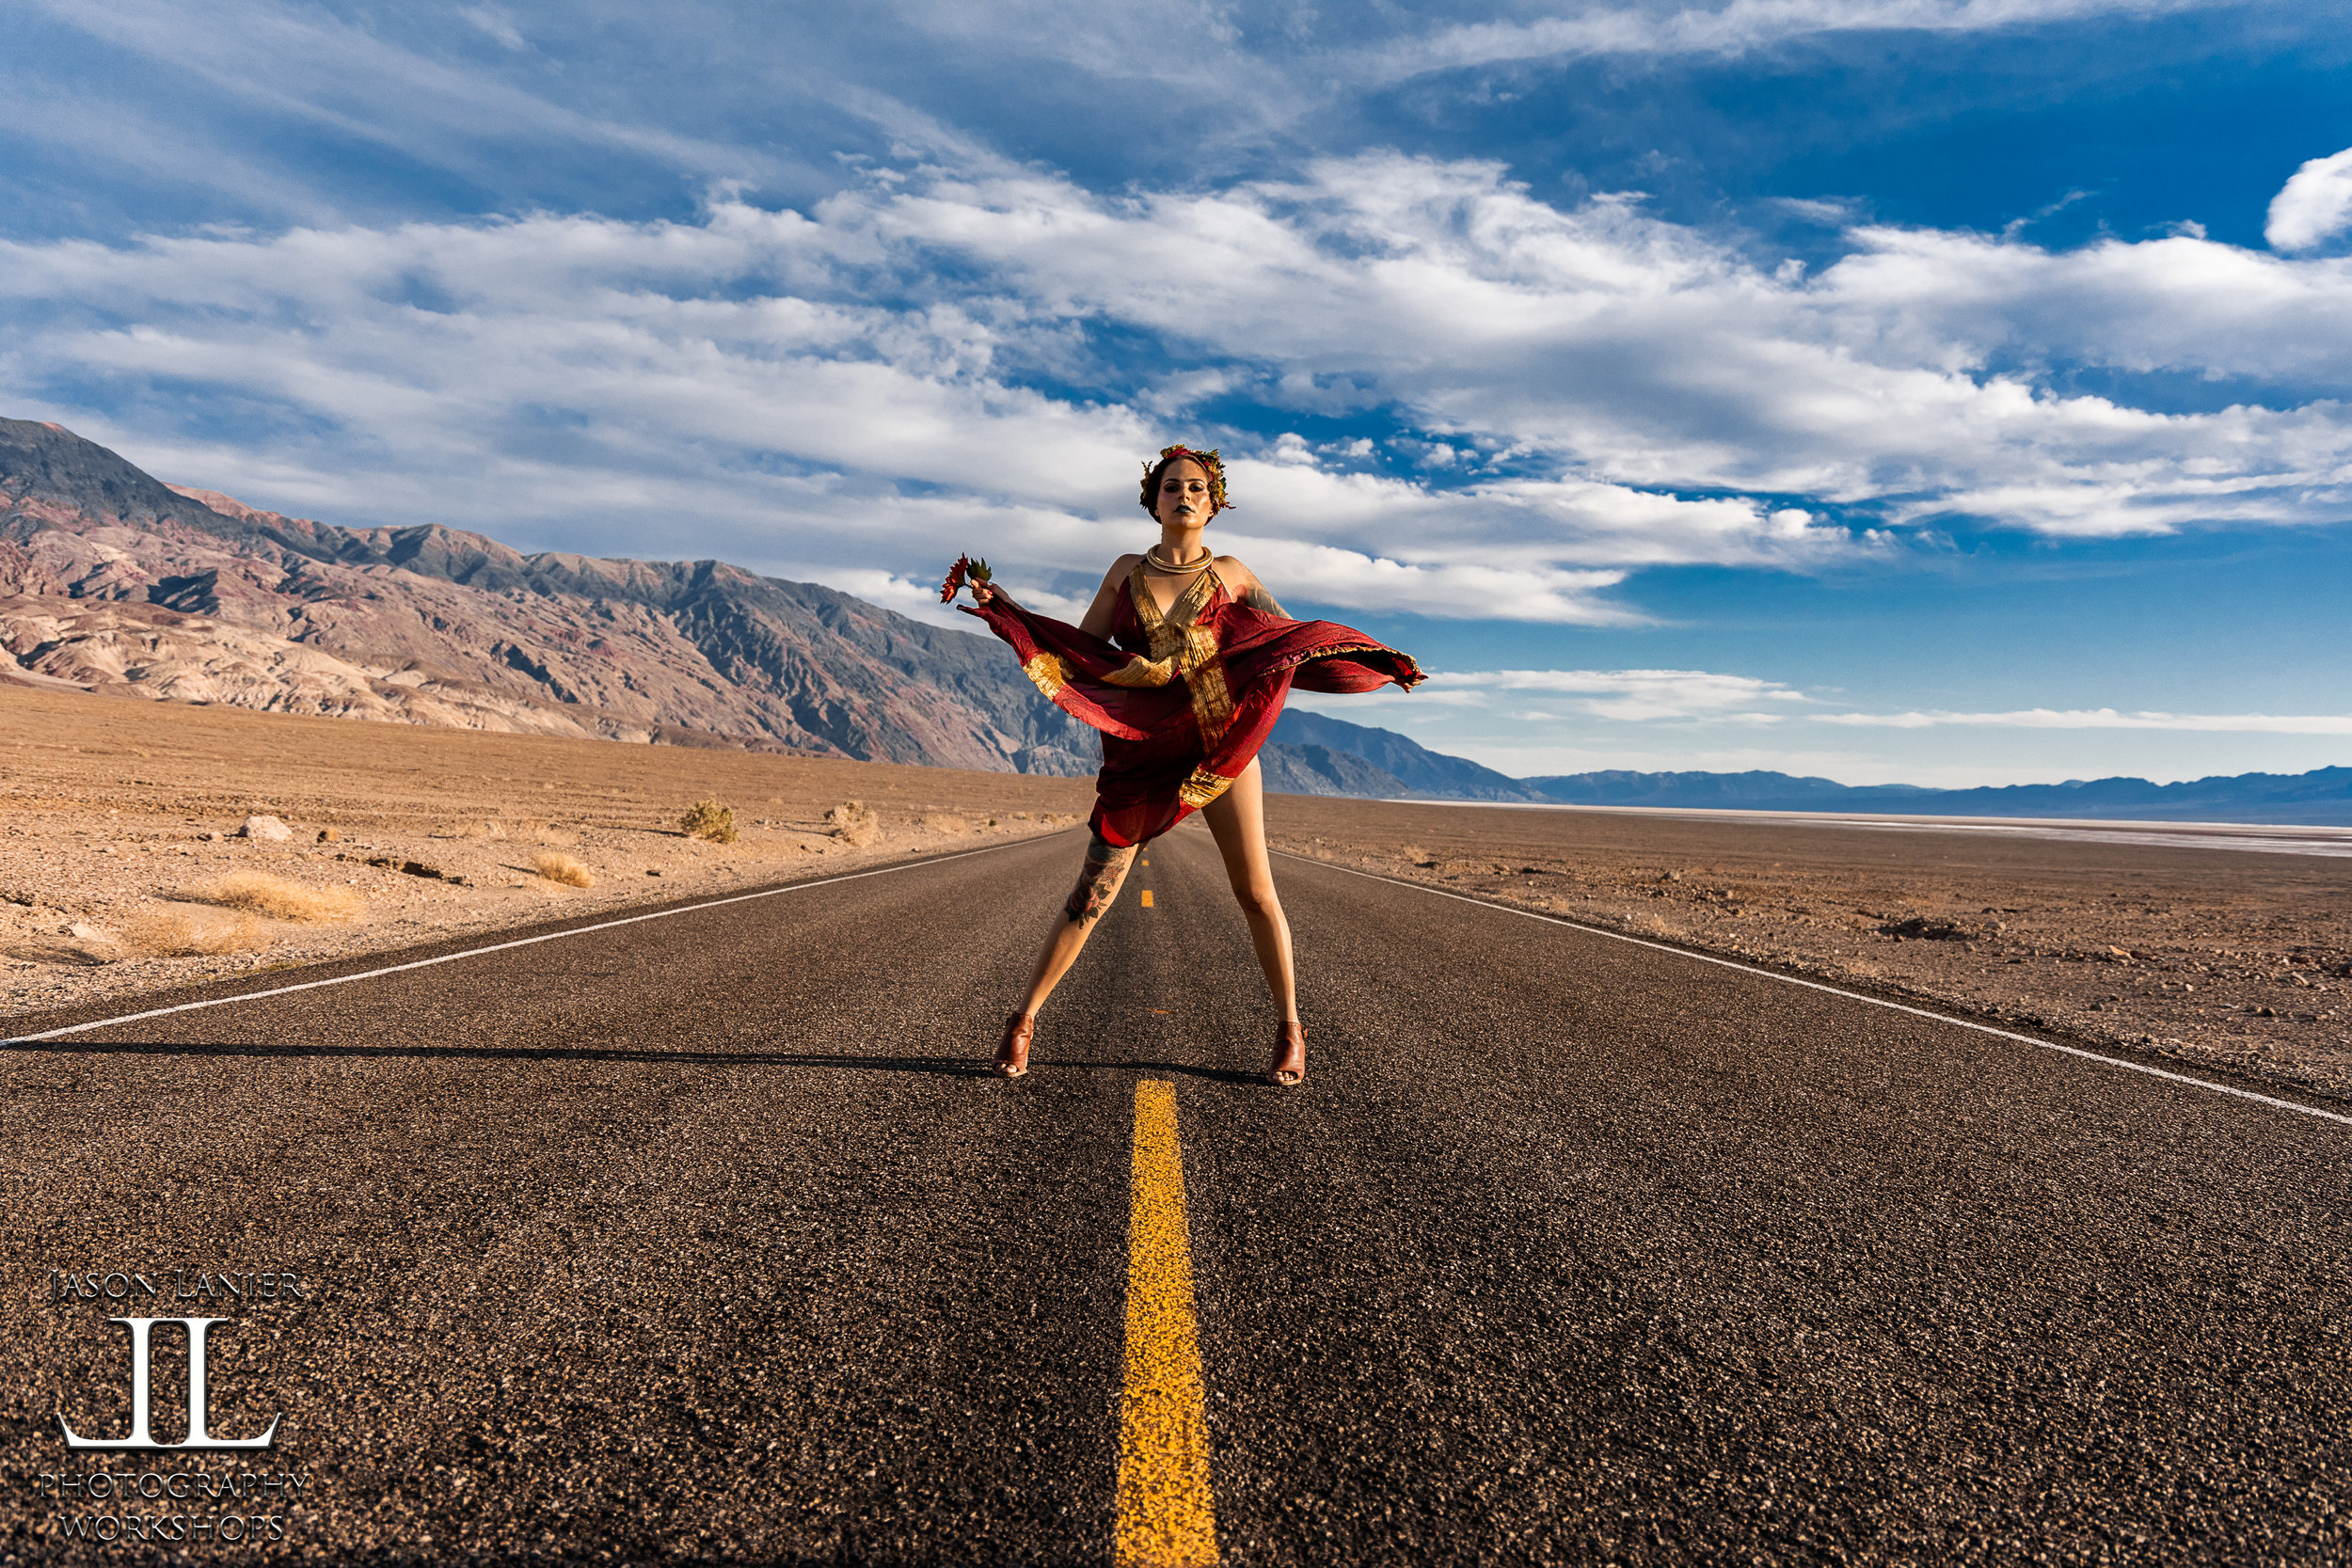
So this is video number 1 of the 7 or 8 shoots that I’ve done with the Canon over the past month and a half all over the world. This was done in Death Valley, one of the most scenic places on earth. And we did this one shooting natural light so we could how the camera performed without adding any lighting to set a baseline for it’s performance.
We’re calling this our Canon Project. A comprehensive look at this camera in a variety of different challenging shooting conditions that most photographers would use this camera in…and a few many wouldn’t.
Once we’ve released all of the videos with the Canon you will see a final review which will encompass all of the knowledge gained from the shoots that we did. This will represent the most thorough comprehensive review anywhere on this camera. And we really put it through it’s paces using the RF 24-105mm, the RF 50mm, and the RF 28-70mm.
I purposely did this shoot with the Canon RF 24-105mm lens only. This is the perfect focal length zoom to use in a place like Death Valley where I can go from very wide shots to very tight shots with a simple twist of the wrist. I’ve never been a huge fan of that focal length but I’ll tell you what, I was pretty blown away by that lens. Below are the shots from the shoot and to say that I was impressed with the colors is an understatement.
Issues with the camera on this particular shoot? Well, really just the buffer was an issue. I was pretty surprised by how fast I’d hit the buffer and the camera wouldn’t be able to continue shooting. This happened when I put it into High continuous drive mode to grab some shots of Emily as the wind made her dress and a sheet that she was holding blow.
The focus wasn’t as fast as I get with my Sony cameras but I don’t think anything will be. That is where Sony reigns supreme. That being said it did very well and really was a lot of fun to shoot.
The performance from a portrait photographer’s standpoint was pretty awesome. The colors are noticeably different in the camera even when reviewing pics on location. I edited these shots using the same manner that I edit my Sony images and they do seem to be richer in the colors than what I get from my Sony cameras.
The 24-105mm lens? I really enjoyed using it. Focus was fast and consistent and you’ll even see that in the video because I included video footage shot with the Canon as well. I think you’ll also notice the colors in that footage as well because it’s completely ungraded and shows you what the camera was producing without any editing. I could see this lens being a big seller for wedding photographers out there especially for things like the ceremony. It will struggle in lower light like at reception due to it being f/4, but for well lit places it really performs like a champ and is very well made.
Does this mean that I’m switching brands and no longer shooting Sony? No, it doesn’t. I filmed this entire series on my Sony cameras and they did amazingly well. What it means is I now have the ability to shoot whatever I want and am able to connect and relate to all of my followers no matter what brand they shoot.
I also gotta tell you that it’s very fun for me. I’m very curious by nature and to be able to try out so many different cameras and lenses is a hoot. It also helps me as a photography educator to be able to relate to anyone coming to my workshops and to have a strong knowledge base in their camera systems as well so I am better prepared to help them.
A HUGE THANKS to my partner in crime Emily Rinaldo for the amazing styling she did to make this shoot possible. She’s a creative lightning bolt and is such a tremendous muse who helps me to create this work. Please give her a follow on Instagram at www.instagram.com/em.explores
Thanks again for following along on this adventure of mine in the world of photography. There’s never a dull moment and I’m so grateful for all of your support as I seek to unravel some of the mysteries that exist out there and share them with all of you.
Until next time, never give up on your dreams, find the right gear that works for you and remember, you only have one chance to get it right.
XOXO
Jason
When the Sony A6400 was announced I’ll be the first one to admit that I was a little confused as to what this camera had to offer. Just the name alone made it confusing for me to comprehend why Sony would release a camera that came in between the A6300 and the A6500. I mean, what’s the purpose of this camera?
A little while ago I had the opportunity to get my hands on one of them to give it a go. This camera quickly became my favorite of the Sony crop sensor cameras. To watch the entire review please click the video below:
The A6400 replaces the A6300 and while the body form factor remains relatively unchanged, there are some big changes on the tech side and the screen that make this a very interesting camera.
The big news from this camera is the update to the eye auto focus and the screen. This is Sony's first offering of a complete flip up screen that makes it useable for vloggers out there.
The other exciting news is that this camera has the same processor as Sony'f flagship camera, the A9. This makes it the fastest of any of the crop sensor Sony cameras and also improves the battery life nearly doubling the total expected shots from the camera on one battery charge.
Eye Auto Focus- no need to hit a secondary button to engage the eye auto focus. This makes using this very valuable function easier than ever and also more accurate. You now even have the capability to toggle back and forth and choose which eye you would like in focus. THAT is COOL!
Flip Up Screen- Yay! We finally have a flip up screen on a modern Sony mirrorless camera. This makes it the first camera for vloggers and photographers like me who actually record a lot of video with their camera. One of the most annoying things for me personally is to keep having to go behind the camera to check for audio signals, to make sure the camera is recording etc. Having a screen that I can see as I record is a big bonus for me,
No Time Limit Recording on Video Mode- I always take a camcorder with me wherever I go because there are times when I need to record for longer than 30 minutes. The A6400 is the first Sony Mirrorless that now extends this video capability to a non camcorder body. This is one of the main reasons why I’ll be buying this camera. The ability to now use a camera like this with all of my pro level lenses is a big advantage for me over using the standard lens that comes on a camcorder and will up my video game for sure.
A9 Processor- The processor that is in Sony’s most advanced camera, the Sony A9, is now the same processor in this little guy which kinda blows me away. This results in much faster auto focus, better tracking, a better buffer and a much better battery life! This is the first breakthrough on battery life from the original small body cameras that we’ve seen and I’m sure will be celebrated by crop sensor shooters out there everywhere.
ISO Performance- I was really impressed that a crop sensor camera was giving me the ISO performance that I was able to get with some shots using this camera. Below are some shots taken at ISO 4000 with no noise reduction that shows some pretty clean images. This is the best I’ve found so far on the Sony crop sensor bodies.
Video Functionality- given the advances in auto focus tracking, no time limit on recording, better battery life, etc. this camera aims to be a vloggers dream. It also has 4k video with S Log which will make the more serious videographers out there very happy. It does NOT have IBIS (In Body Image Stabilization) which will disappoint some, but the lack of IBIS is one of the main reasons the camera costs less than the A6500. If you’re serious into video work you’ll most likely be using a camera like this on a gimbal anyways so you shouldn’t need it too much anyways.
*Sony A6400- https://bhpho.to/2IKCRBg
*Sony 135mm G Master- https://bhpho.to/2IPq3d5
*Sony 35mm Zeiss- https://bhpho.to/2IDrv28
*Sony 50mm Zeiss- https://bhpho.to/2FmytlK
Gear Used to Record the Video:
*Sony A9- https://bhpho.to/2oOdnGF
*Sony 24-70 G Master- https://bhpho.to/2tVmFpj
*Sony AX33 Camcorder- https://bhpho.to/2IBQOgP
Given the price, the improved technology and tilt screen, I believe the A6400 is the best crop sensor camera that Sony has to offer. I would buy and use it all day over the A6500 due to it’s flip up screen, improved battery life, faster processing, eye auto focus and more. It also is significantly cheaper which makes it a much more viable option for many photographers out there.
It is hands down a quantum leap in technology and performance over the A6000 and takes it’s place as the best bang for your buck in the Sony crop sensor marketplace. It will be the crop sensor camera in my bag and I’ll be placing the A6500 aside for now. Some people will miss the IBIS in the camera, but I think they’ll appreciate the drop in price more.
I hope this has helped. Make sure to take a moment to check out my Youtube Channel if you haven’t already. www.youtube.com/jasonlanierpros. Also make sure to give a follow to my Assistant Emily on Instagram at @em.explores as well.
So what do you think? Let us know by writing in the comments below. Thanks for visiting us here!
Jason
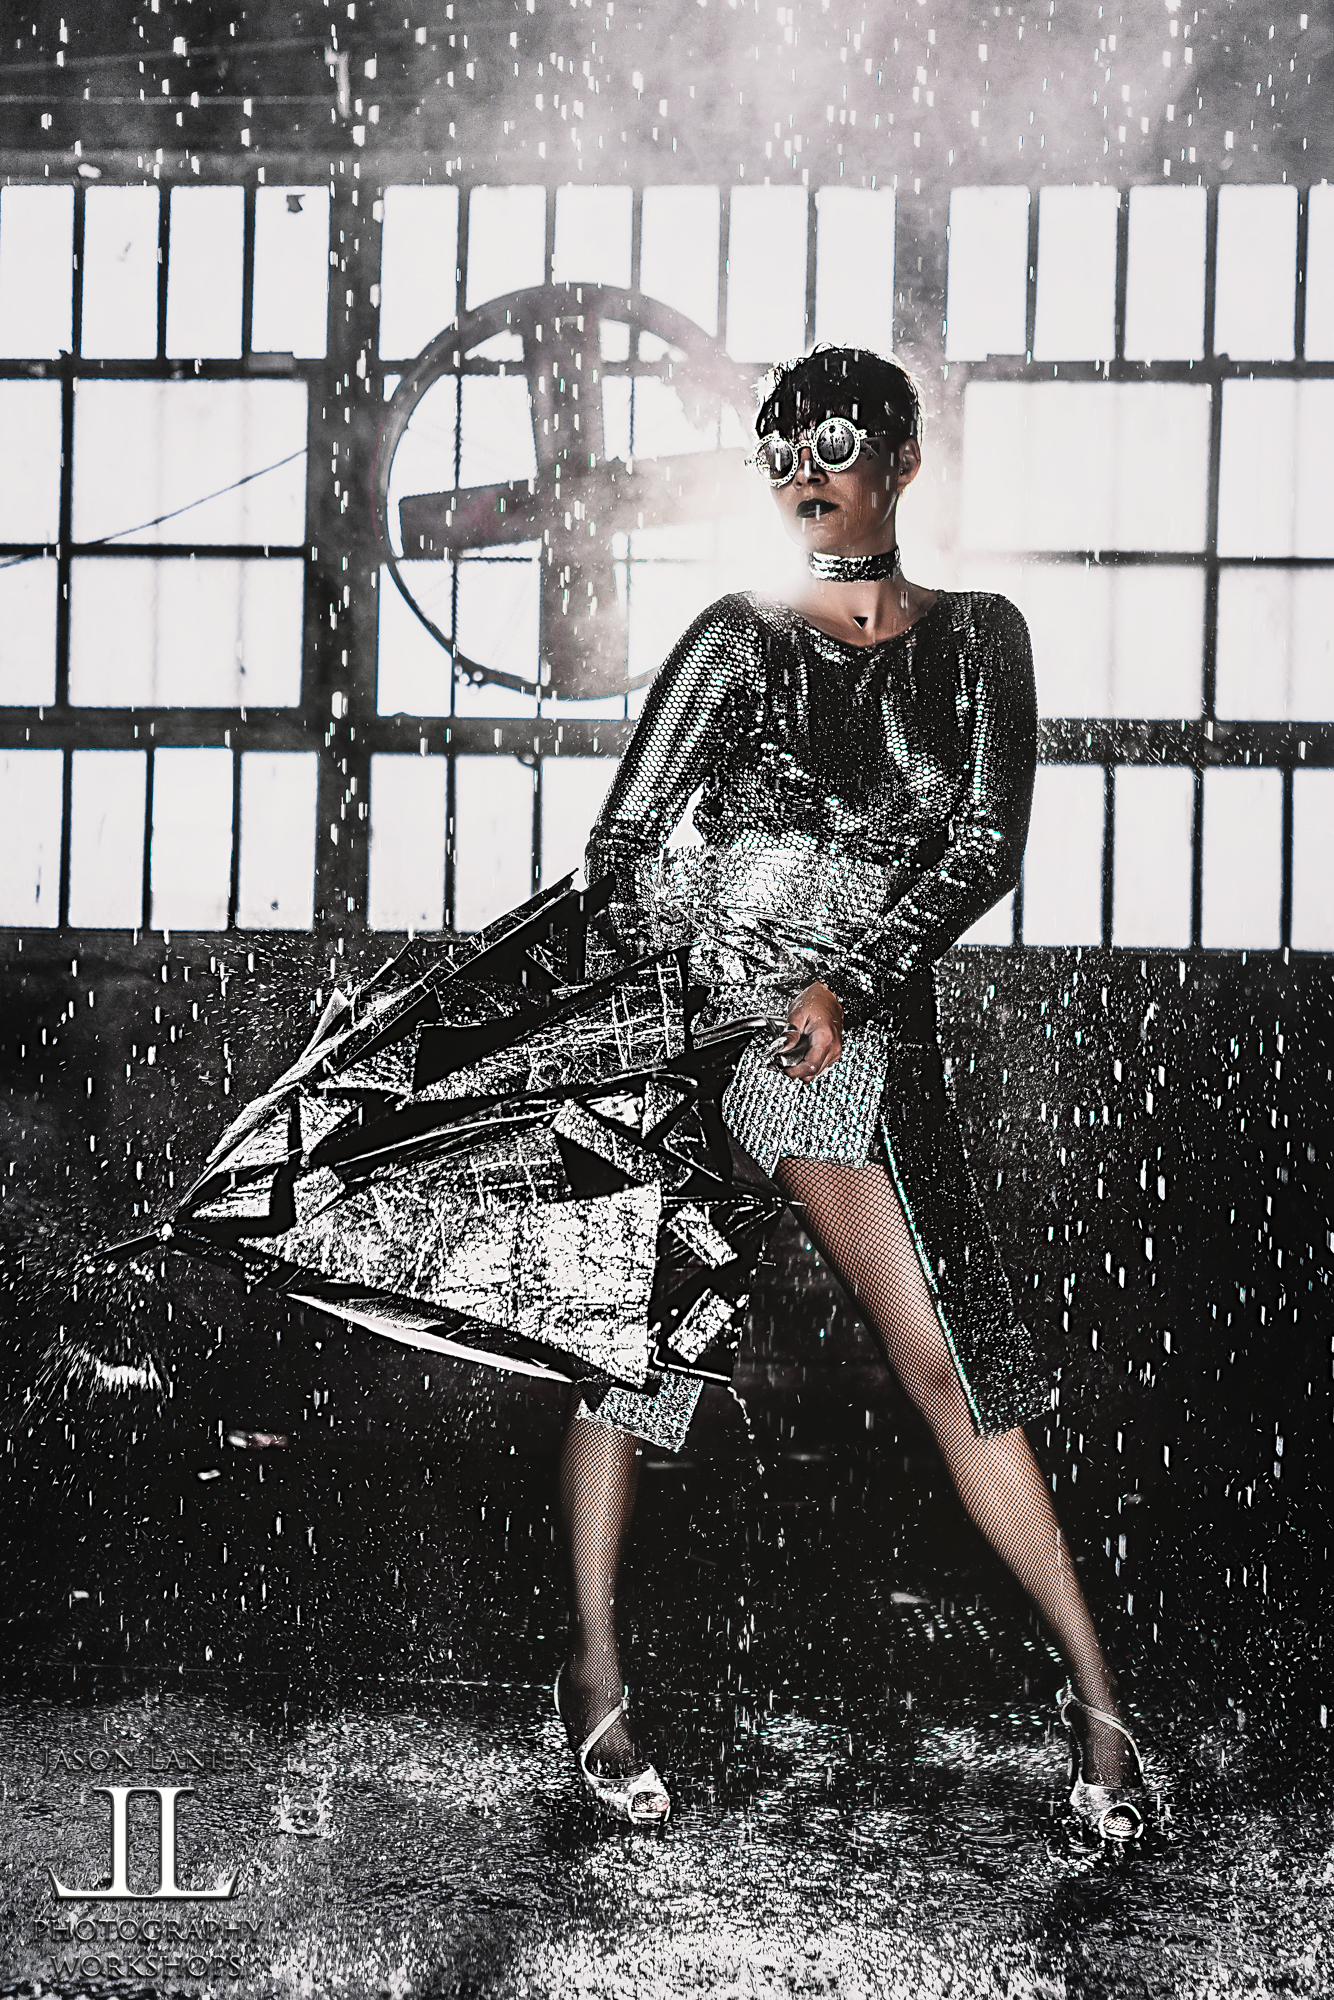
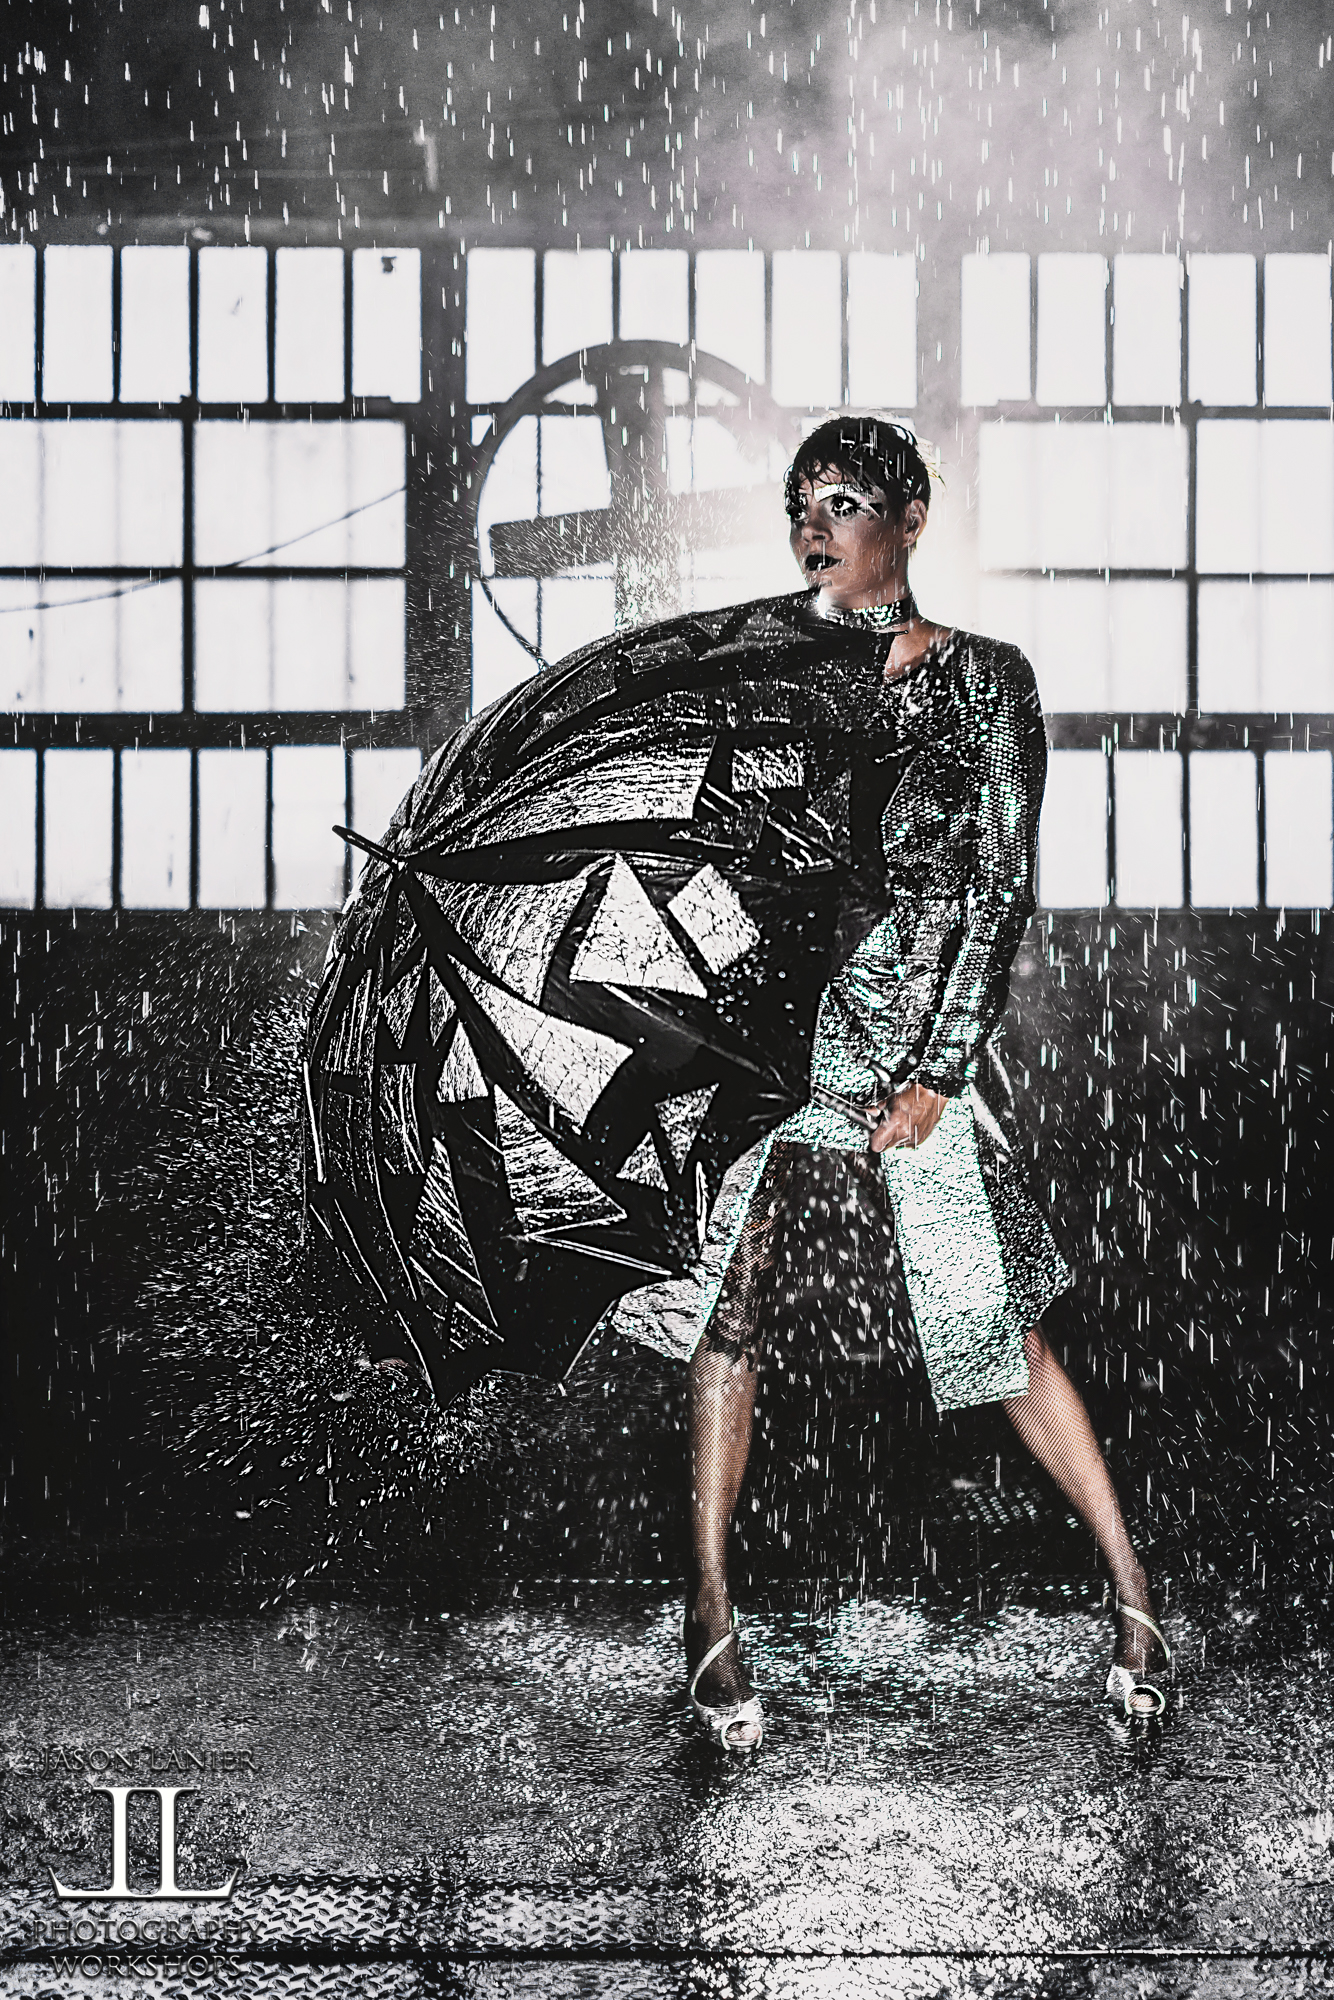
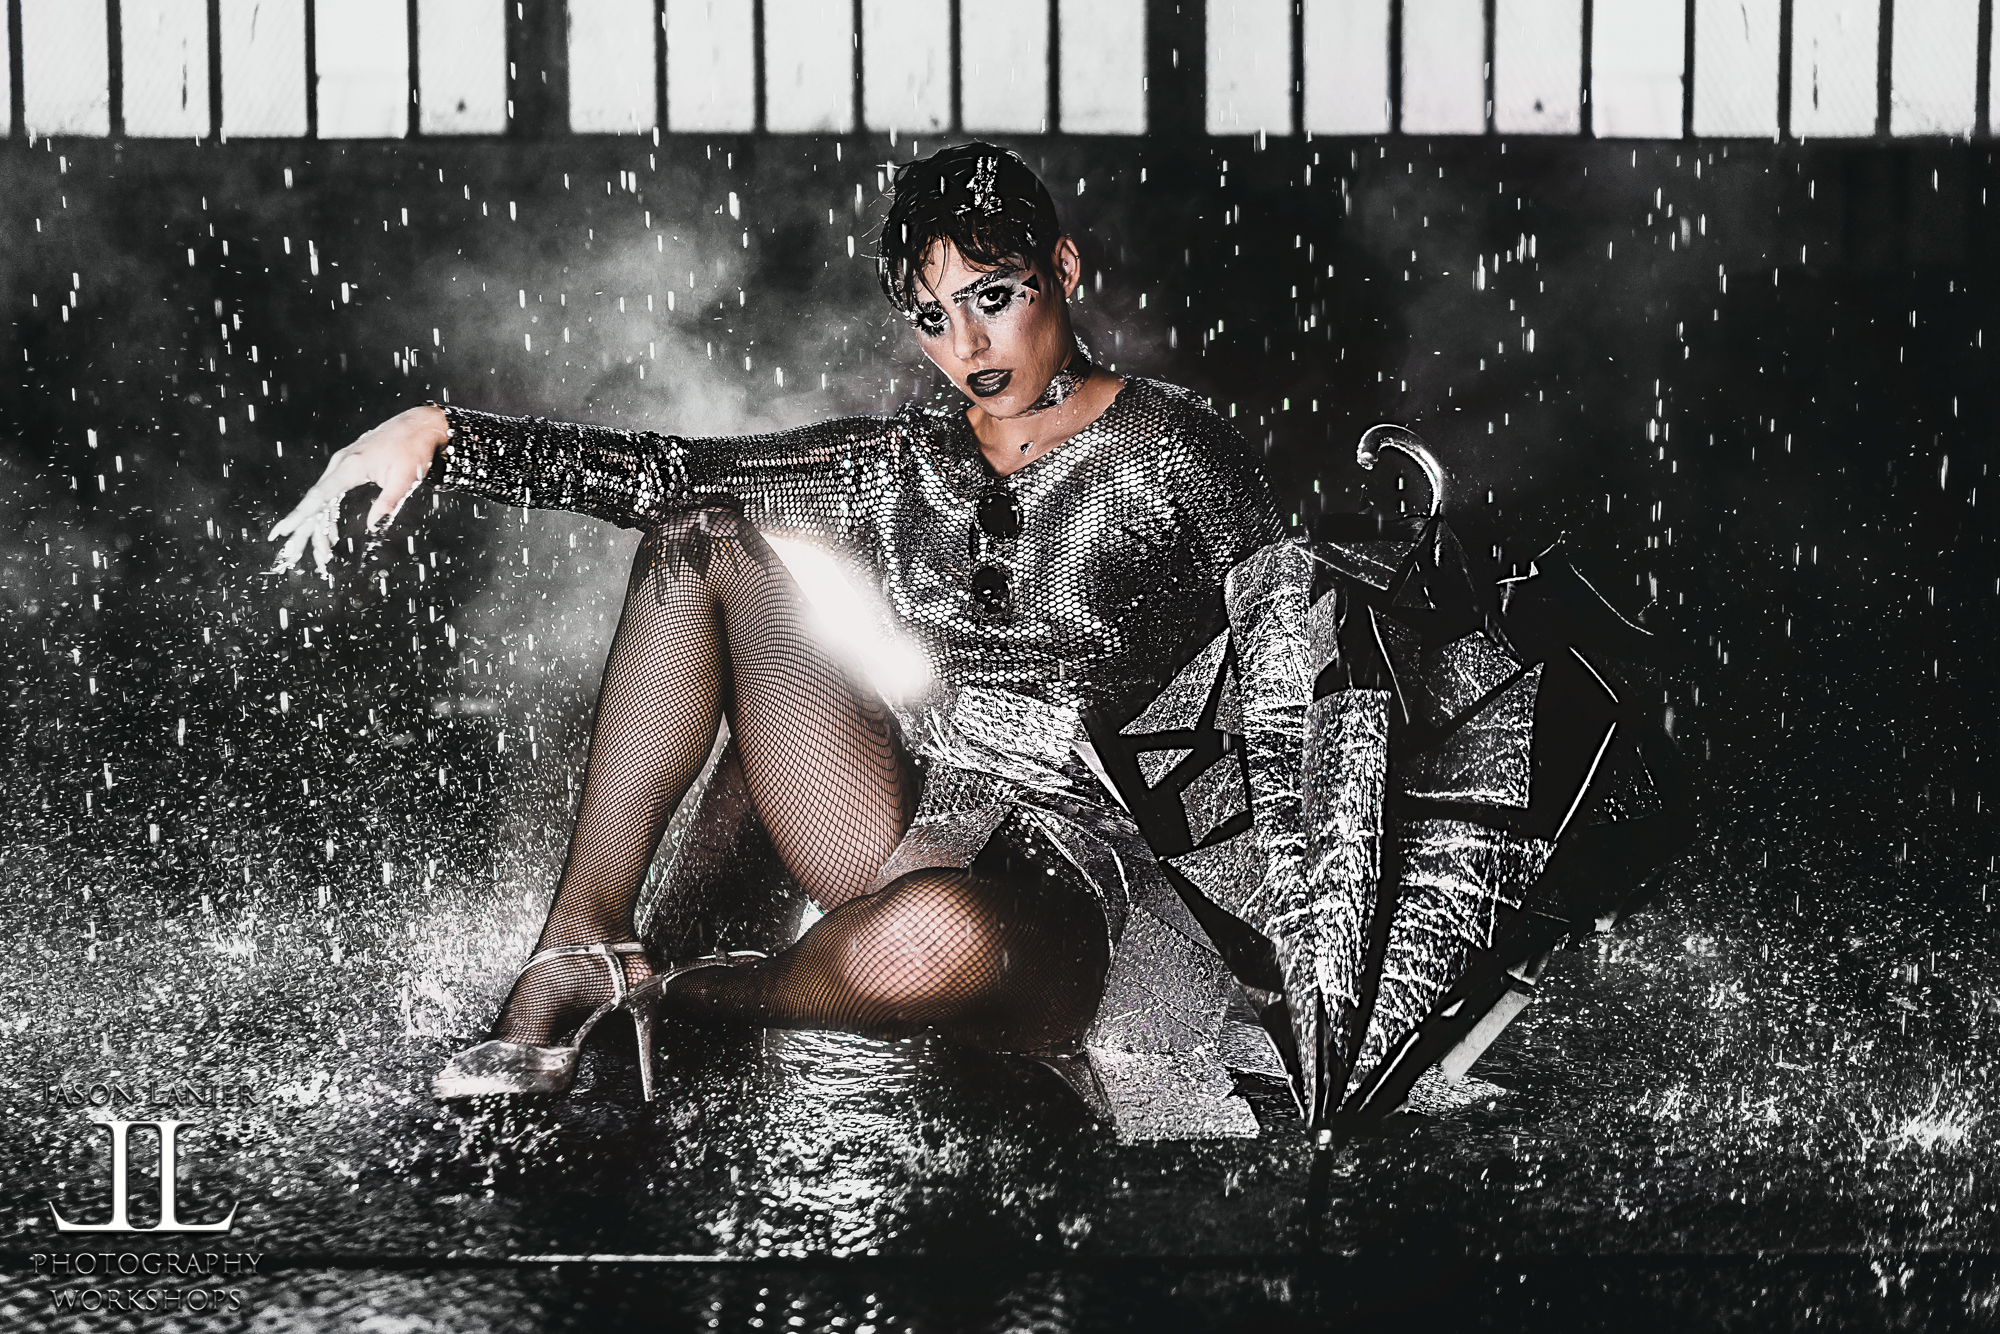
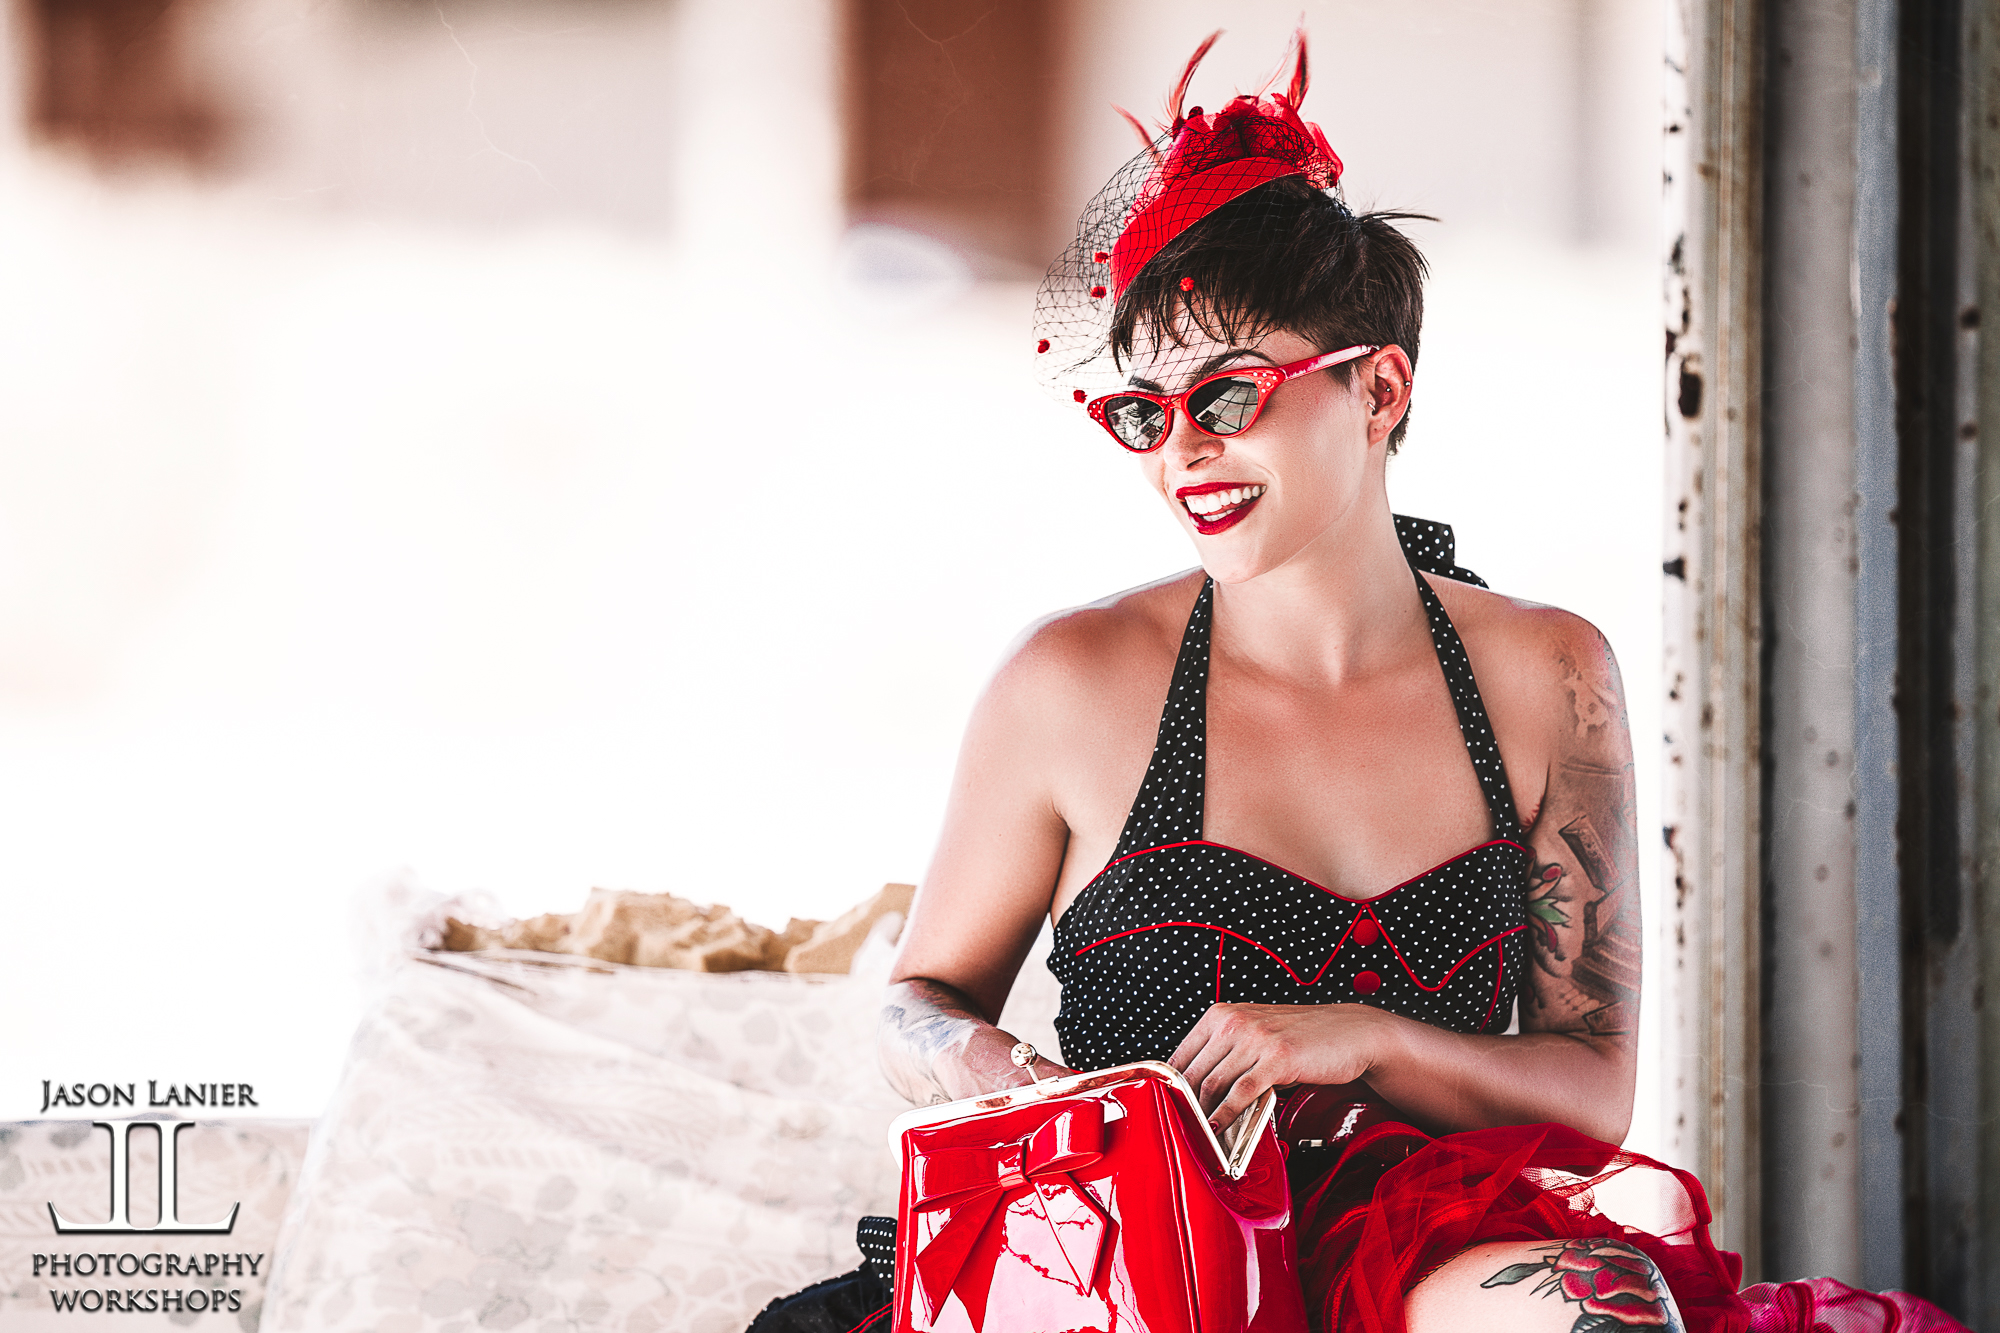
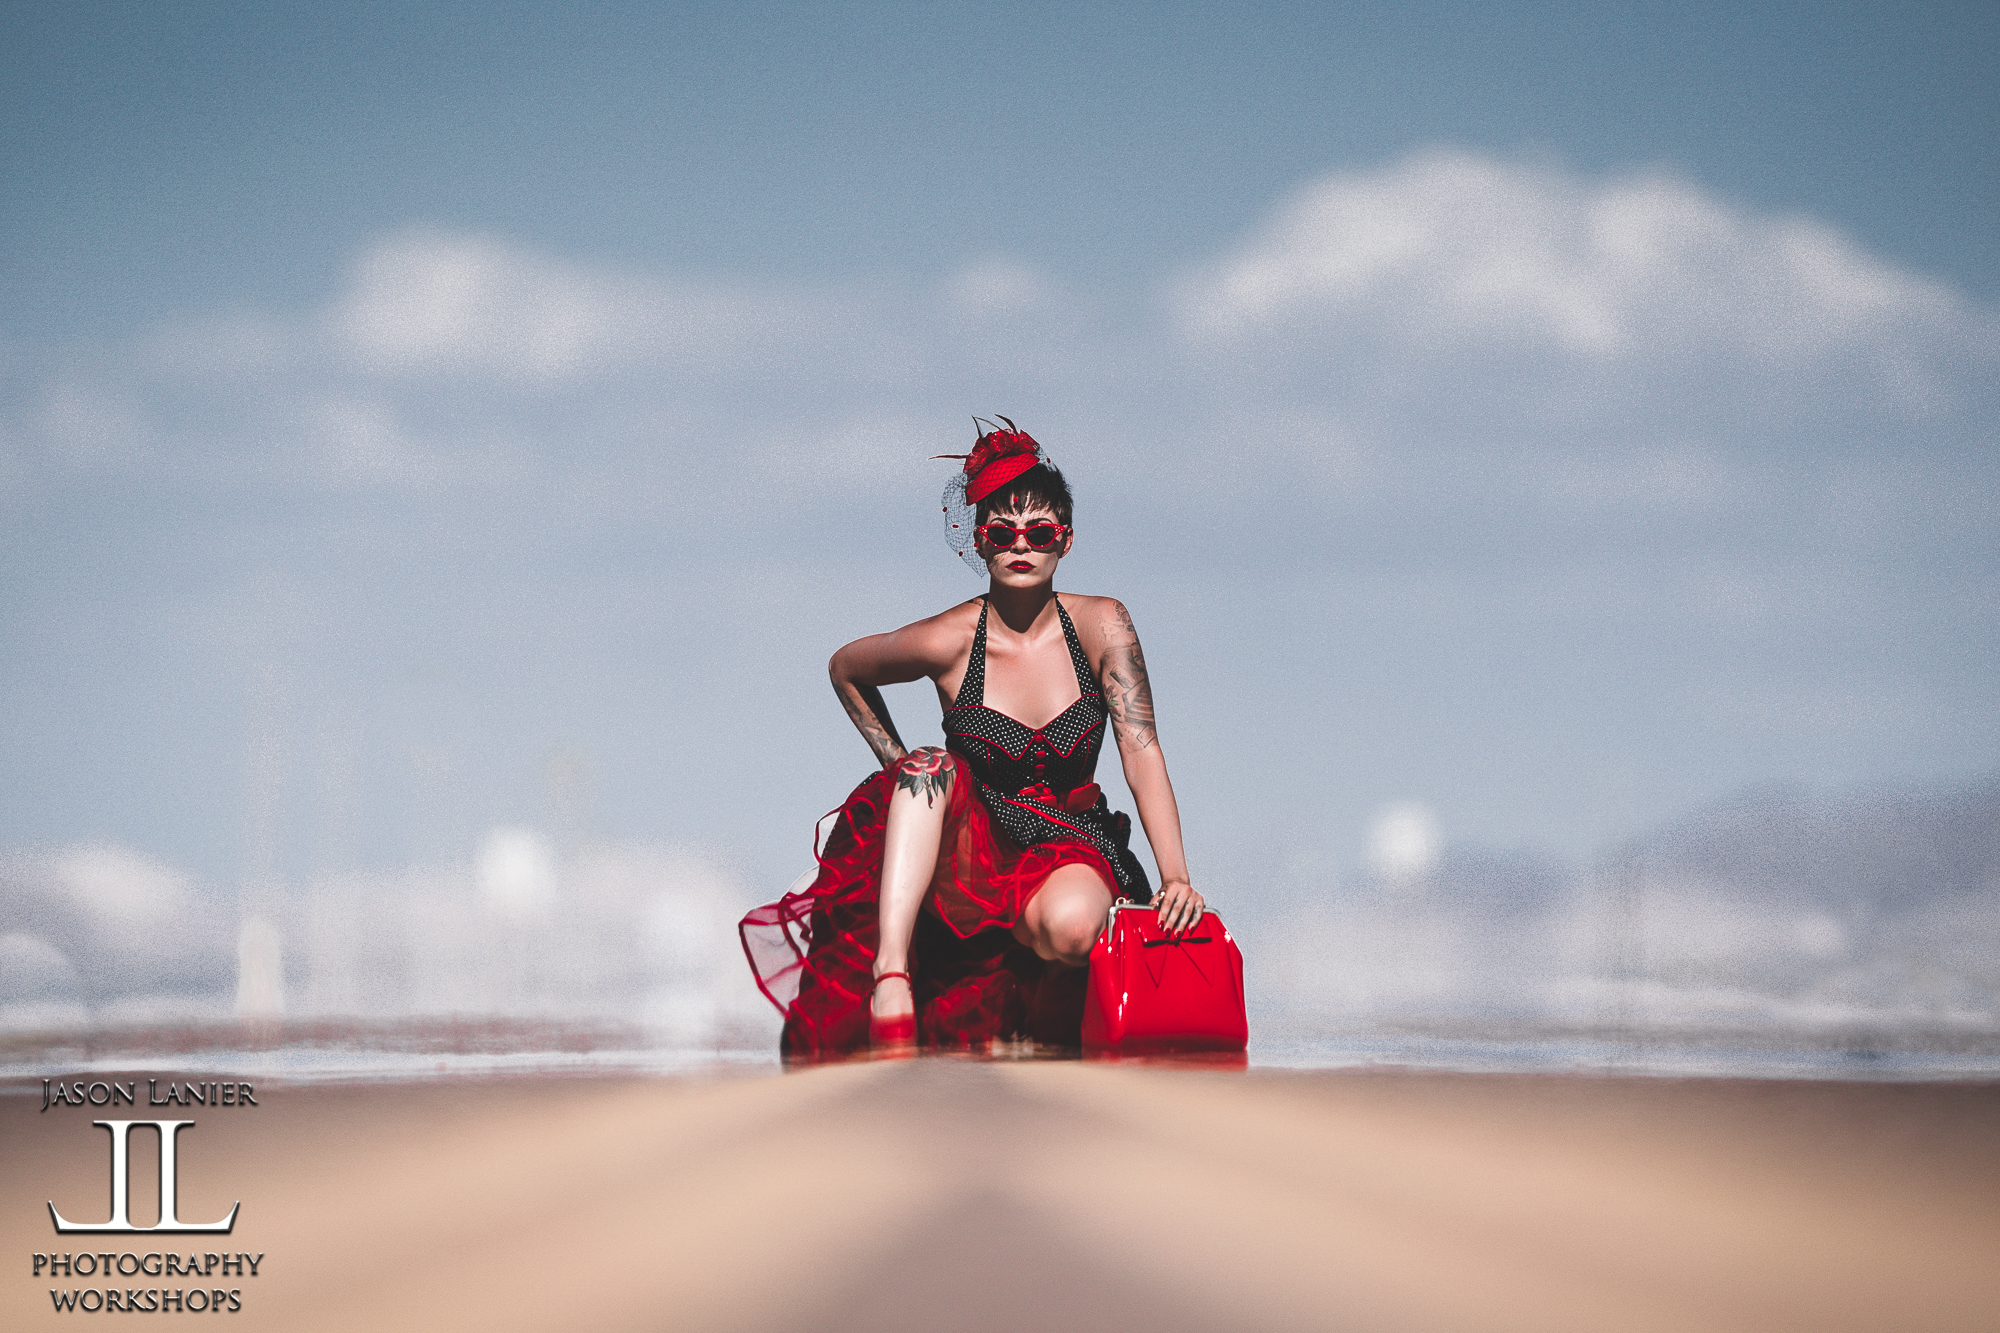
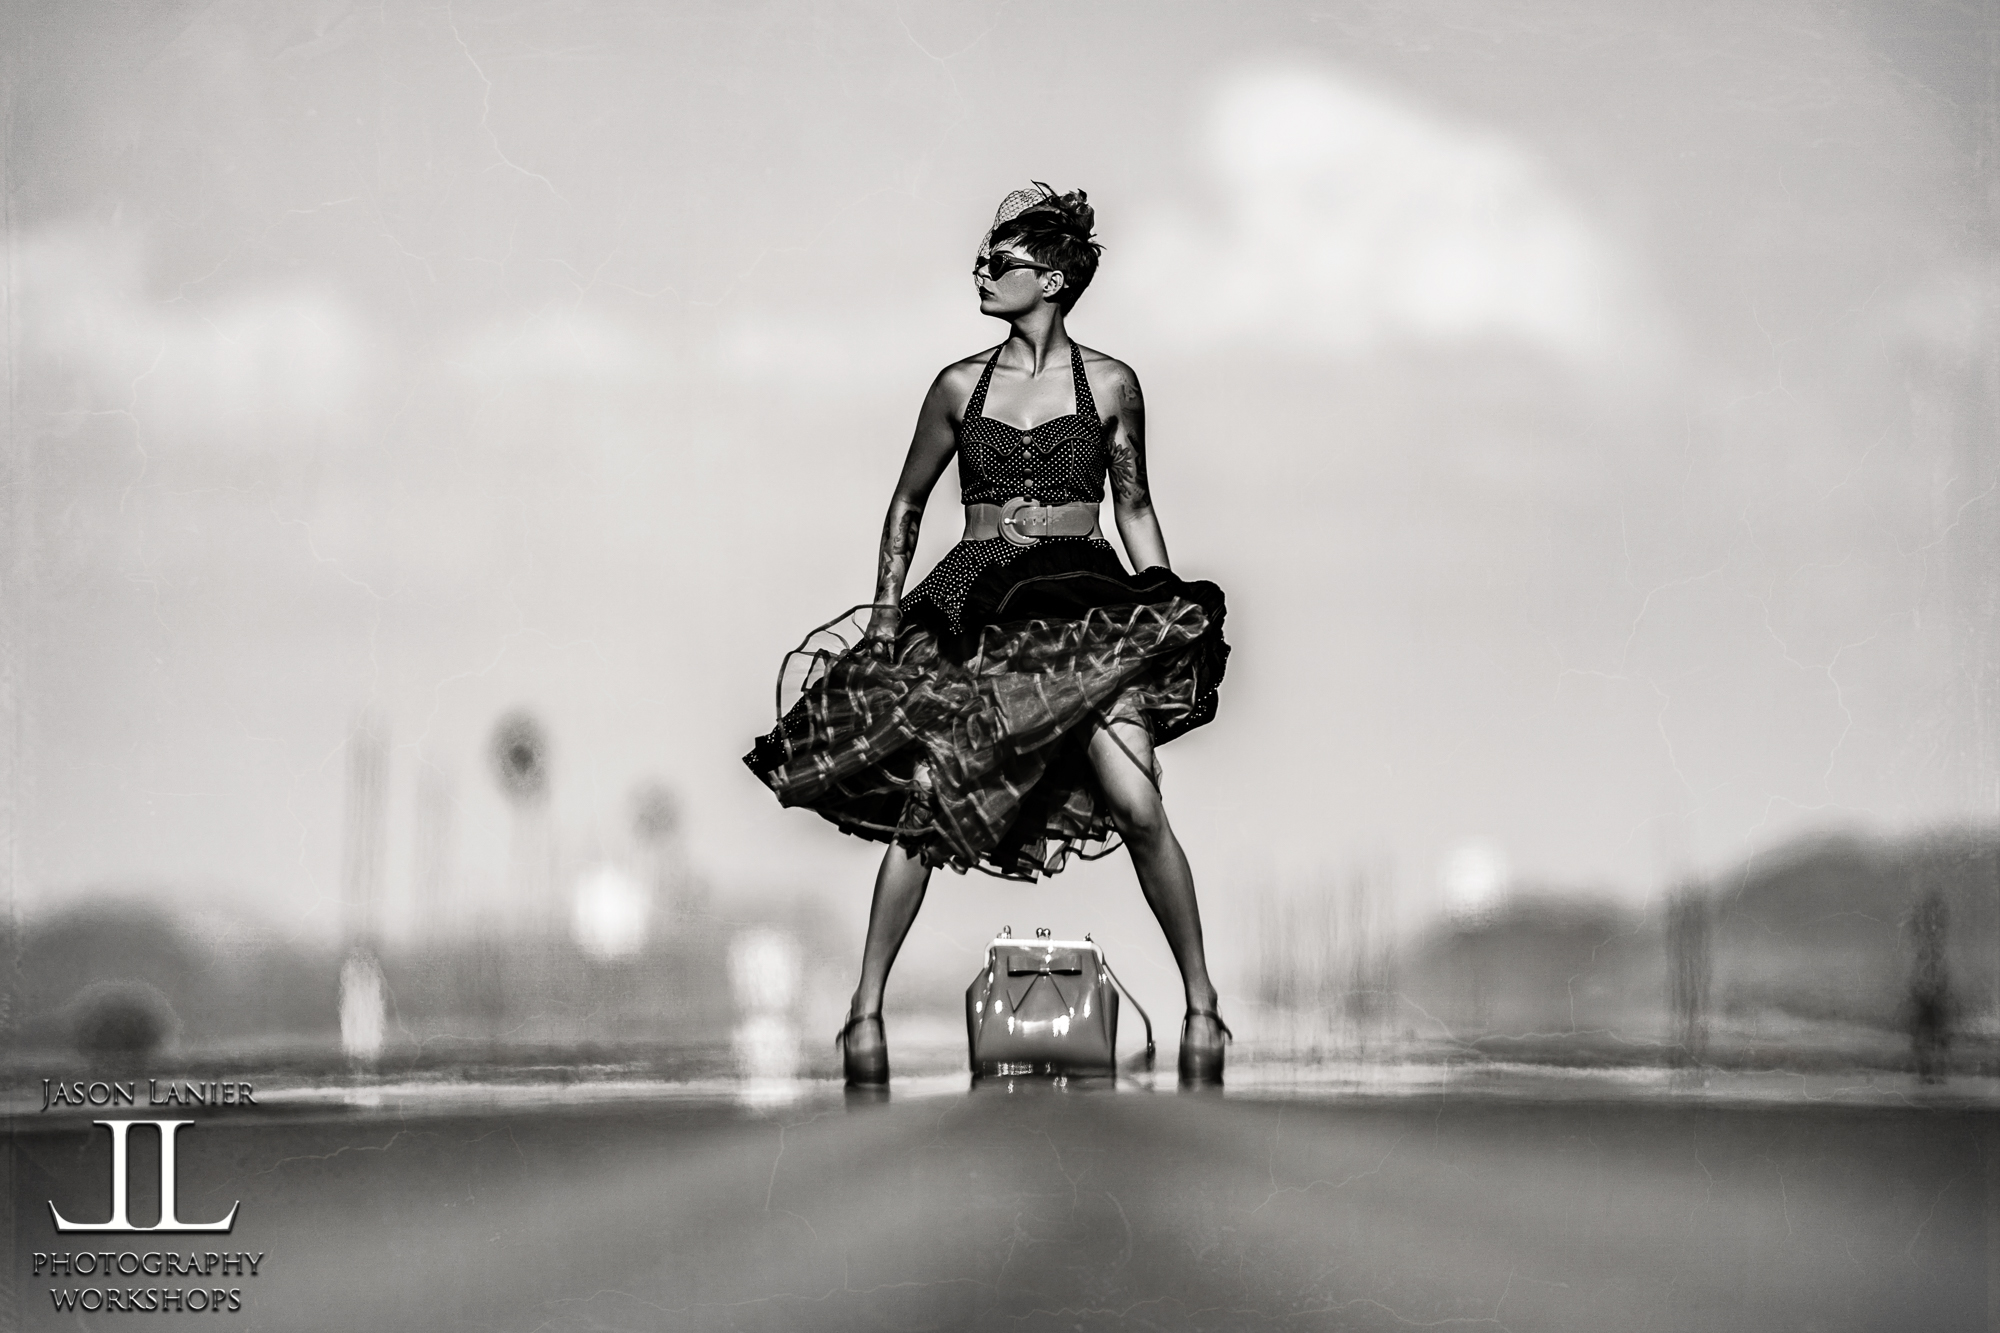
Any photographer who’s been shooting long enough outdoors has had his or her bouts of shooting in the rain. While it can certainly be challenging, it can also be very rewarding to give you some results that are different than what you create on a regular basis.
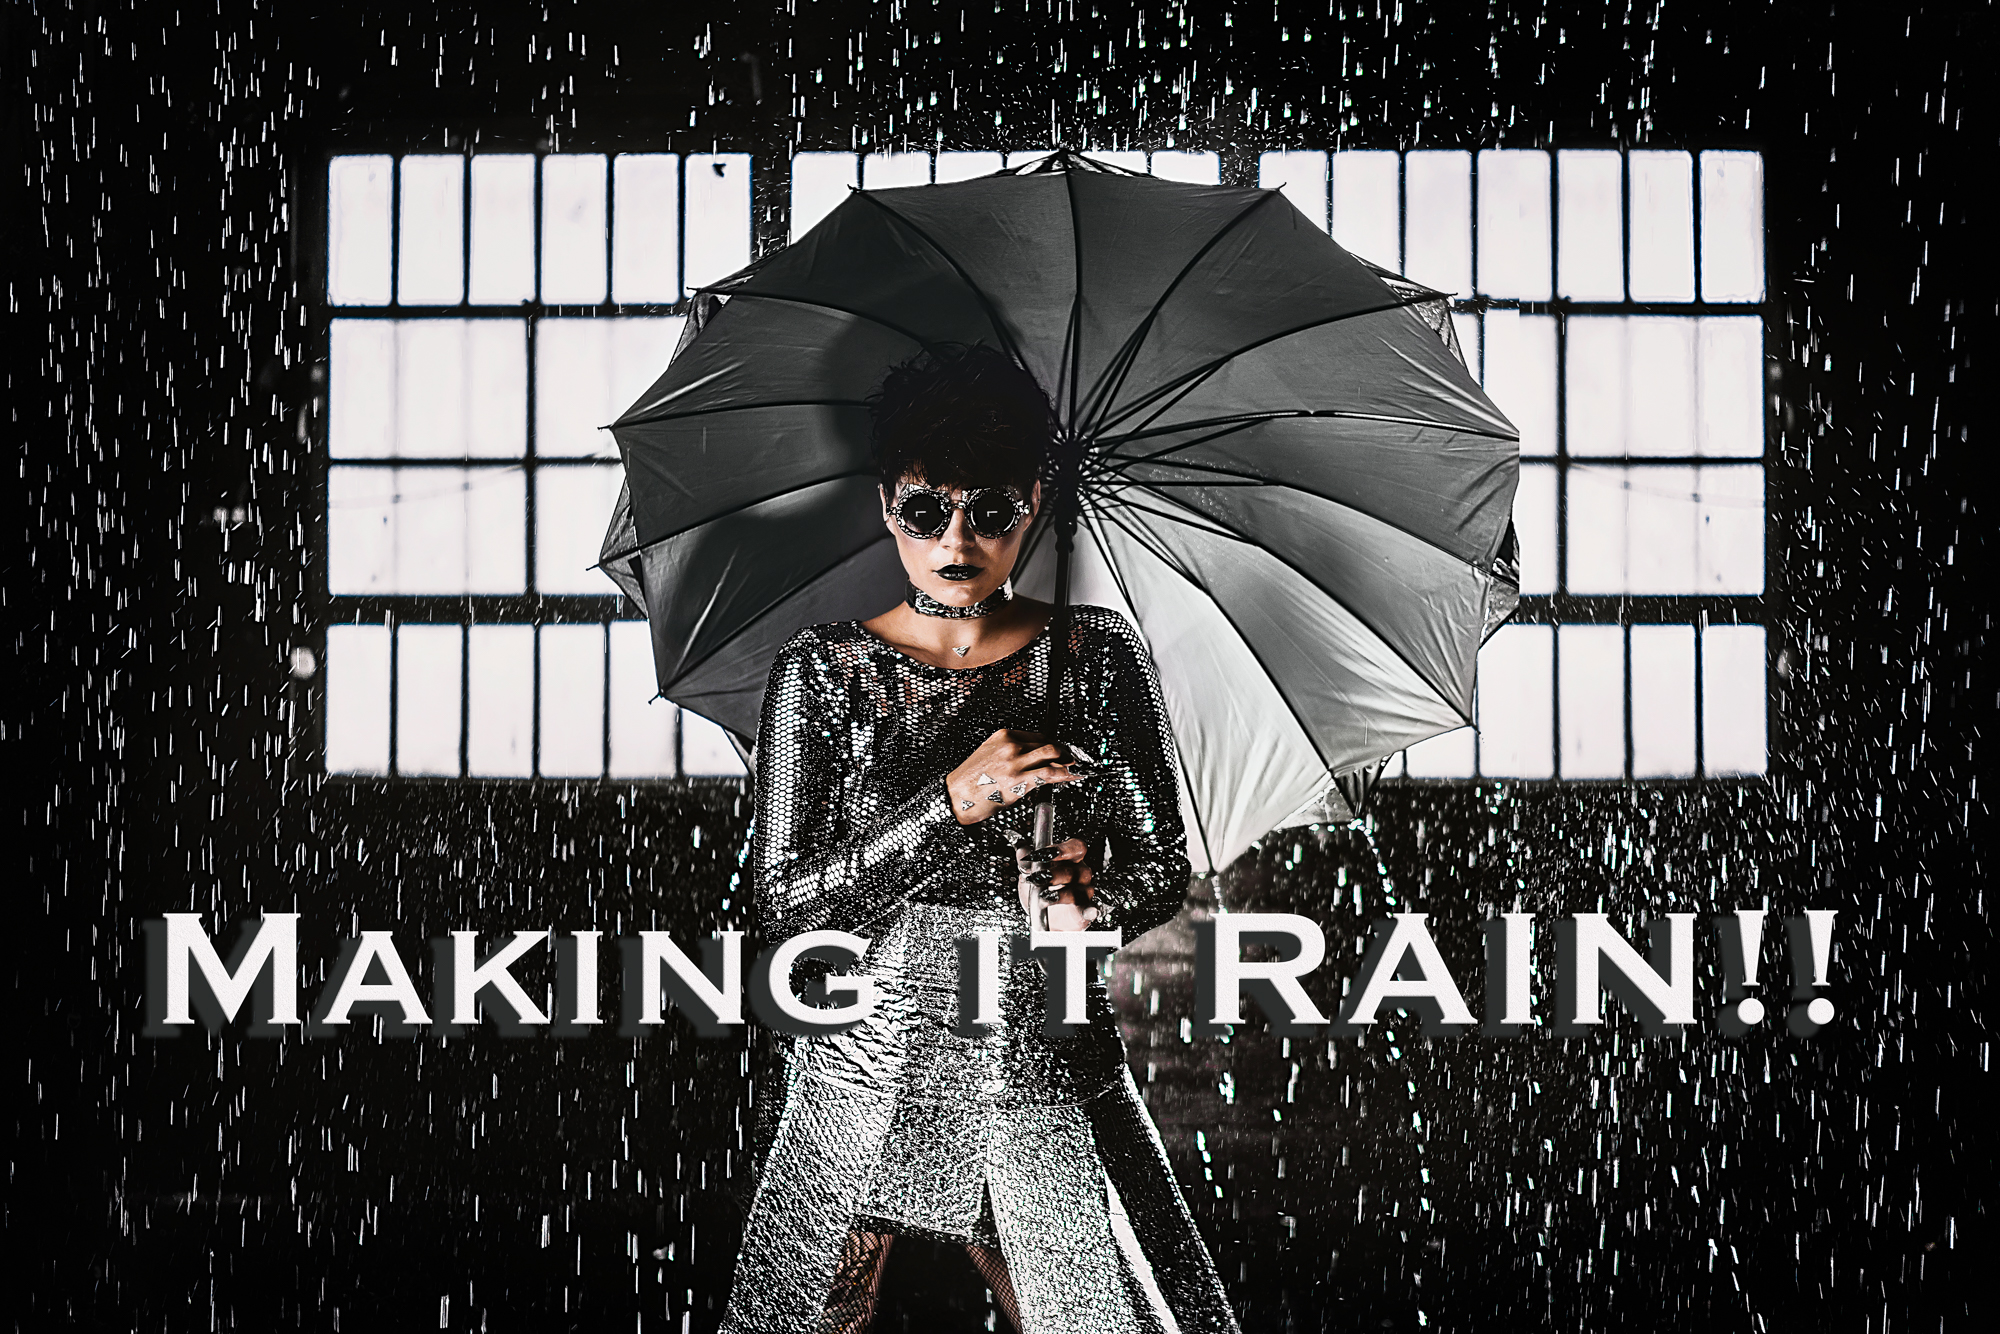
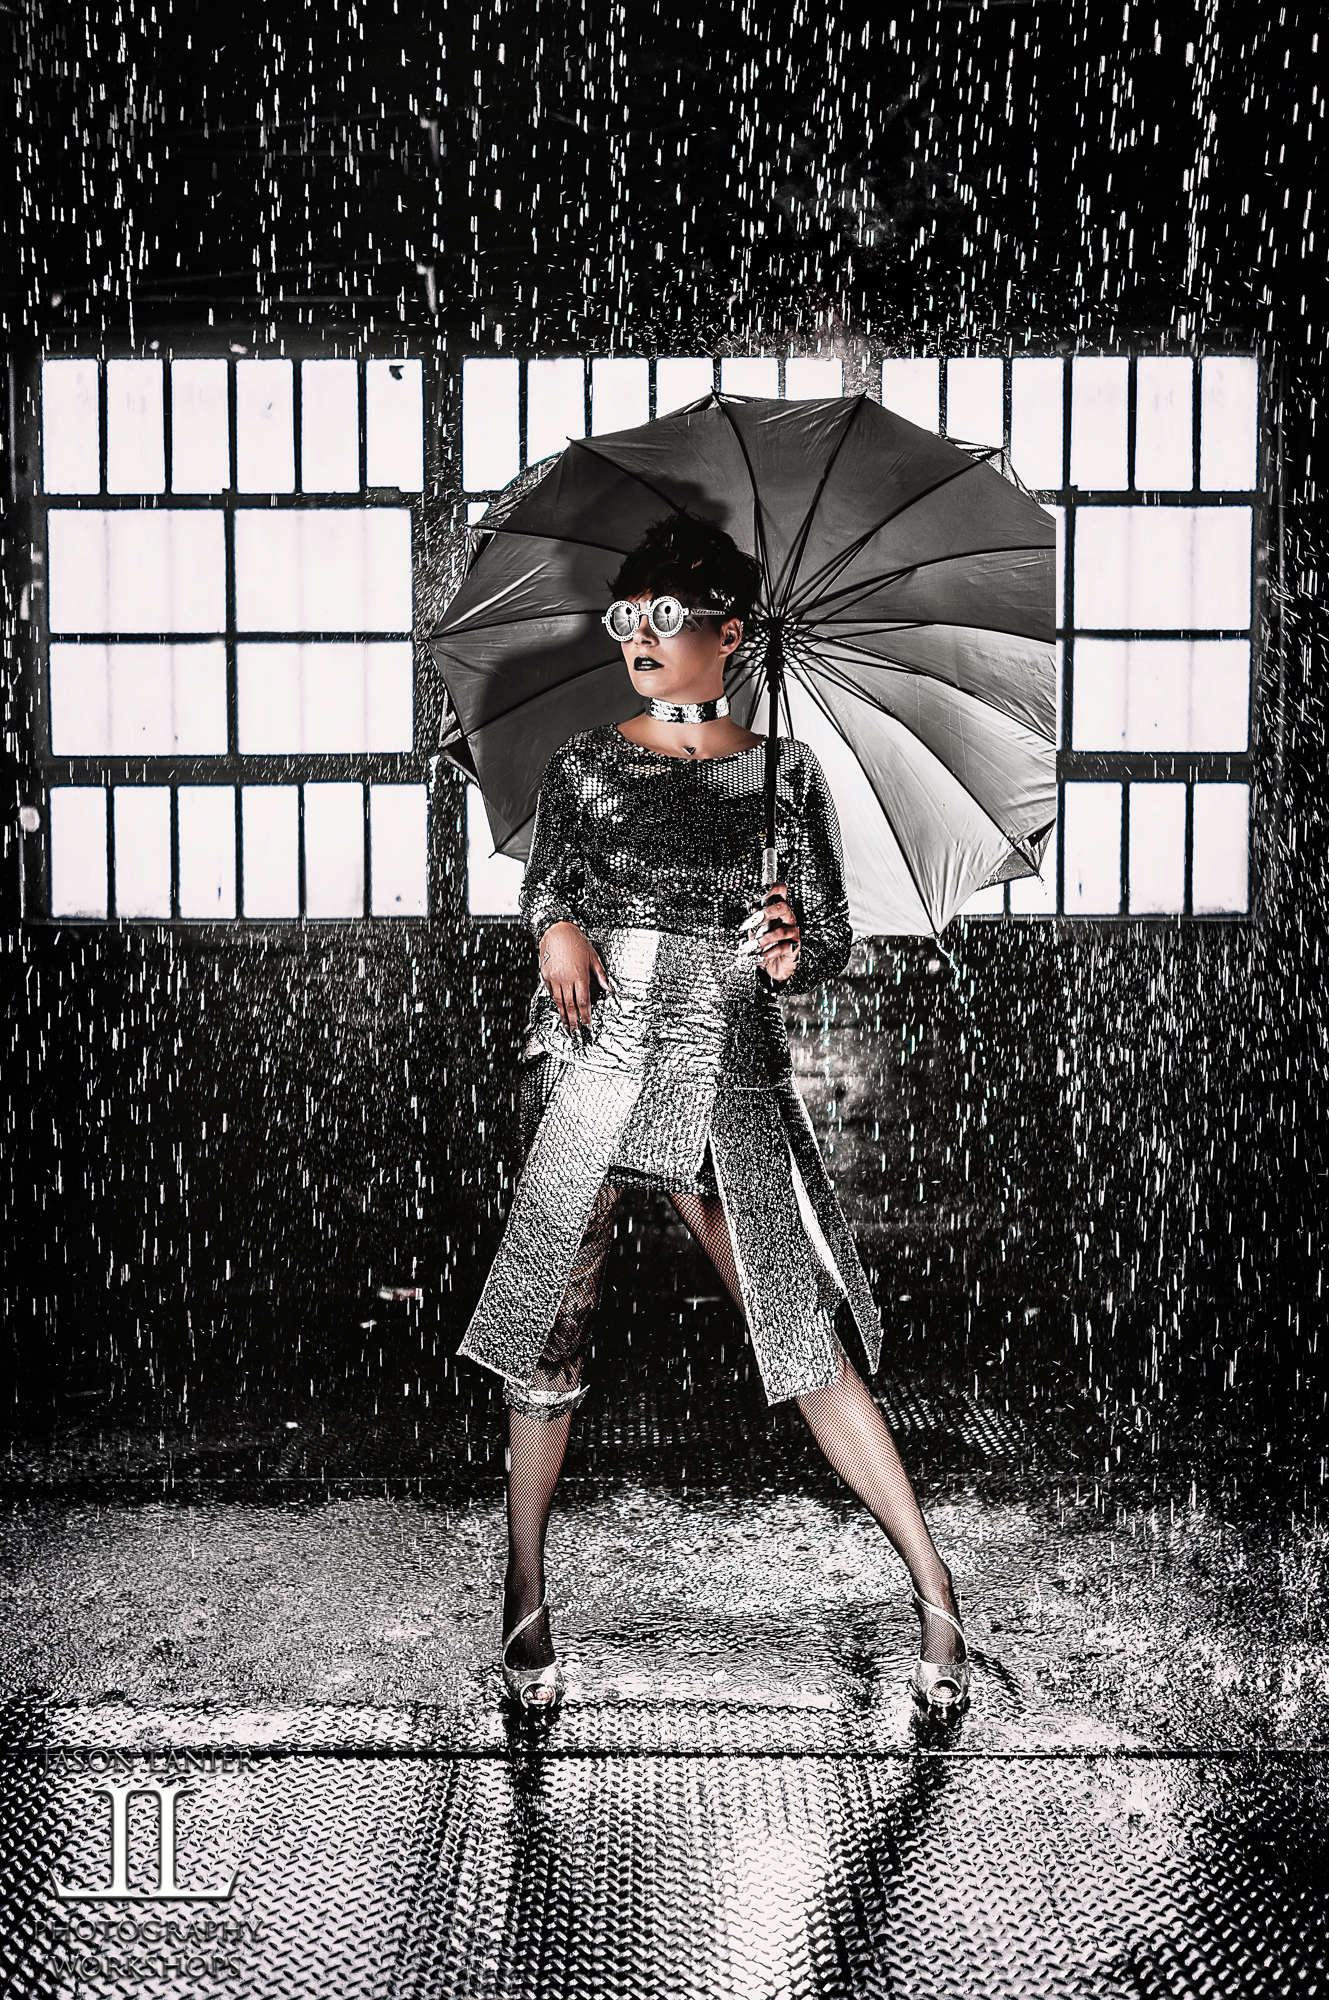
Well, there are some studios out there that actually offer rain INSIDE of a studio setting. What they do is set up pipes that pass water through with holes in them that drop water down into a studio setting that has the proper drainage and water collection set up to make it possible to shoot with rain indoors.
I recently did a shoot with my muse Emily (you can find her on IG at @em.explores), at FD Photo Studio in Los Angeles. The obvious benefit to shooting indoors vs. outdoors is the fact that it allows me to set up lighting in ways that would be very difficult or impossible to set up under normal rainy conditions.
Here are some of the pics from the shoot:
**Links to Gear:
*Rotolight Products- to get a 10% discount and FREE Shipping on any Rotolight products please visit: www.jasonlanier.com/rotolight to get the promo code now!
*Sony A7Riii- https://bhpho.to/2zu1lJu
*Sony Zeiss 35mm- https://bhpho.to/2IDrv28
*Sony Zeiss 50mm- https://bhpho.to/2FmytlK
*Matthews Scrim- https://bhpho.to/2IE2HH9
*Westcott 7 Foot Parabolic- https://bhpho.to/2ICi3vP
This was a very fun shoot done at FD Photo Studio in Los Angeles. This was shot using the Sony A7Riii with both the 35mm and 50mm Zeiss lenses.
Lighting was set up using the Rotolight Aeos inside of a 7 foot parablic umbrella with a Rotolight Anova Pro 2 used as a kicker light and another Rotolight Aeos used as a fill light.
The model is the beautiful Emily Rinaldo who can be followed by going to Instagram and following her @em.explores.
We hope you enjoy the shoot and invite you to stick around and watch a few more videos while you're here. Don't forget to click on SUBSCRIBE and NOTIFICATIONS so you're updated every time a new video is released!
Thanks,
Jason
Back in November 2017, the kind folks over at Olympus sent me a test kit for the EM-1, Mark 2, which is the OMD Mark ii. I was excited to see what it could do particularly because of it’s weather proofing body specs.
Well, like it can many times, life and career got busy. This little micro four thirds camera sat in my office for over a year. The people over at Olympus were more than patient and just urged me to give it a try when I found the time to do so.
**To receive 10% off any Rotolight product and get FREE shipping please visit www.rotolight.com and enter the promo code: jasonlanier10
Fast forward to the end of 2018 when the mirrorless marketplace was changed by Nikon, Canon, and Panasonic entering the full frame mirrorless sector.
These new cameras ushered in a renewed sense in me to try out some different mirrorless cameras. As someone who believes in the future of mirrorless I had devoted the past 5 years to Sony, the leader in the mirrorless game.
But, with these new cameras coming out, it made me think, why not try all of them? First I tried the new Nikon Z7, and then when preparing for a number of shoots in Los Angeles, I saw the Olympus bag sitting in the corner of my showroom.
I immediately felt bad for the gear feeling like I had neglected it for nearly a year and a half. So, on a whim, I picked it up and decided to give it a go at my studio shoots in lieu of my Sony gear. I still took my Sony gear in case I was unhappy with the Olympus, but I felt it was high time to see what this camera could do.
So my model Emily and I went down to FD Photo Studio in Los Angeles to do a number of shoots. We first planned on doing just 1 shoot with the Olympus, but it turned into a complete week of shooting with that little guy as I really put it through it’s paces.
This blog post isn’t a complete review on the camera but rather a post on just the creative lighting shoot I did with it. Why? Well, because most people (myself included) don’t usually associated micro four thirds cameras with shooting in lower lighting conditions.
Using the Rotolight Lighting system I set up the Anova Pro 2 as my key light, another Anova Pro 2 as my rim and accent light on the back wall, and a Neo 2 as a rim/accent light on my model Emily, placed directly behind her.
If you watch the video you’ll see the progression of the shoot as I share production shots showing how things were set up and how we ended up with the final results that you can see in the shots below:
All of these images were taken with the Olympus 25mm f/1.2 lens shot wide open at f/1.2. The lens actually performed really well and as always, the LED lighting by Rotolight was a perfect fit for the mirrorless system.
I fired all 3 lights using the strobe mode instead of continuous LED so I could get double the power output out of the lights.
To see the complete set up and shoot please make sure to click on the video to see how it all went down. I had a great time shooting with the camera and can’t wait to share more shoots with all of you.
For more information about my workshops and what we do please visit www.jasonlanier.com/register today! Don’t forget to click on SUBSCRIBE AND NOTIFICATIONS on my Youtube Channel to get updated every time a new video is released.
Thanks!
Jason
So, I switched to Sony mirrorless nearly 5 years as one of the early adopters and advocates of the Mirrorless wave. During the span of those 5 years one of the most common statements I’ve heard is, “Just wait until Canon and Nikon come out with their full frame mirrorless.”
To which my response has always been, “I can’t wait!” During those 5 years I’ve shot Sony exclusively and have purchased or used nearly every known lens that will work on the Sony system for both mirrorless or for their DSLT (their version of DSLR) system.
I’ve adapted Canon glass, Sony A Mount glass and used all the Sony mirrorless glass. I even attempted to use Nikon glass with adapters and famously had the Fotodiox adapter ruin my camera. Why do I say all of that?
Because I exhaust things. By nature I’m incredibly curious and as such, I just couldn’t resist the opportunity to try the new Nikon Full Frame Mirrorless system out when the opportunity presented itself.
Over the years Canon and Nikon have both had crop sensor or smaller sensor versions of Mirrorless cameras and those never appealed to me. It’s why I’ve still not tried Fuji, Panasonic, Olympus or others. I tend to stick to those camera companies that offer full frame.
So a little while ago I found myself in Richmond, Virginia for a workshop and I met up with a friend and fellow pro John Sichenze who offered to let me try his Nikon Z7 out. John has been shooting Nikon since 1972 and is a member of NPS, so having him tag along for the shoot was important to me as well. Getting his insights and opinions as to what I was discovering on the camera was helpful and a good way to bounce my findings off of him.
To REALLY get a grasp for how the shoot went, you gotta watch the video. You can read reviews all you want, but being able to watch how the camera performs is better when you…watch it lol.
In the video review/shoot I had the opportunity try both Nikon F mount lenses with the adapter and Nikon’s new mirrorless lenses. I tried it with flash, with LED, and natural light. I shot it with fast action and as a portrait camera in both daytime and night time conditions.
First observations:
The camera takes amazing pics. I never doubted this, even before I put it in my hands as you’ll see me say in the video. In this day and age of advanced camera technology I’ve always been a believer that virtually any camera can take great pics. What I enjoy about a camera is it’s ability make it EASIER for me to do so.
How fast does it focus? How well does it perform in low light? What’s the buffer like? How’s the black out time?
DOES THIS CAMERA MAKE IT EASIER AND MORE EFFICIENT FOR ME TO CREATE MY WORK VS. OTHER OFFERINGS IN THE MARKETPLACE?
Below are some of the resulting images from the shoot:
*Image Quality- Outstanding. I’ve always loved the image quality out of Nikon. It was the camera system I used for the first decade of my career. The Z7 definitely did not disappoint.
*Adapted Lenses- I was very impressed with how Nikon was able to adapt their DSLR lenses to their mirrorless system. They behave very similarly to when I adapt Canon lenses to my Sony cameras. This will make Nikon users very happy.
*Native Lenses- Both were pretty decent. Definitely not blown away. I enjoyed the 35mm f/1.8 more than the 24-70. It’ll be interesting to see if Nikon is really committed to providing a whole lens lineup for this new system.
*Focus system- the adapted lenses and native lenses focused and worked well during virtually all conditions except for flash. See below. I really do wish the cameras had eye auto focus.
*Buffer- I wasn’t very impressed with the performance of the buffer as it stopped after 19 shots.
*Blackout and Review- the camera lags with it’s blackout time and image review compared to the speed of what I’m used to with Sony.
*Flash- the camera REALLY struggles when using flash. Why does it struggle? It goes from dark to bright trying to acquire focus making using flash on this system very difficult.
*LED- the camera performed well when working with LED’s at night. Mirrorless and LED lights seem to go together very well so this makes sense.
*Screen- I really liked the touch screen to fire the shutter. Brightness and use seemed good.
*EVF- a little lacking compared to Sony in regards to responsiveness, but the EVF is something that makes all mirrorless systems superior to DSLR’s in my opinion.
*Video- I was impressed with the video output of the camera. It has a timer that counts down from 30 minutes and doesn’t crop in which I like. I don’t like that you have to switch to a movie mode to do so, but the quality of the video seemed very nice.
*ISO Performance- below are shots taken at 10,000, 16,000 and 25,600 respectively using the 105mm lens
The end of the video provided us with an opportunity to meet and shoot with a local who came upon us as we were doing our wrap up. It tells the underlying theme that at the end of the day the camera brand we shoot with is less important that what we do with the camera.
Am I switching to Nikon? No. The system just isn’t there yet. Sony is still the king in the mirrorless marketplace. But it’s worth noting that competition makes everyone better. It pushes the brands we use to have to be better and to not be complacent. I’m grateful we live in a day and age where we as photographers get to benefit from the competitive marketplace.
Last but not least remember, KEEP AN OPEN MIND. I’ve always believed in what I say at the end of every one of my videos. “Find the Right Gear That Works for You.”
To see the entire review and performance, please check out the video, it’s definitely worth a watch!
A big thanks to John for letting me use his camera and to the other John for filming.
The biggest thanks to Emily for just killing it as a model. She really brings so much to the shoots and I appreciate her so much. You can follow her on Instagram at @em.explores
For more information about what we do and to visit us for a workshop please visit www.jasonlanier.com/register.
Thanks!
Jason
Join me for my first experience on the streets of Addis Ababa, Ethiopia where I take on the question of whether or not photographers should compensate strangers when we’re taking their pictures as part of street photography or photojournalism.
Now, this is a complex question. You have to ask yourself:
Is it offensive to offer money to people when you take their picture?
Is it offensive when you don’t?
Is it messing up the natural flow of a shoot and what’s occurring when/if you offer money?
This shoot was done back in August, 2014 when I had first delved into the world of shooting Sony. All of these images were taken with the first Sony I ever purchased, the A6000.
I have to admit it was quite challenging to tackle this issue for myself. I was used to shooting weddings, portraits, landscapes and most things that photographer shoot. I had done work on local streets of the United States but never something to the magnitude of Ethiopia.
To find out how I handled it all and what I ended up doing, please watch the video that I made from this shoot.
To see the images from this shoot please check them out below:
The images in this video were taken using the Sony A6000 with the E mount 50mm f/1.8 lens and the 16mm f/2.8 lens.
As this is a touchy subject that many photographers need to answer, my attempt with this video is to show how I handled the situation so hopefully it helps others out there to determine what they would do if they were in a similar situation.
We thank you for watching and invite you to stick around and watch a few more while you're here.
A big thanks to the Out of the Ashes Organization for helping to make this trip possible. You can find out more information about them by visiting www.outoftheash.org
Don't forget to click on subscribe and click on NOTIFICATIONS so you're updated every time a new video is released.
Thanks!
Jason
WOW! This was a FUN SHOOT! While I usually spend the vast majority of my time teaching and not shooting at my workshops, I’ve learned to do a demo shoot at every workshop to help my students understand exactly what I’m teaching. I’ve also received feedback over the years that for some of my students who are visual learners, the demo session of the workshop is invaluable to their learning experience.
The other thing that’s so much fun at my workshops is when I have fellow photographers who are attending bring lenses that I haven’t had the chance to use before. At my Houston workshop in December 2018 a photographer named Jose brought the Canon 300mm f/2.8. I was thrilled to be able to borrow it and see how it worked with my Sony A7Riii using the Metabones Mark 5 Adapter.
As an early adopter to the Sony Mirrorless system, I am very accustomed to using Canon lenses on my Sony bodies to be able to supplement the Sony lens lineup that was lacking when I first switched over. I currently own 7 Canon L lenses and have used the 400mm f/2.8 and the Canon 200mm f/1.8 on my Sony bodies….BUT, the 300mm f/2.8 was one I hadn’t gotten my hands on yet.
Until Houston.
Jose was so kind to let me borrow the lens and his Metabones Mark 5 Adapter. In the past I’ve always used the Metabones Mark 4 Adapter or the Sigma MC11 Adapter. To answer the easy question for those reading this and wondering…did I notice a difference using the Metabones Mark 5 over the others? No. So if you’re like me, you don’t need to rush out and spend money on it unless you currently don’t have an adapter.
But, back to the lens.
Yes, it’s heavy.
Yes, it requires an adapter to use.
But yes, it delivers some pretty stellar results. Check out the shots below from the shoot:
As you’ll see when you watch the video I tested this lens in a variety of ways. First I shot with it just doing portraits as most people would use it.
Then I decided to up the ante and added the Westcott Eyelighter to the equation with the Godox AD600 Pro light that I was using inside of the Westcott Rapid Box XXL.
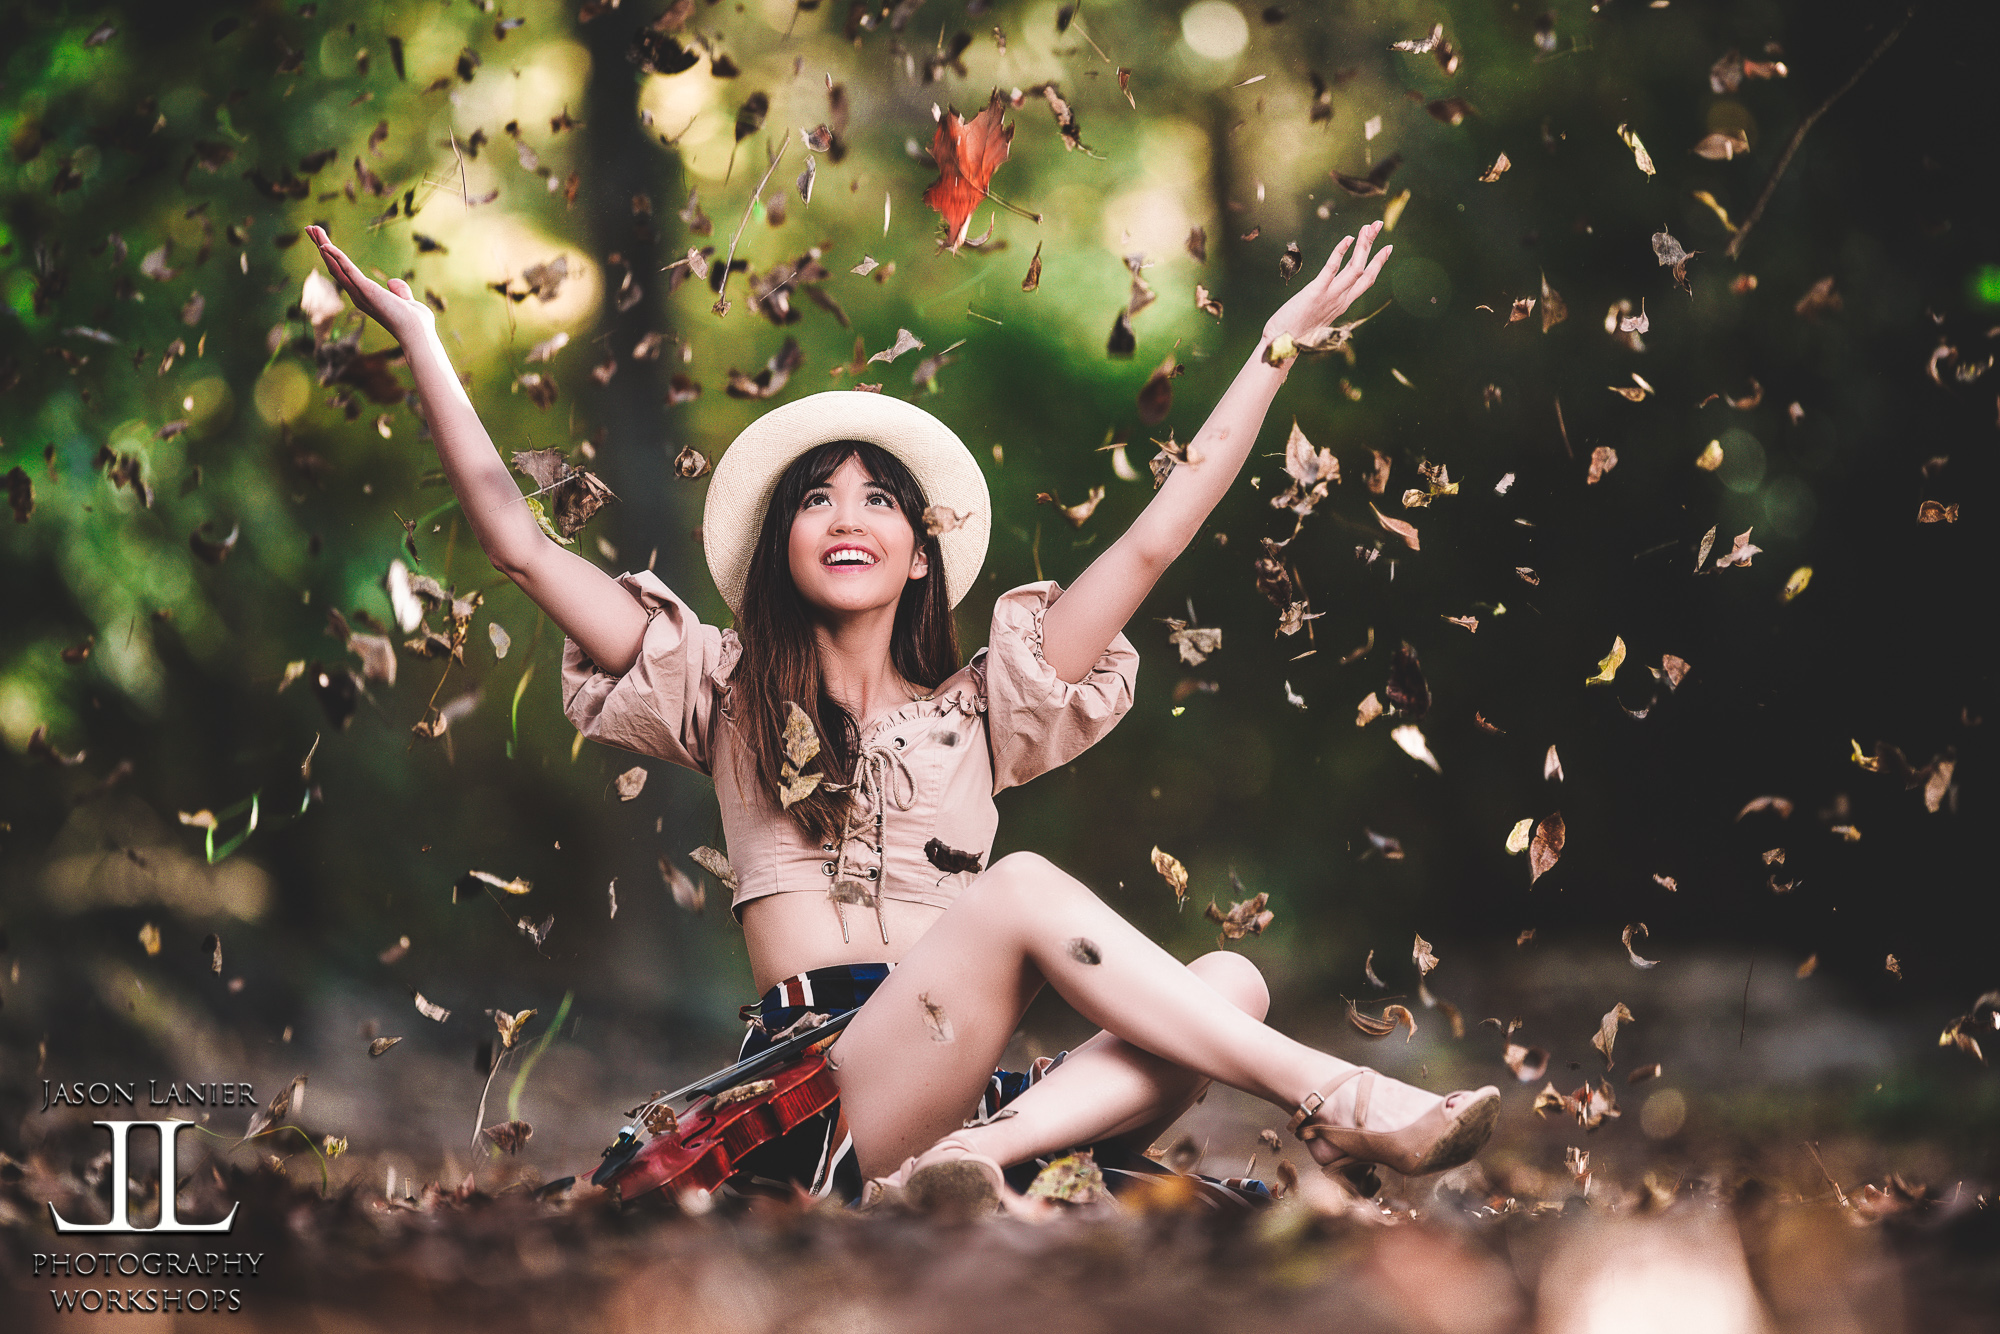
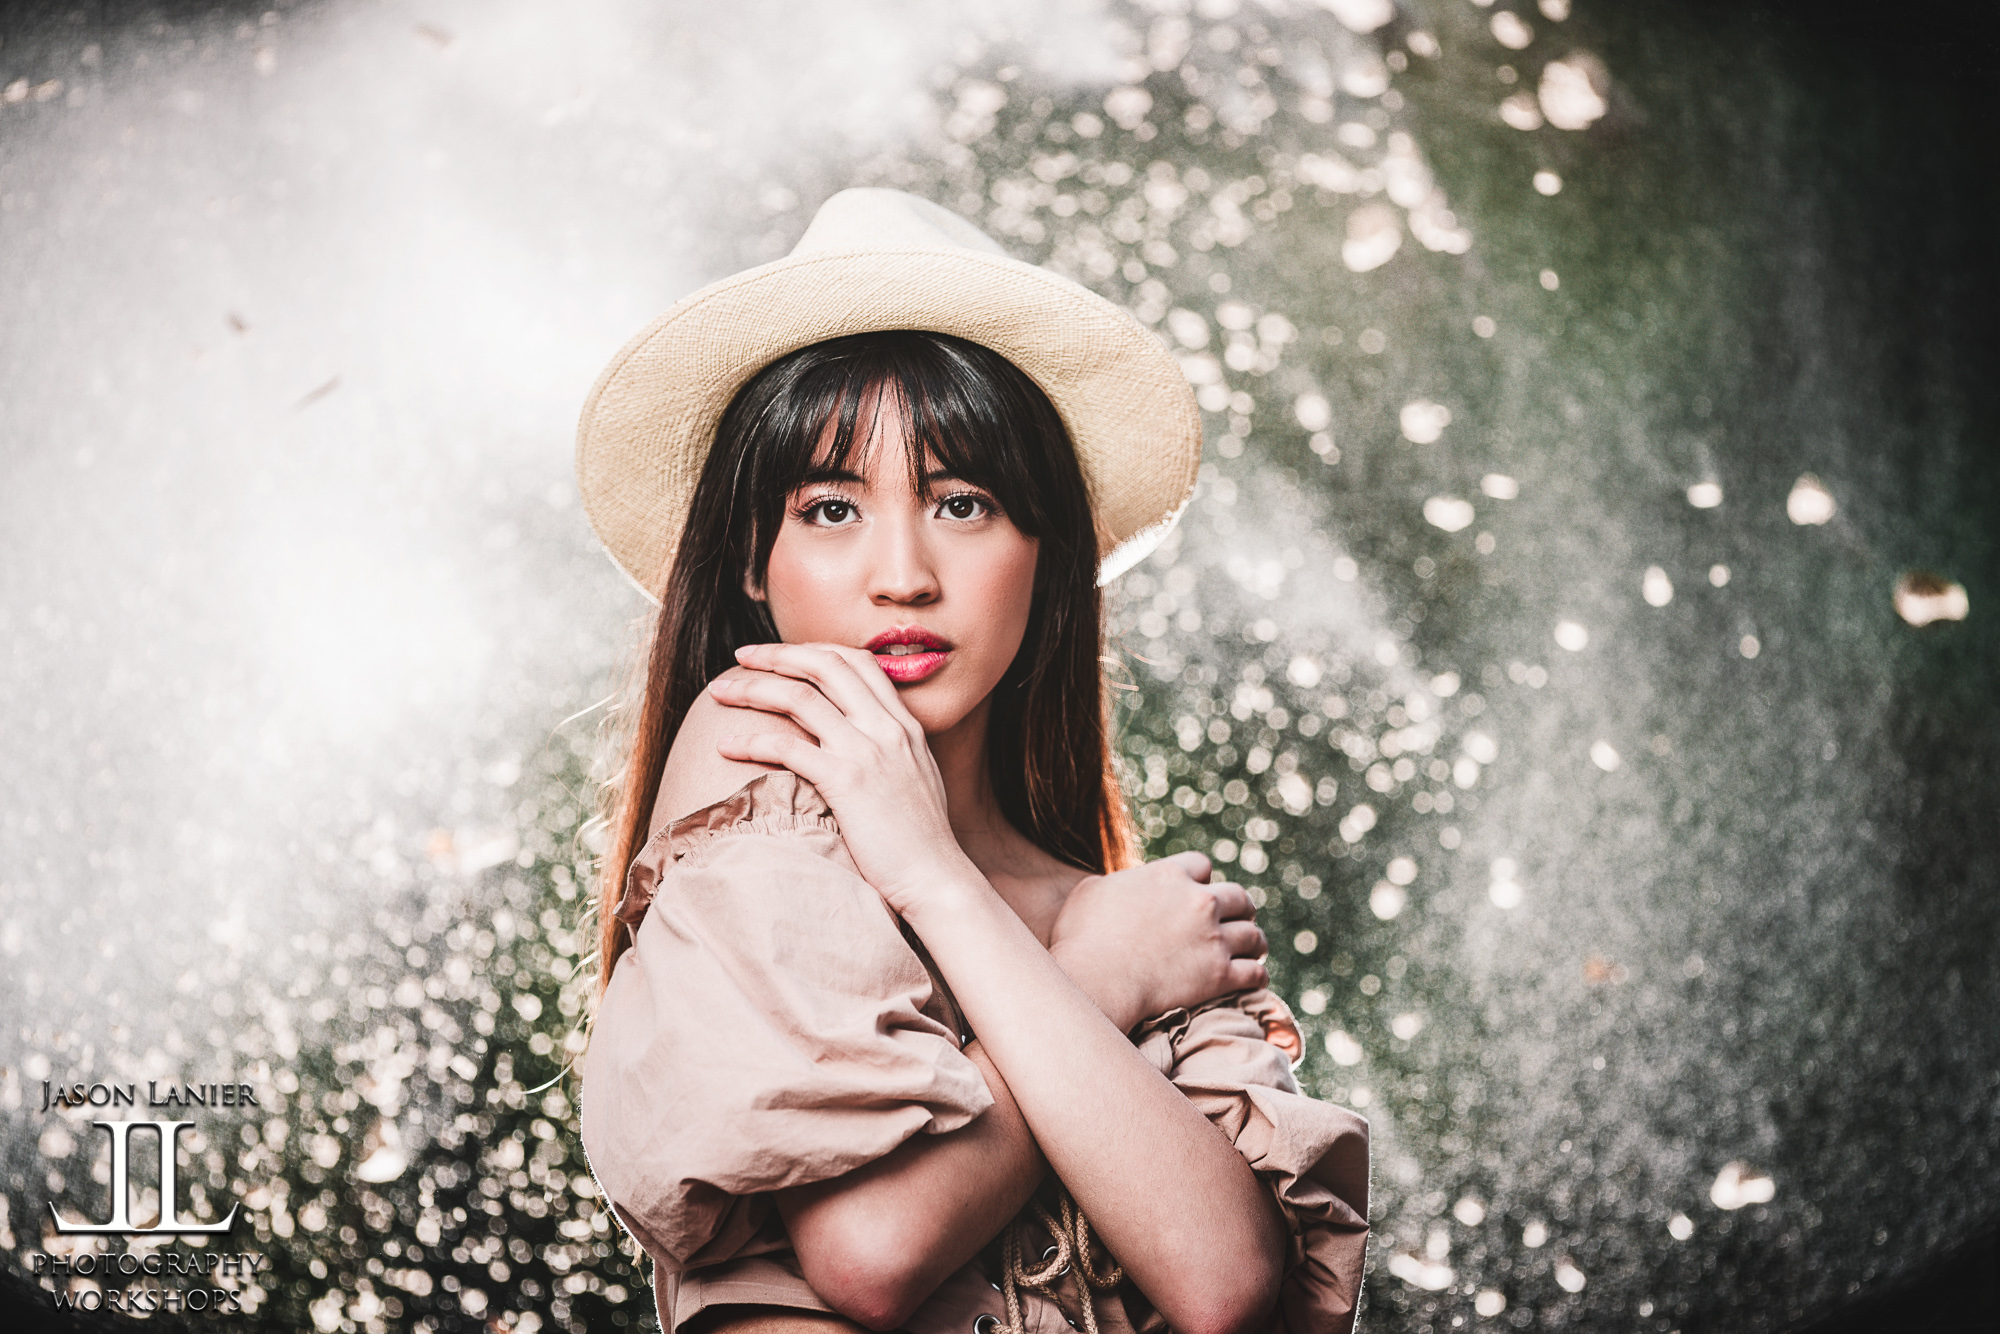
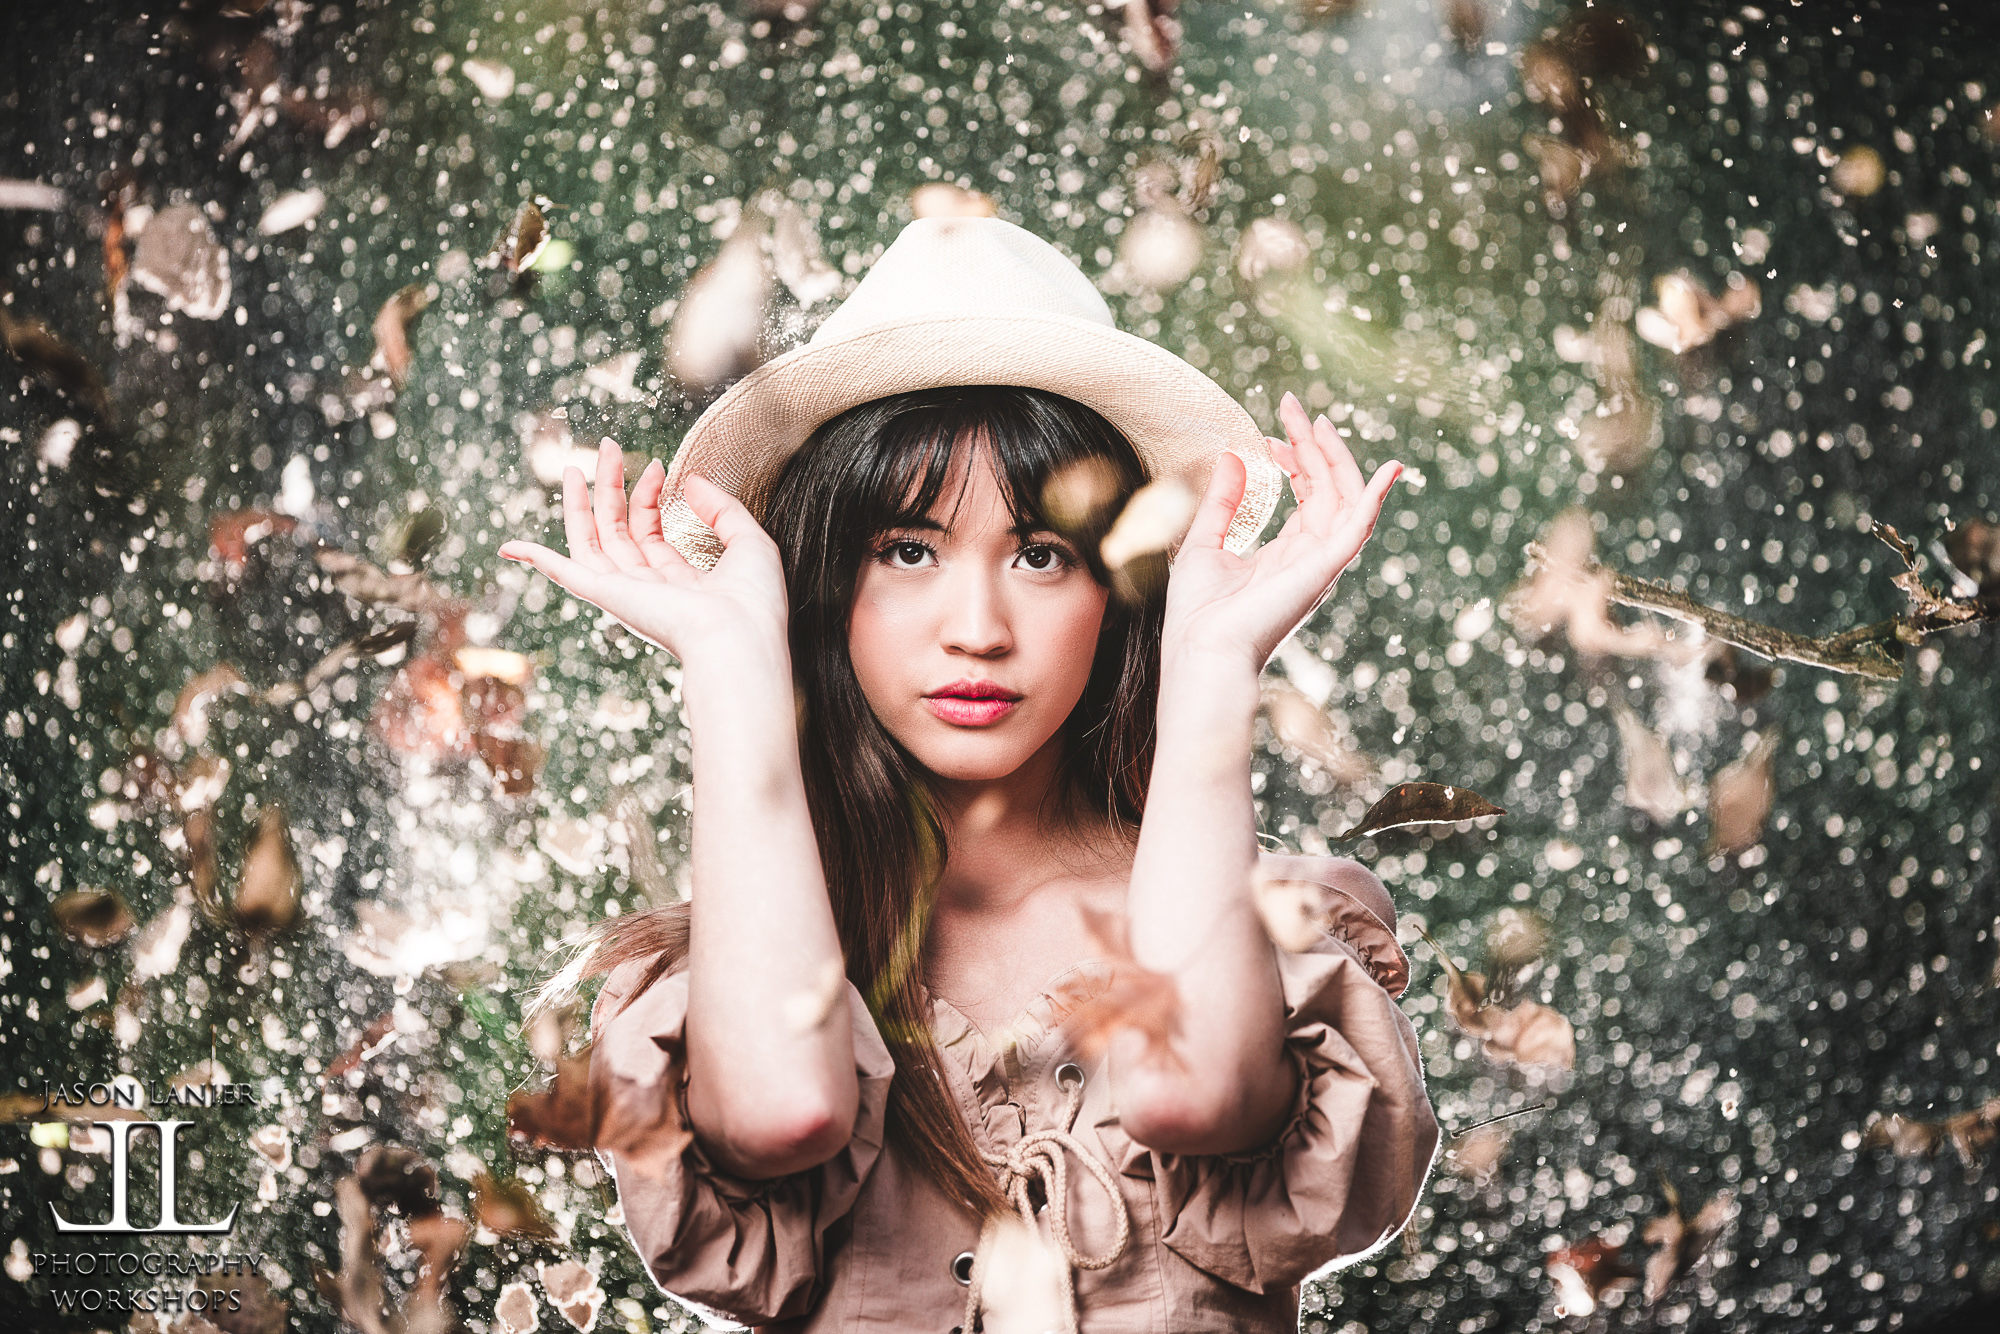
And THEN I decided to add some ambience to the background of the shots by asking the photographers there to throw sand and leaves behind the model (@macanoniii). You’ll also see that I added a rim light to the back of the shot by having a photographer hold the light behind the model to illuminate not just the model, but also all of the particles flying in the air.
Throughout the shoot I used different focusing modes to be able to adequately acquire focus. Did the lens acquire focus as fast and reliably as using the Sony 400mm f/2.8 lens? No. It didn’t.
Is it more than usable in most circumstances if you have the lens and want to use it on a Sony? Yes.
I switched to manual focus and had the lens situated on my model for the last set of shots when a lot of stuff was flying in the air because I didn’t want the lens to hunt for focus and miss the eyes of my subject.
I hope this helps!
If you have any questions about the lens or how it performed make sure to notate it in the comment section below.
Thanks again for being here and if you like what you see, make sure to check out some more of our posts and videos!
If you’d like to join us at a workshop please visit www.jasonlanier.com/register.
We also do a podcast called Jason Lanier Unfiltered that you can find on iTunes, Spotify and more.
Thanks again for stopping by!
Jason
Most experienced photographers know that when you use artificial light you should place it above your subject. That’s because when you do so, you are creating a lighting pattern that casts shadows down on your subject.
But there is a lighting technique called Feathering Light. That technique is utilized by having the edges of your light paint light onto your subject. This is done to minimize the effect of using light with your subject and even more importantly on the canvas of your image.
For example, if you want to do a shoot and don’t want there to be light spill or shadows on the ground coming from the flash, you would feather the light. This technique can also include facing the light up or even placing it on the ground so the light is shooting up.
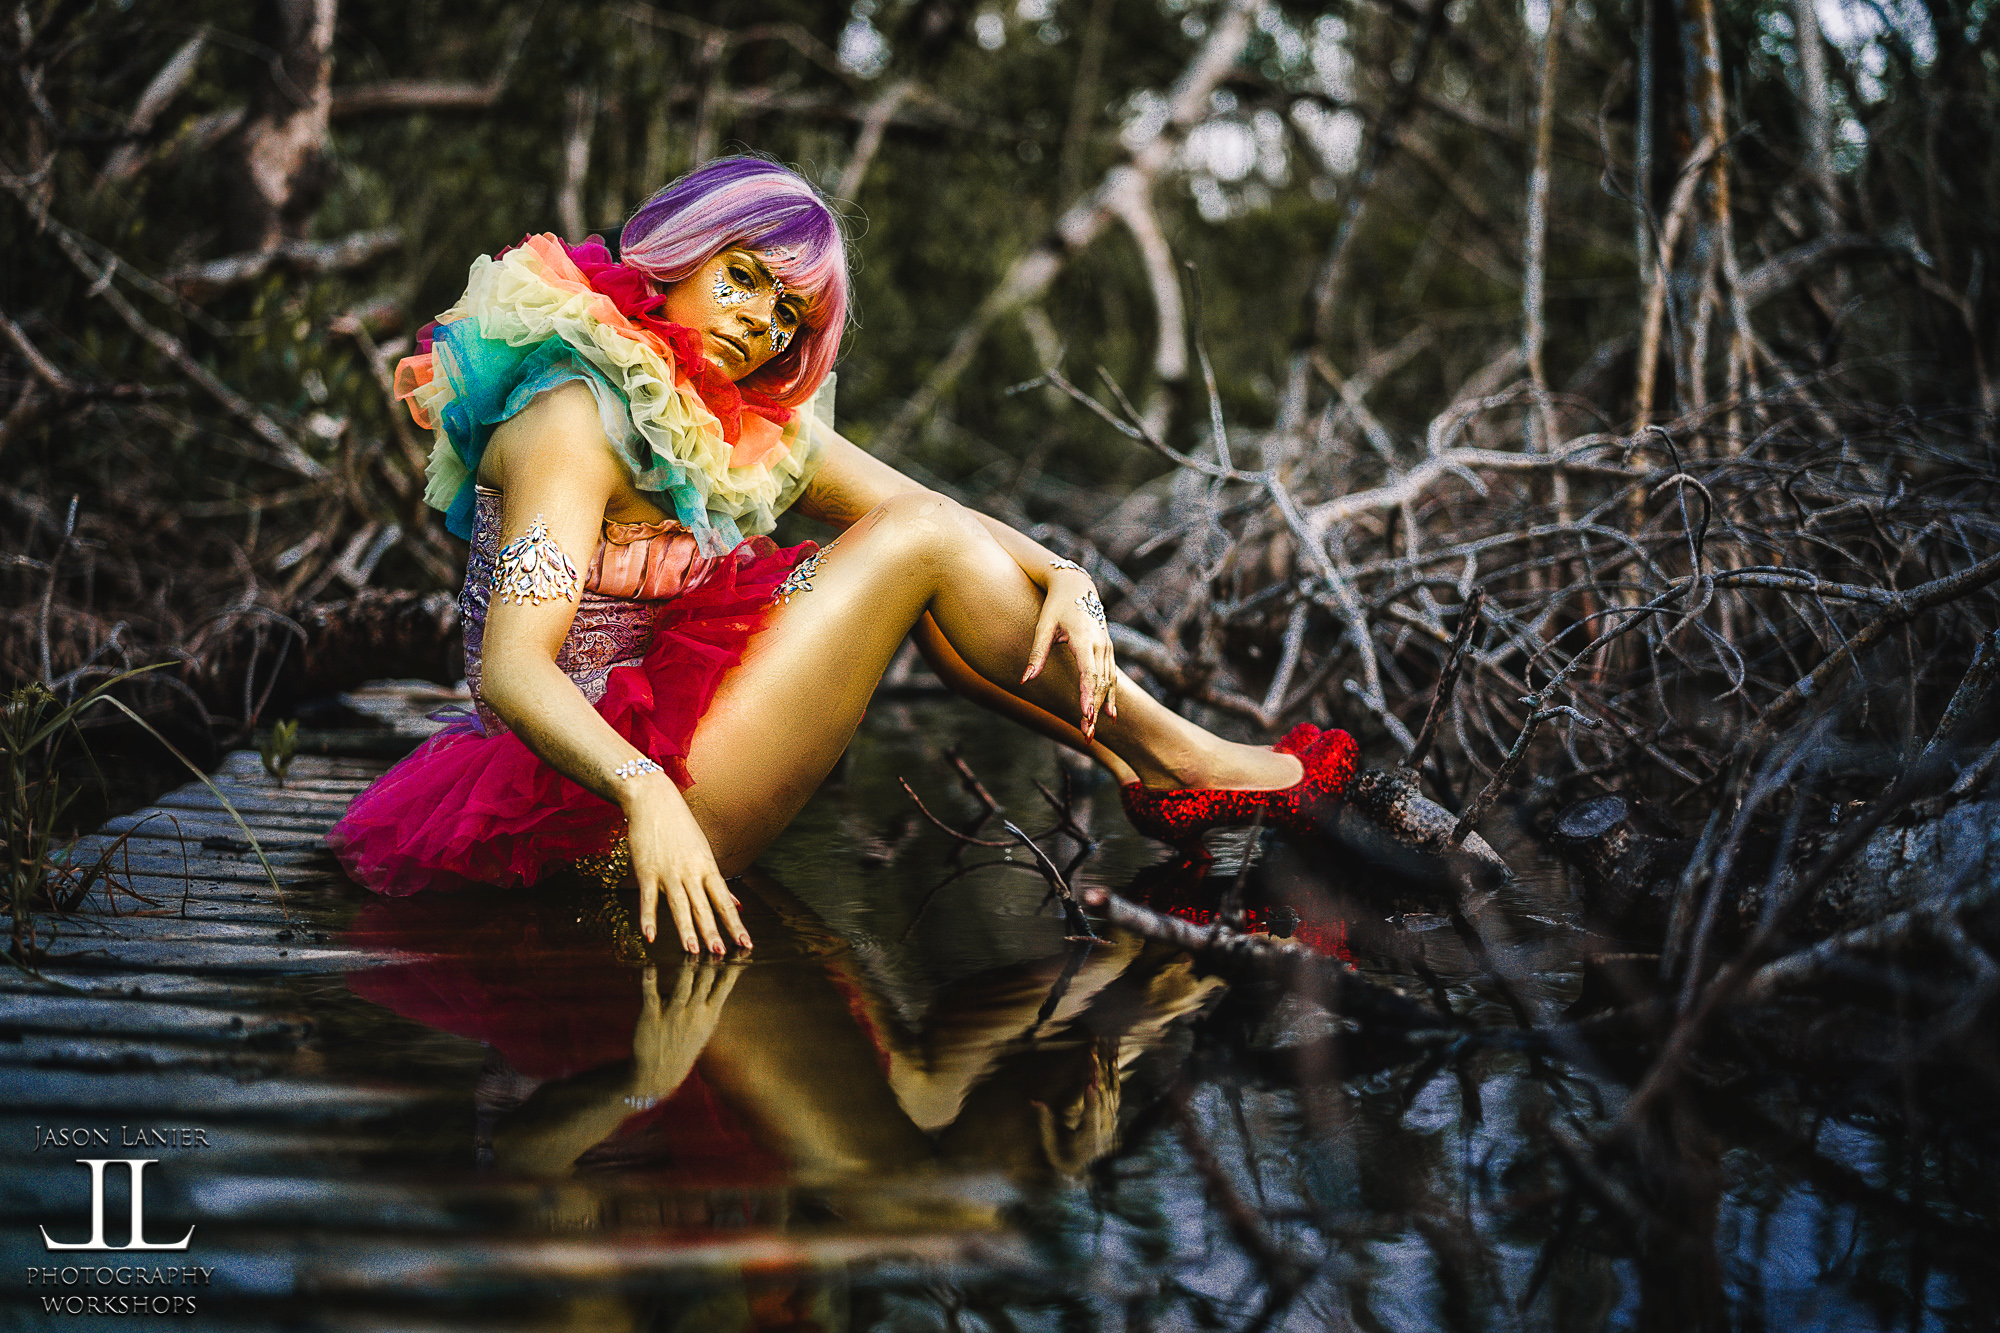
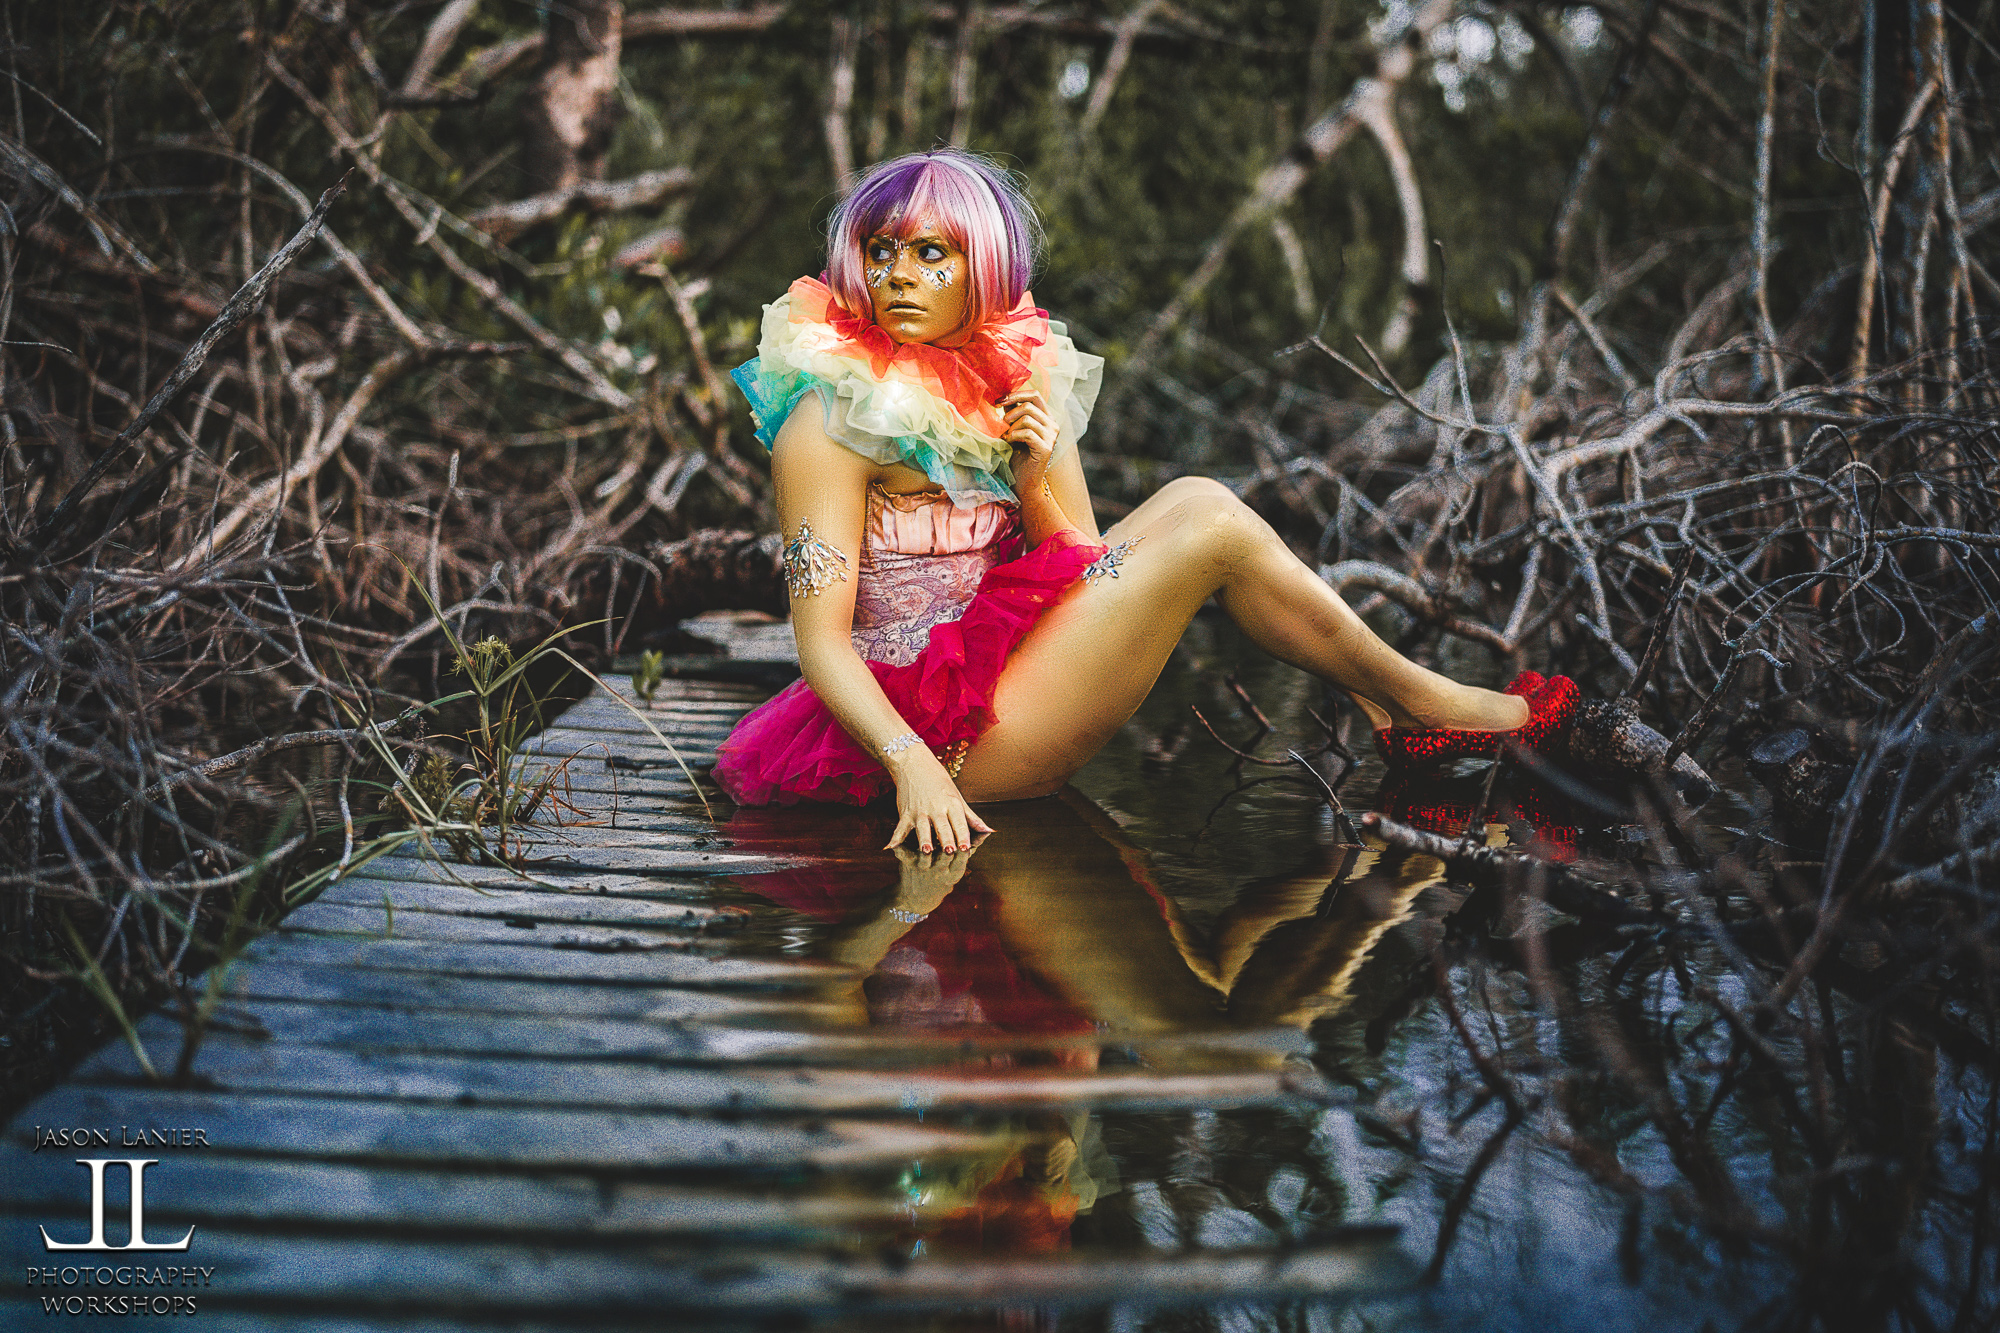
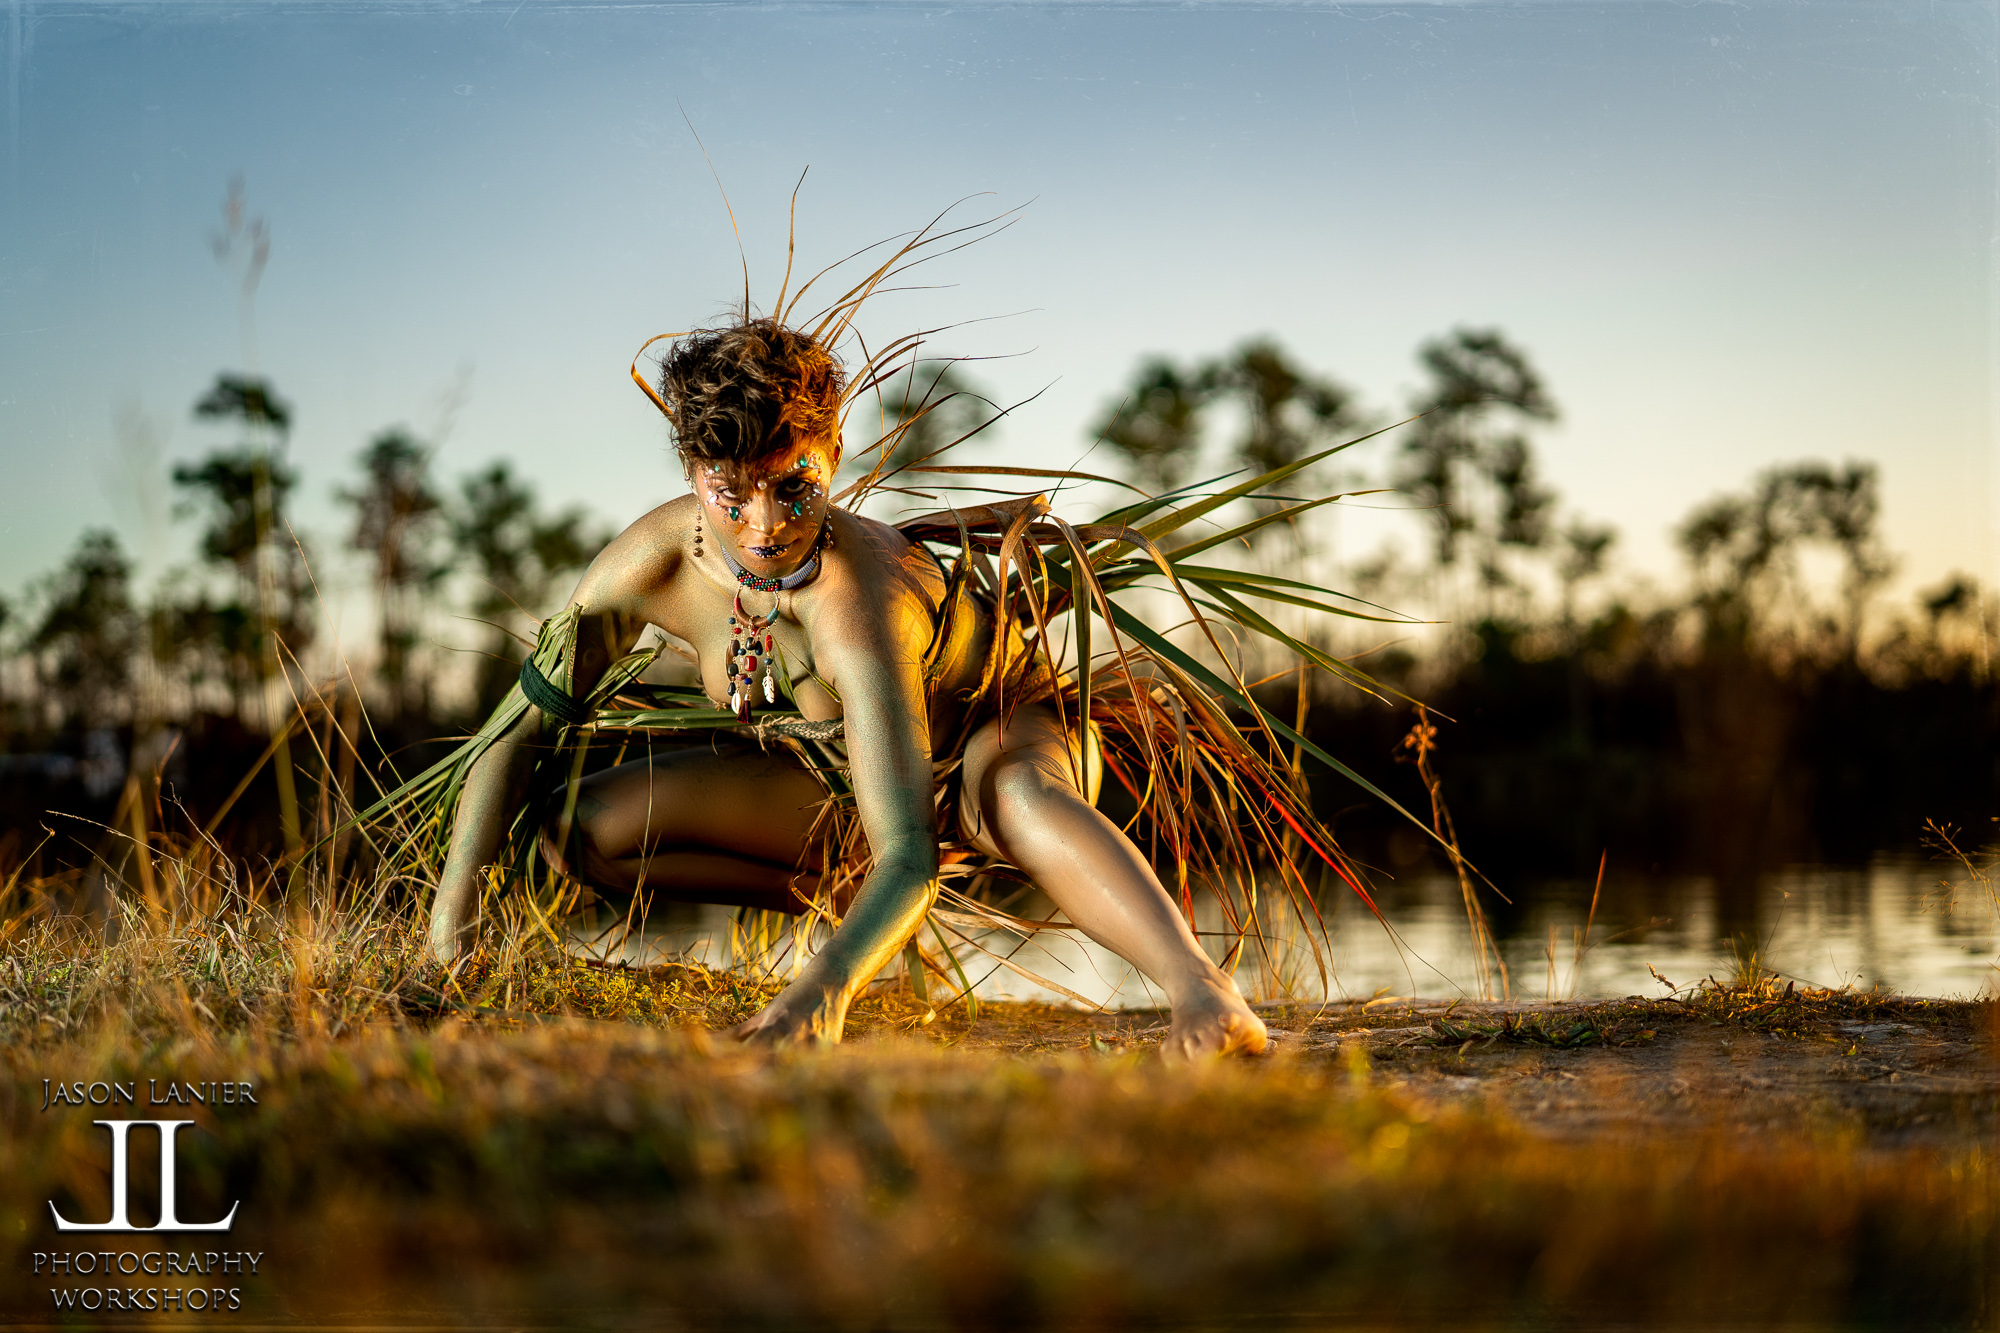
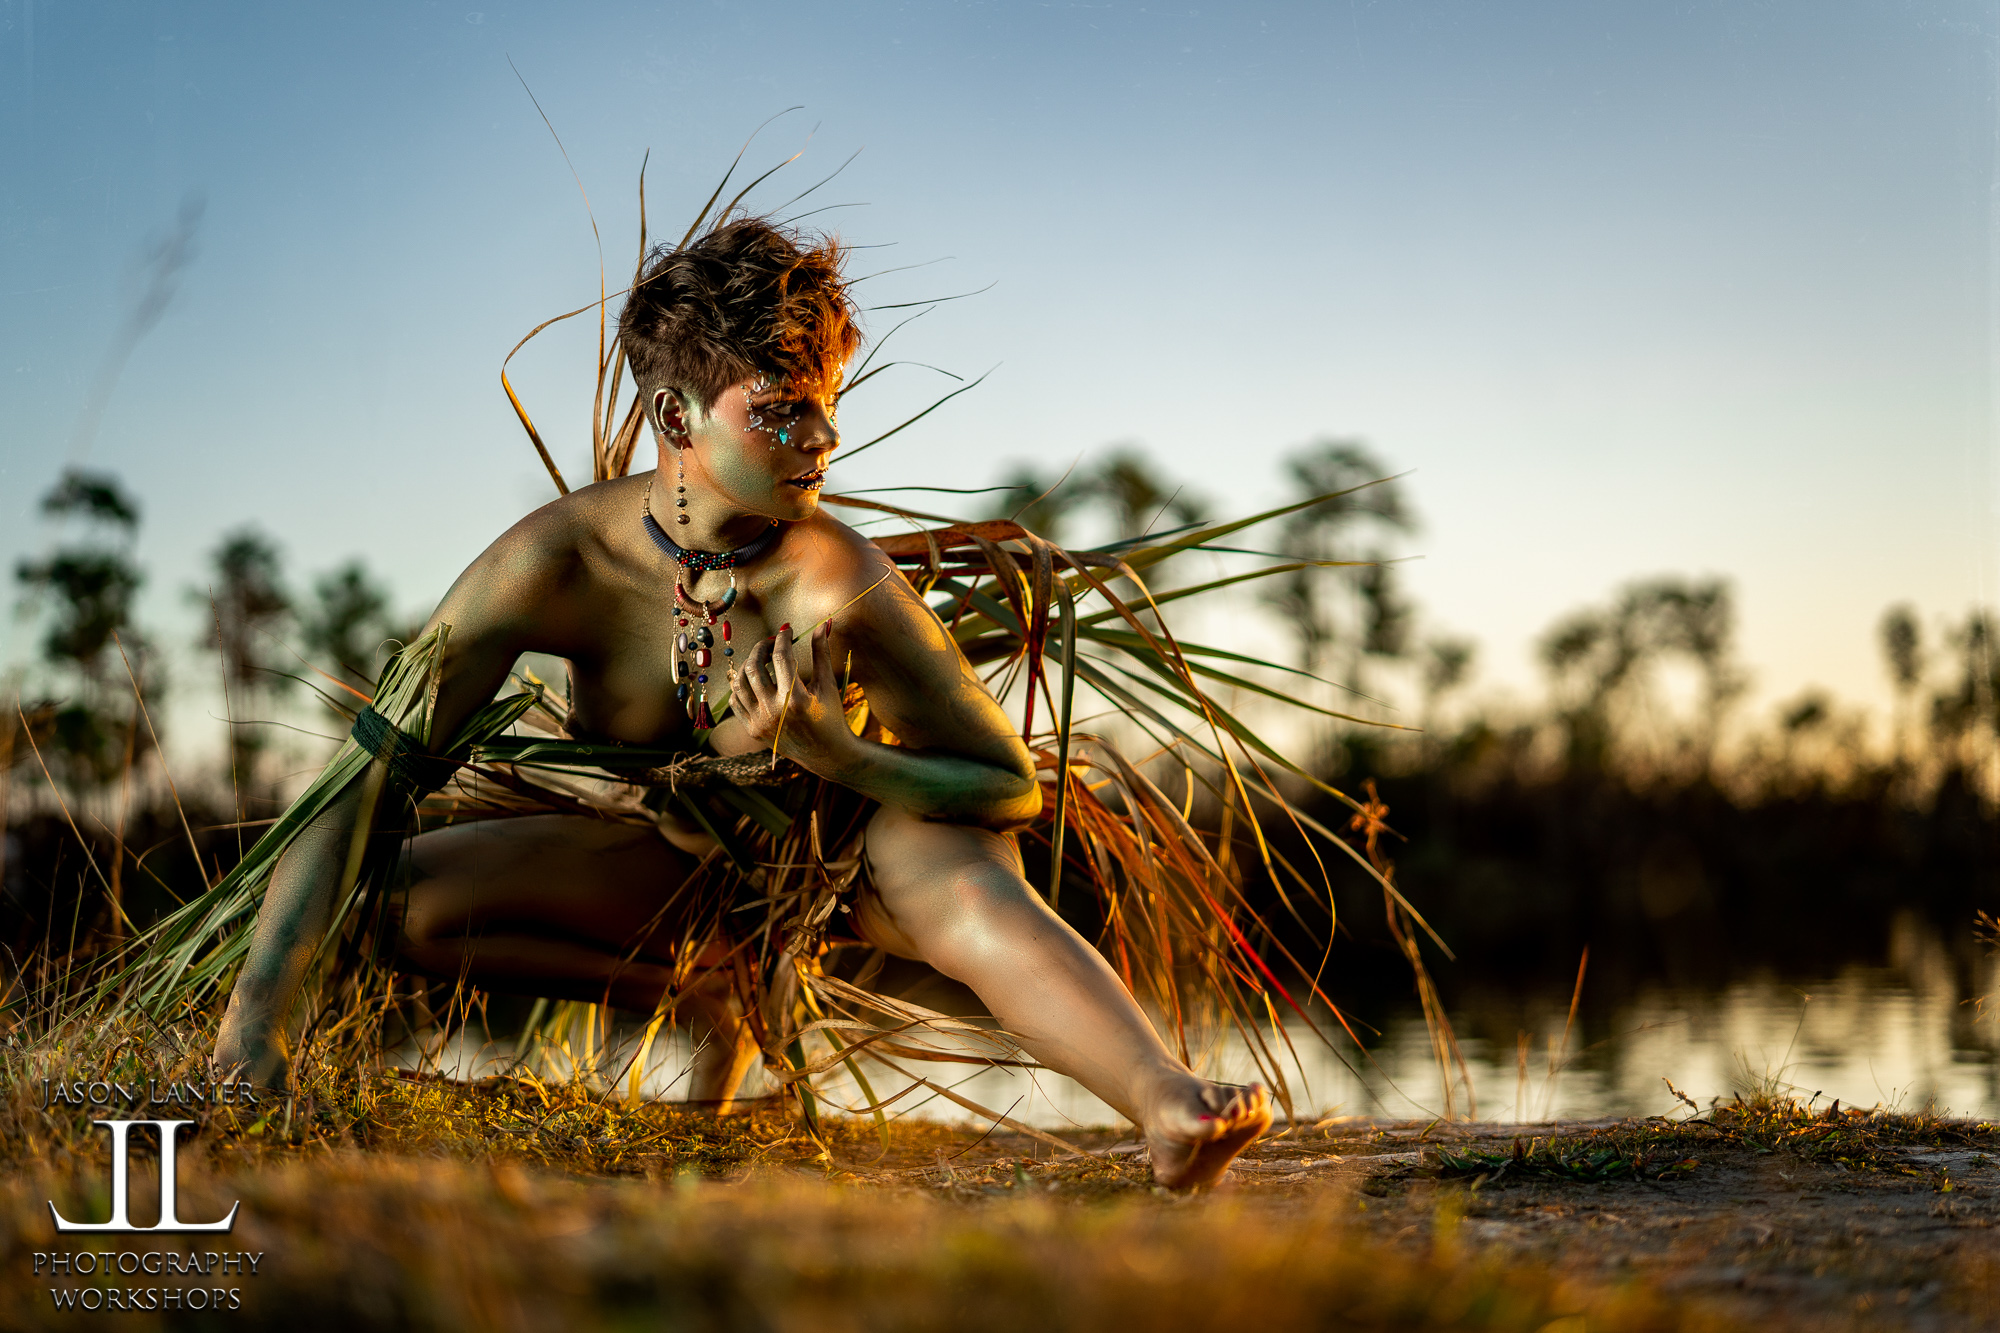
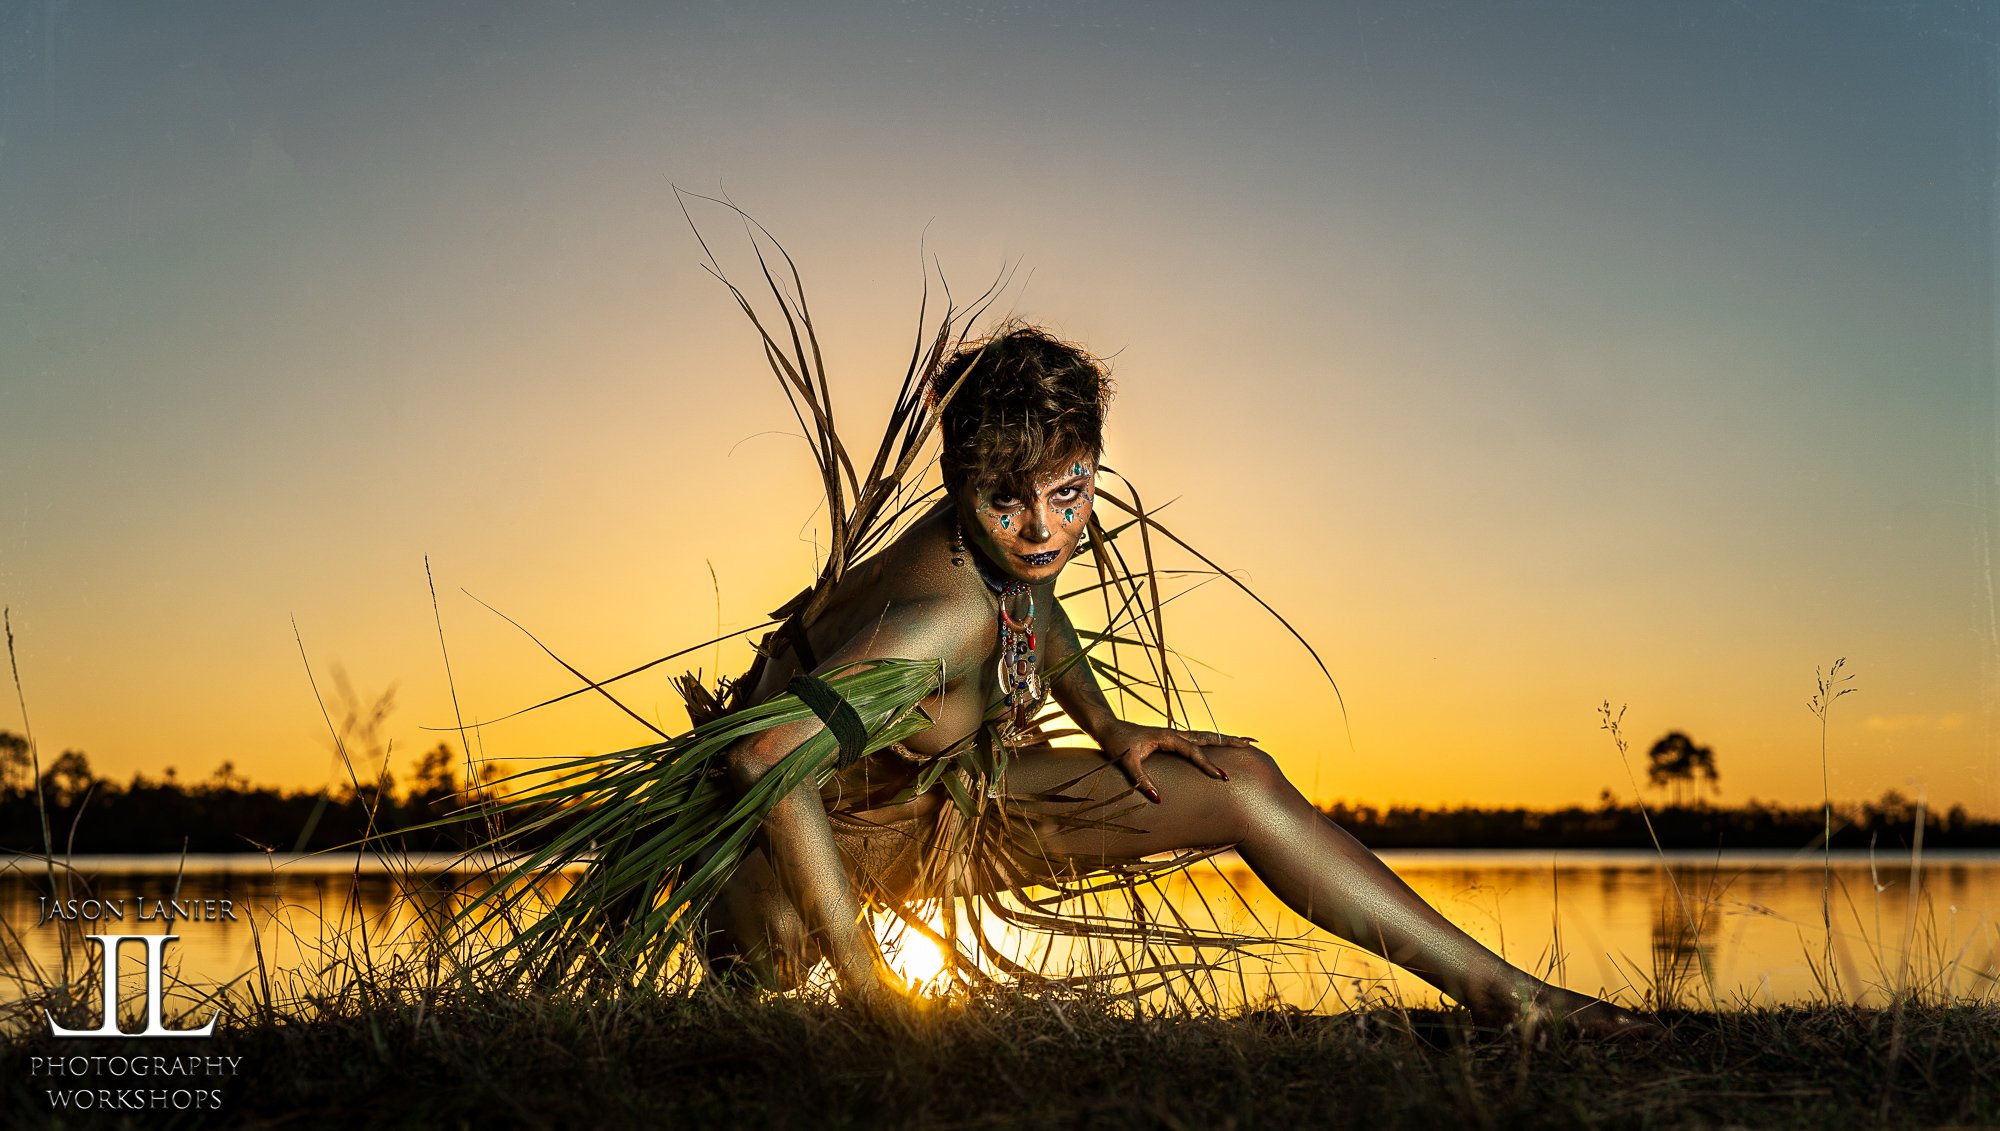
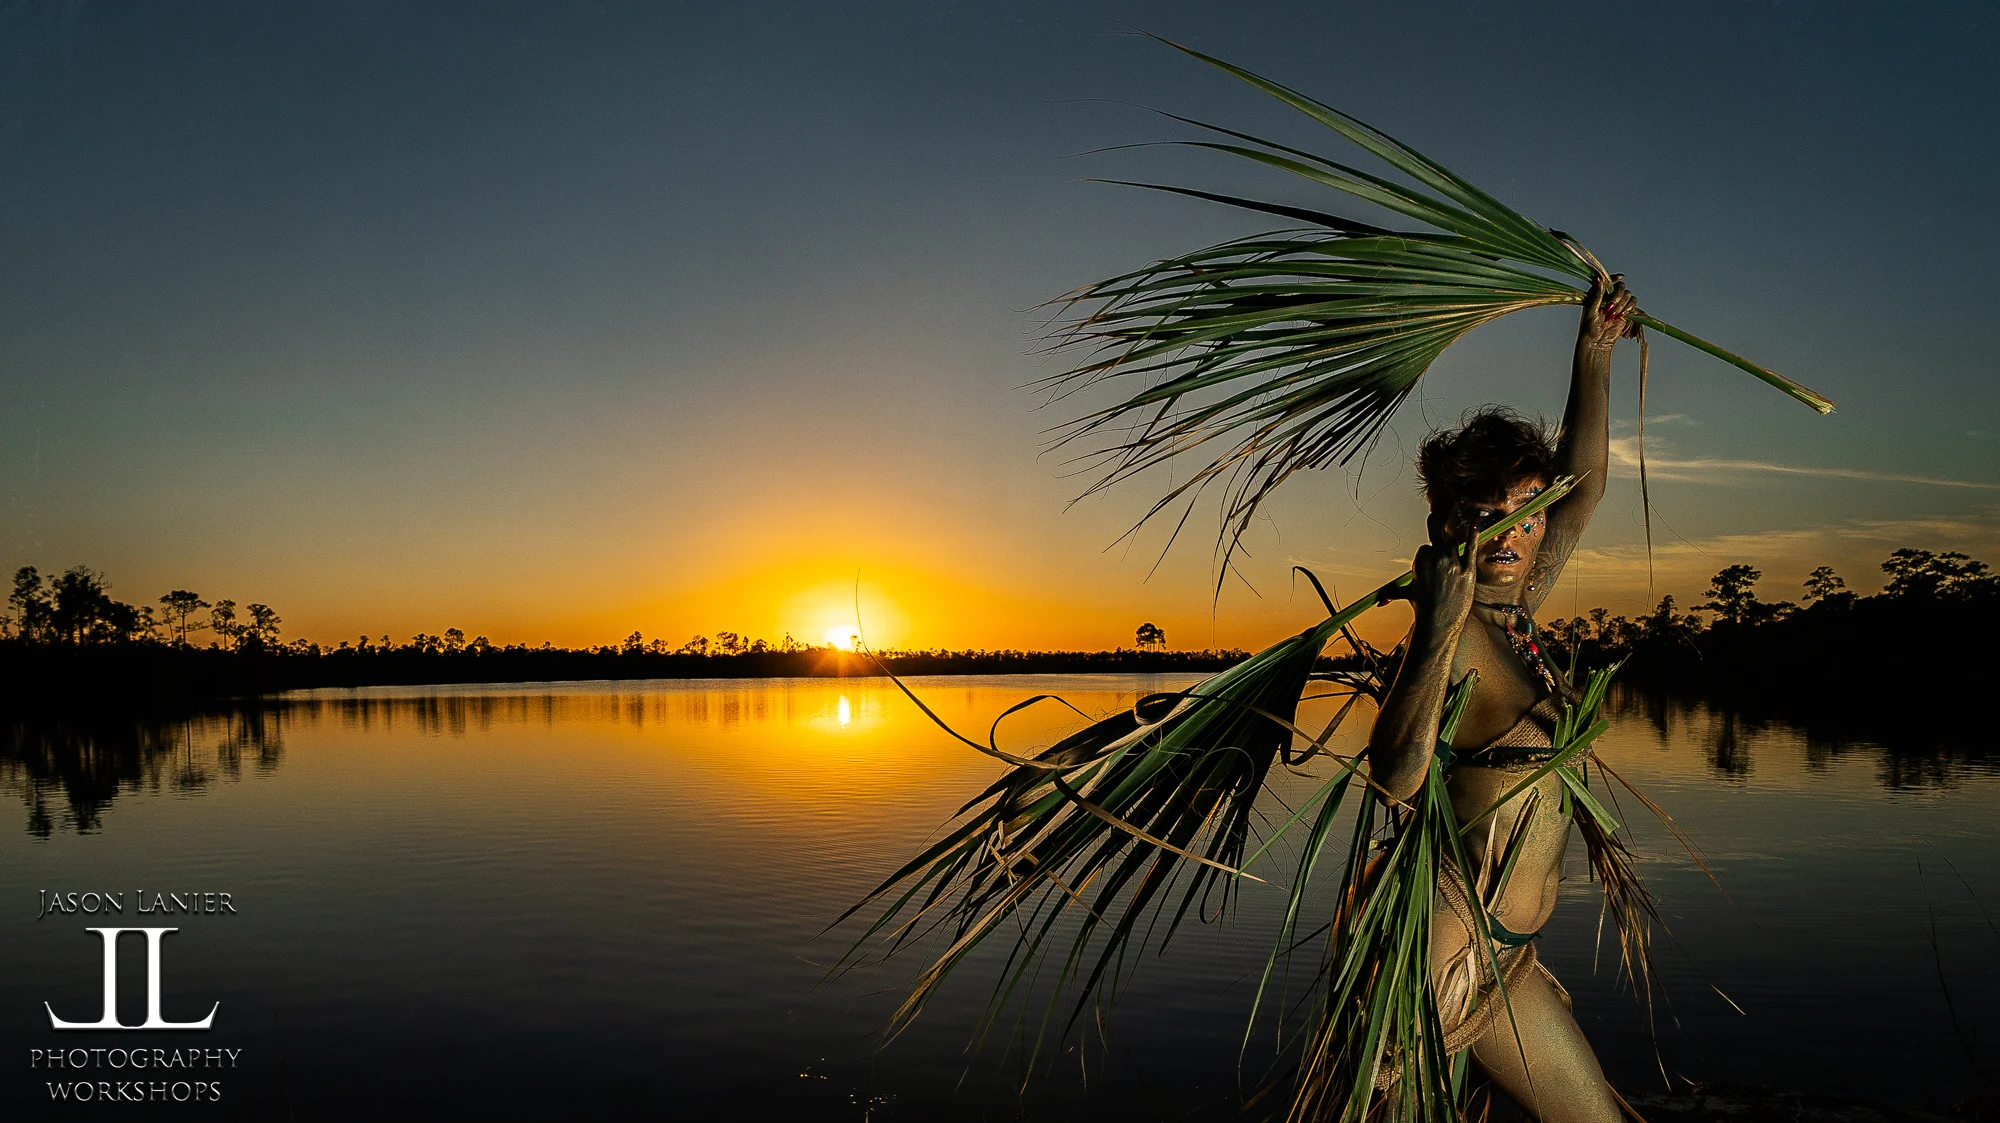
Check out the video above of the shoot that I did in the Everglades which shows exactly what I’m talking about. This was a crazy shoot with my Model Emily who painted herself up and used palm fronds on the ground to create an amazing outfit.
This was done using the Godox AD 600 Pro flash inside of the Westcott Rapid Box XXL modifier with three layers of diffusion; the deflector plate, the inner baffle and outer sock.
As you’ll see in the video I use the edges of the light modifier to cast light onto Emily vs. what I’d normally do which is use the center of the light source. Below are the resulting images from the shoot. I’m breaking them into categories based upon the lens used.
Shots using the Sony Zeiss 50mm:
Shots using the Sony G 12-24mm lens:
Shots using the Sony Zeiss 35mm:
I really hope this helps some of you out there to explore some alternative ways of lighting. The pros to lighting like this include creating some dynamic shots in a way that allows your ground area to remain dark. The cons are that you have to be careful of where and how your shadows fall on your subject.
Immediately following this shoot we did a live video blog/podcast. To check that out click below:
Thanks for visiting my blog. I really appreciate your support and thank you in advance for your comments and for sharing the content with someone you think can benefit from it. To learn more with us online please visit www.patreon.com/jasonlanierphotography.
To learn with us in person please visit www.jasonlanier.com/register.
We’ll see you soon!
Thanks,
Jason
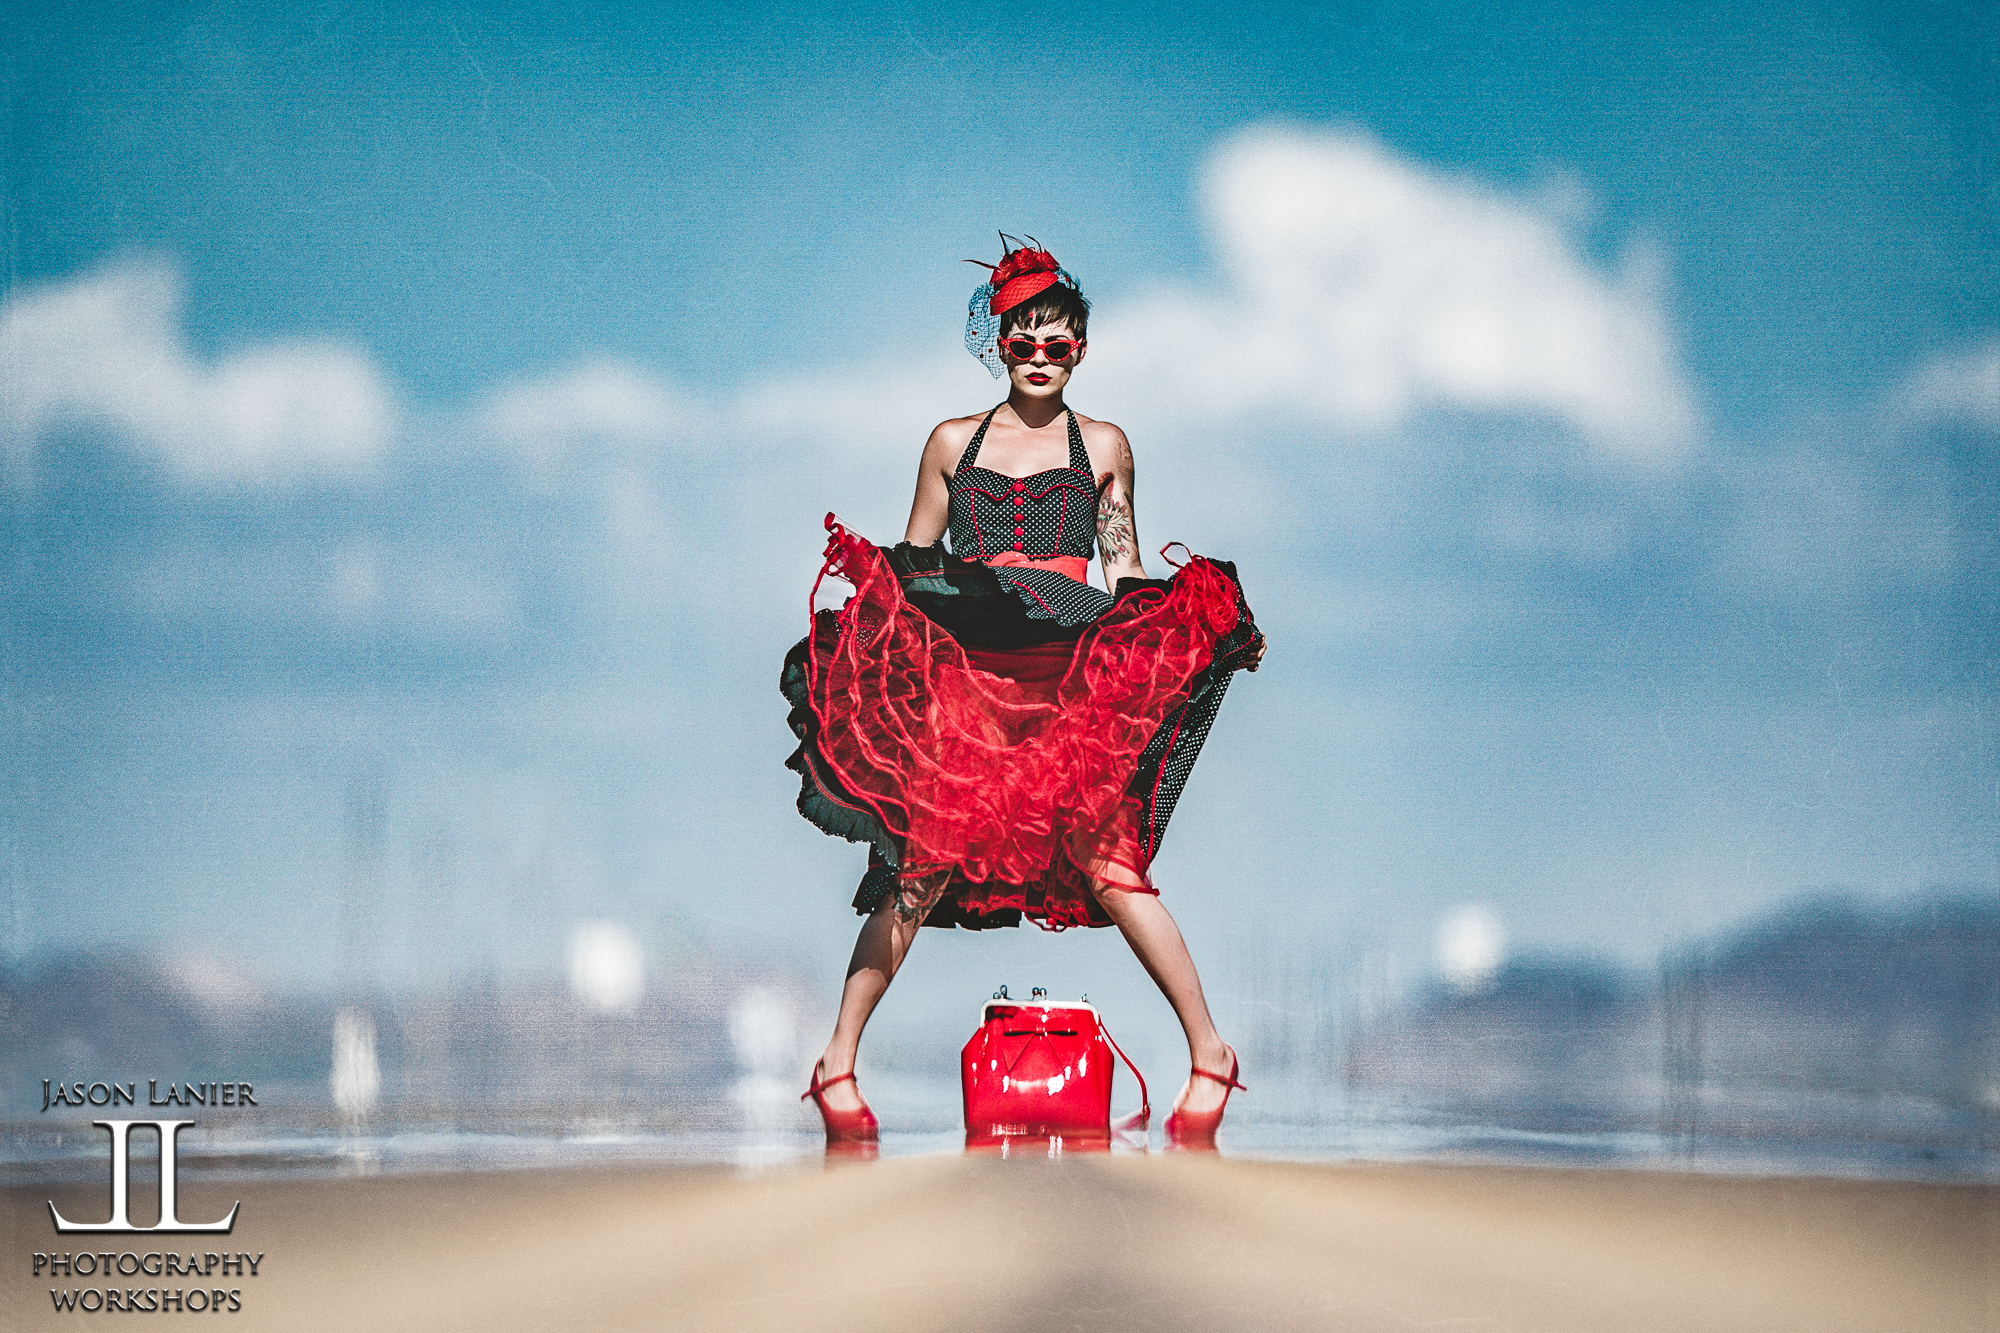
I’m writing this blog in the early parts of December 2018. But once upon a time back in August of 2018, it was still VERY HOT. My Assistant Emily and I found ourselves in the middle of NOWHERE on the side of the road in Arizona. The temperature gauge inside of the car was telling us it was 115 degrees and boiling hot…but I digress.
Sony was gracious enough to lend me the 400mm f/2.8 lens for a few days for me to go out and test this thing. I already own the Canon 400mm f/2.8 so being able to play with this lens was a treat.
Questions abounded:
*If I already own a 400mm f/2.8, do I REALLY need to spend the amount of money as I would on a good used car to buy this lens?
*Is it really THAT much better than my Canon lens? I mean, this thing ain’t cheap.
So while driving down the road heading back to a cooler California, we saw this abandoned gas station and of course we HAD to go and shoot at it.
The first challenge was COMMUNICATION. I mean let’s face it, the 400mm wasn’t necessarily meant for doing portraits. BUT, I wanted a challenge rather than do the typical thing that most people do with this lens.
**Performance- From a performance perspective this lens hit all of the checkboxes. It focuses very sharp and very fast, has all the bells and whistles that you’d want on a premium lens and it is LIGHT! We weighed this thing and it was pretty much HALF of the weight of my Canon 400mm f/2.8. Why does that matter? Well, it actually makes the Sony 400mm f/2.8 the first lens in that range that can actually be used for handheld purposes. Why would you want to do that? Simple. It would be for the ability to be able to quickly change and shoot in areas like safari wildlife and sports. Having done both professionally in the NFL and in South Africa, I can attest to the fact that wielding a heavy lens and having to maneuver a monopod or tripod can mean missing some crucial shots.
Below are the images taken with the lens using the Sony A7Riii. The first three shots are with flash. The rest are without. If you’d like to see and know why check out the video above where the light takes a big FALL.
**VALUE- let’s not beat around the bush. This lens is EXPENSIVE. While it’s in the same stratosphere as it’s Nikon and Canon equivalents…all of these lenses are for the super pro who has a very particular need. So for pro wildlife and sports photographers who make their money shooting with the very best lenses this is a must have. For the average person out there the Sony 100-400 G Master is a great lens that is more versatile. The shots aren’t as special as they are coming out of the 400mm f/2.8, but they are very nice and the lens is about 25% the cost of the 400mm f/2.8. The other advantage of the 100-400mm is it is much more versatile for wider images which I did find very useful when I used it on safari in Kruger National Park in South Africa in July of this year.
A BIG thank you to Emily for braving the insane heat and giving me yet another epic performance. She is the BEST in every sense of the word. To follow her please visit www.instagram.com/em.explores today.
Please take a moment to let us know what you think by dropping a comment down below. Don’t forget to click on SUBSCRIBE AND NOTIFICATIONS so you’re updated every time we release a new video on Youtube. You can find our channel now by visiting www.youtube.com/jasonlanierpros. Please let me know what questions you have. If you have the money, this lens is phenomenal.
Thanks!
Jason
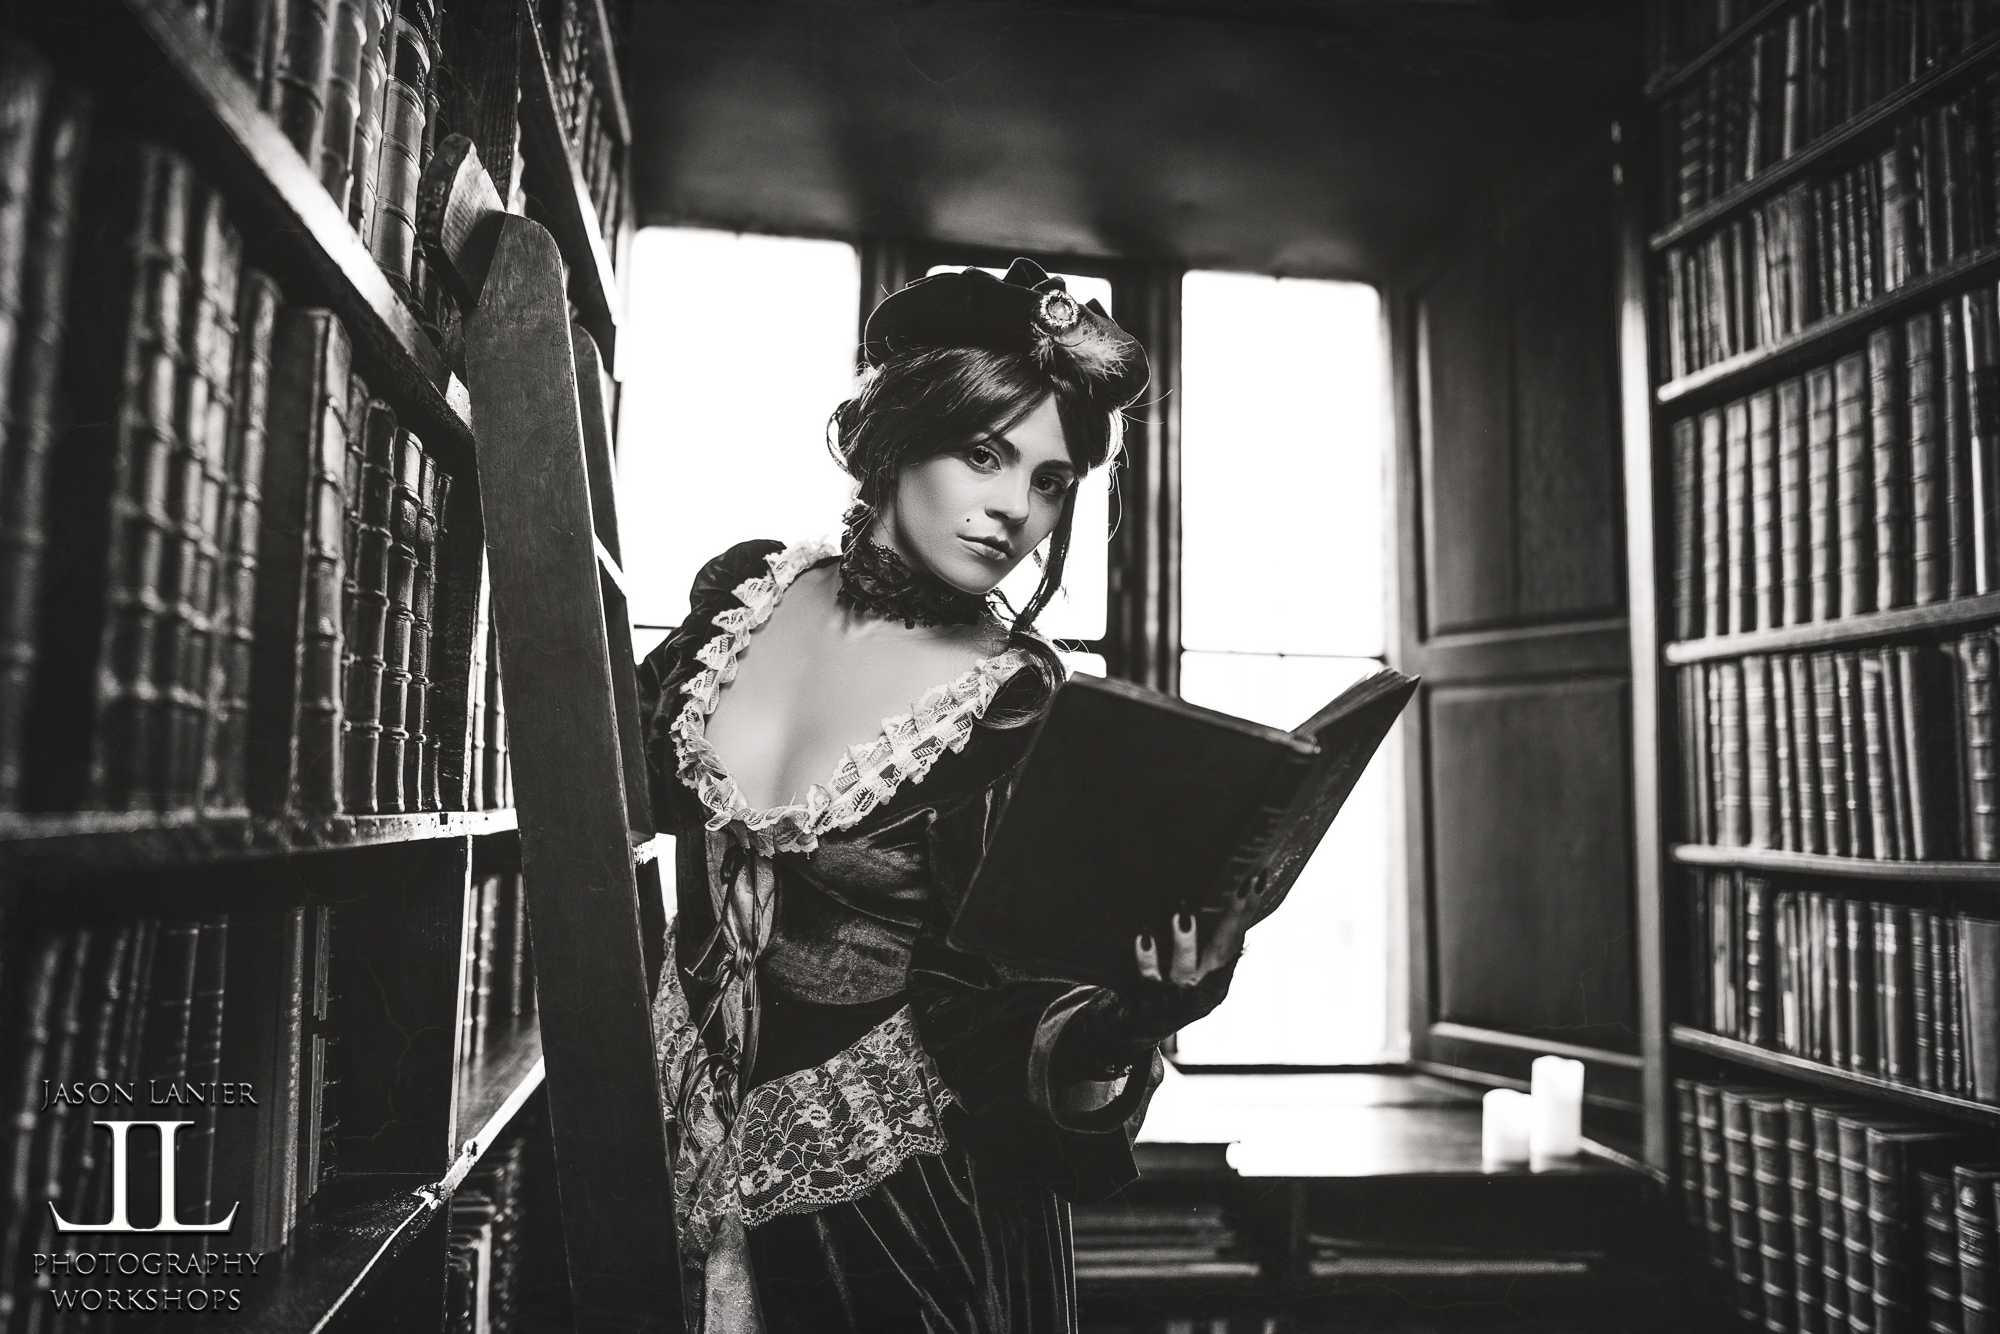
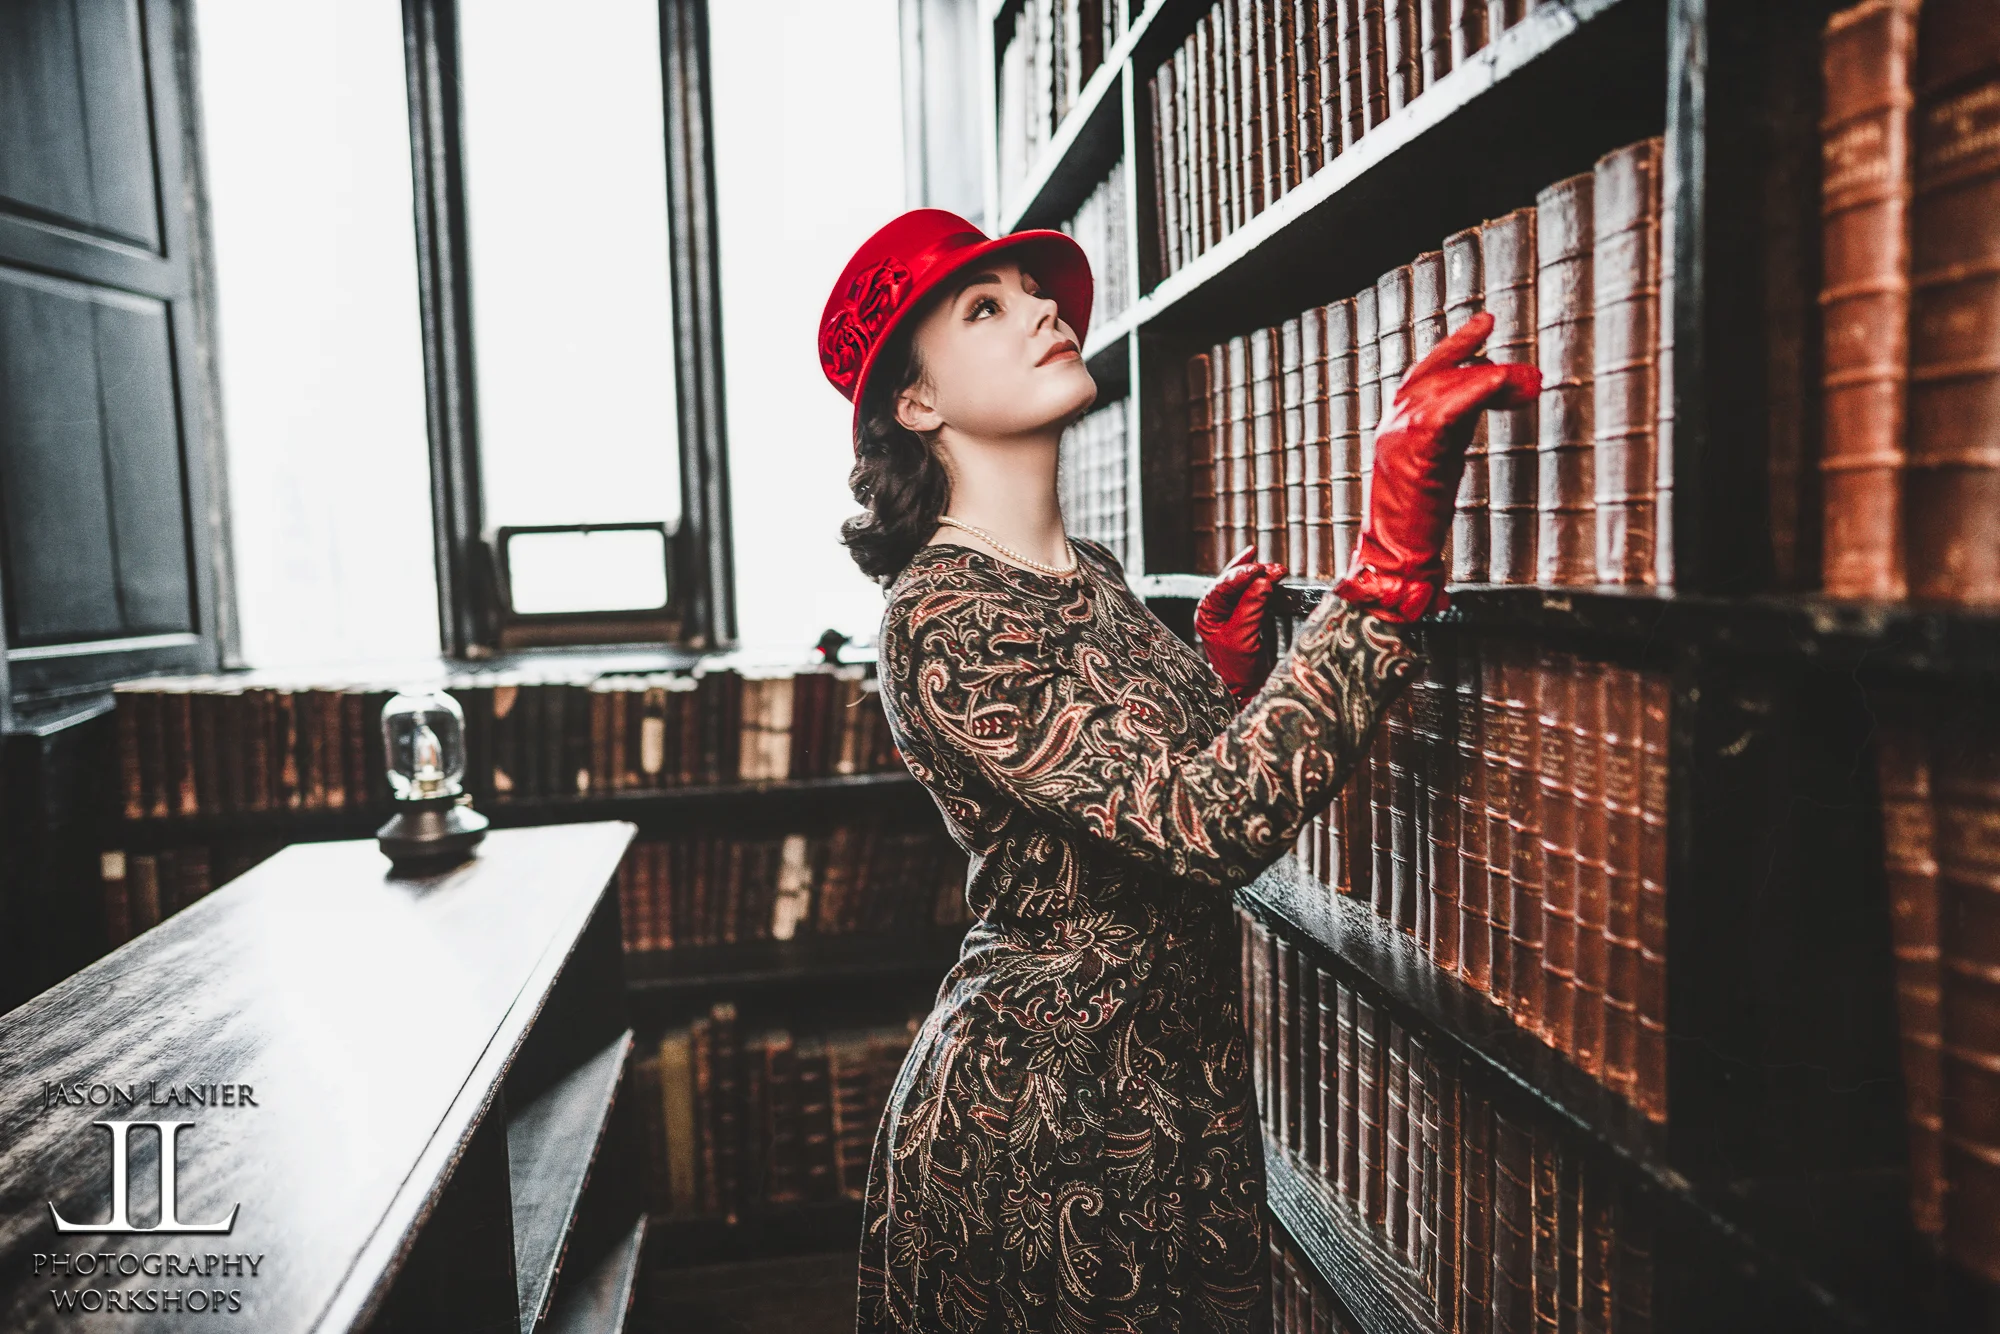
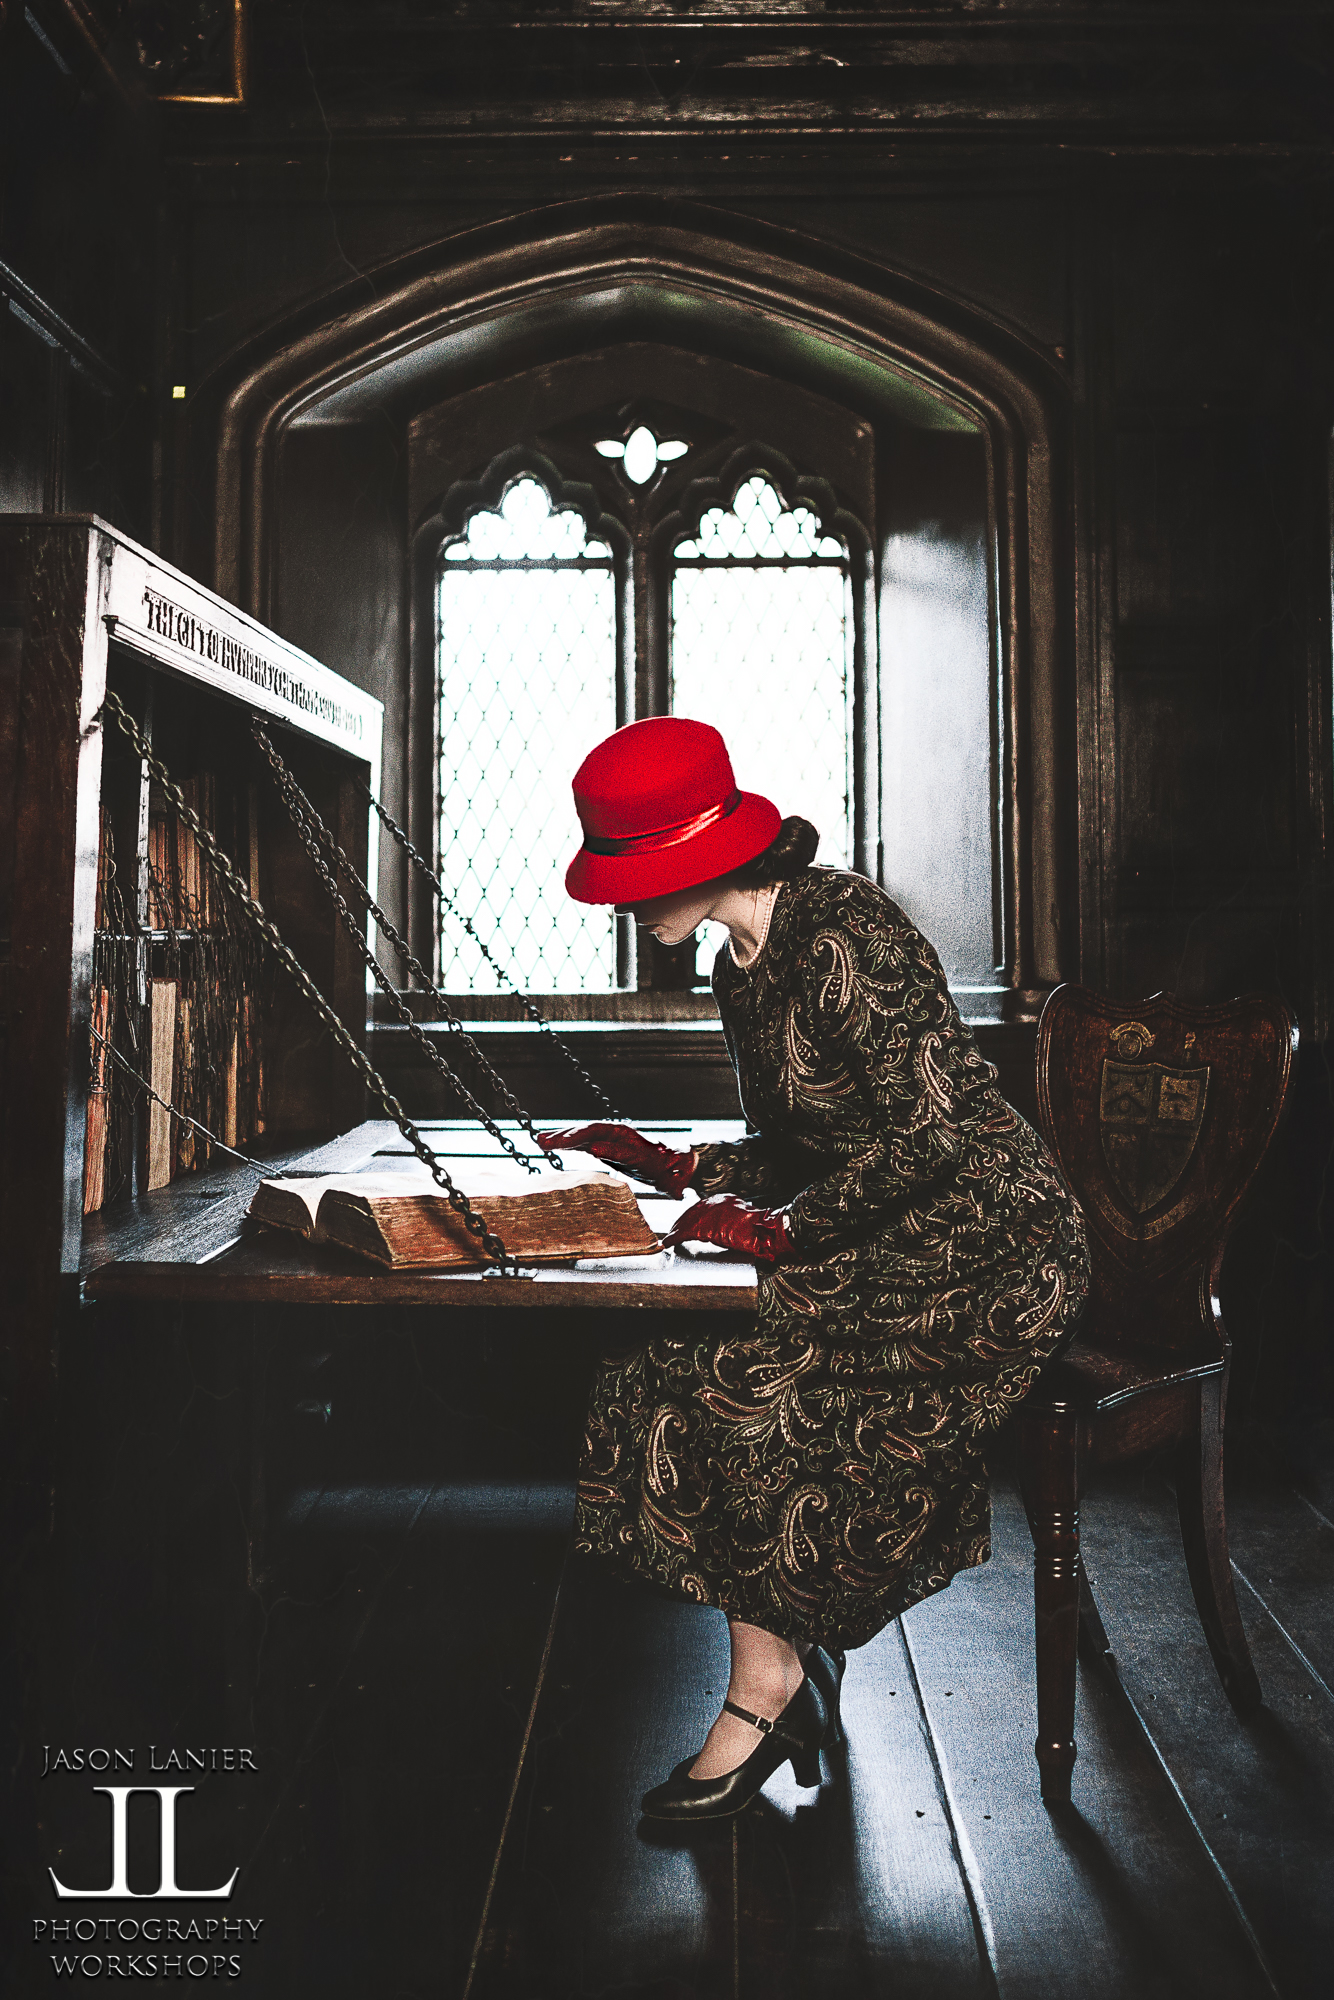
Early November 2018 I found myself in Manchester, England doing a workshop for Sony, Rotolight and Jessops Camera at the historic Chethams Library. Sony offered me the opportunity to use one of their 24mm G Master lenses to do some shooting fun with the newest G Master to the Sony family.
How could I say no? To watch the video from this shoot please click below:
This was an interesting lens for me. I’m not gonna lie, I originally had no intention on testing it out. Why? Well, it was simple. I have a TON of lenses. I mean I think I’ve blown my kids inheritance on lenses over the past number of years as I’ve purchased nearly ALL of the Sony E mount and FE mount lenses.
On top of that I already own a Sigma 20mm f/1.4 Art lens, so I just didn’t find myself in a position where I felt I needed another lens. But since I was already there, at the event, and since Sony was offering….I put it on my Sony A7Riii and decided to put it through it’s paces.
Initial thoughts when first handling it:
*Very light! I couldn’t believe how lightweight the lens is. I don’t know what Sony is doing with their glass but they are really breaking some new ground in delivering high quality, LOW weight lenses. This lens is right up the alley of the 400mm which is very light and high quality. This lens is HALF the weight of it’s bigger brother, the 85mm G Master.
*Feels solid- the lens like all the other G Masters the lens feels very solid and has all the stuff you want with a top of the line lens incuding an aperture ring, focus lock buttons, the ability to turn the focus on and off on the lens etc.
Thoughts when shooting with the lens:
*Very fast focus
*Makes no sound when using autofocus which could be good for video purposes for those who elect to use AF for their video work.
*Very sharp- I was impressed with the accuracy of the focus system, especially when shooting wide open at f/1.4 which as many people know, I shoot all the time.
Below are the images taken at the shoot:
PROS:
*Performance- Works just as you’d expect a top of the line lens to perform.
*Lightweight- the lightest of all the G Masters.
*Affordable…kinda- it’s the most affordable lens of the G Master family. But not many people would consider $1,398 cheap lol.
*Portable- due to it’s size and weight it’s a better choice for a travel lens than the Sony Zeiss 35mm f/1.4.
*Versatile- this is the kind of lens that can do A LOT. I could see myself using this as a wedding photographer for wide angle portraits, reception shots, ceremony shots etc. I mean being able to crank down to f/1.4 for low light ceremonies and receptions could be a lifesaver over the 16-35mm G Master at f/2.8 for example. I could also see myself using this lens a lot for videography purposes.
CONS:
*Other Options- to be fair there are other options out there, most notably the Sigma Art 24mm f/1.4. I personally own two Sigma Art lenses, the 105mm and the 20mm, both f/1.4 lenses. While they aren’t QUITE the level of the G Masters, they are pretty damn awesome, especially for the price. As a comparison the Sigma is $849 which is 40% cheaper than the Sony, so if you don’t have all the bucks for the G Master, the Sigma might look pretty enticing. It should be noted the Sigma doesn’t have the aperture ring which is very useful for videography work. But you’ll have to determine if that matters for you or not.
Summary:
If you have the money and want a versatile lens I think this is a great choice. Let’s face it, I think all the G Masters could be summed up similarly. Some may not be versatile, but all of them are amazing if you have the money. I personally own all of the G Masters except for the 400mm…but I have shot with that one extensively as well. If you have the money and don’t want to compromise performance the G Masters are a safe bet. But if you aren’t fortunate enough to be able to afford all of them, it is good to know that other options are popping up in the marketplace like the Sigma Art series and also some new offerings by Tamron.
**Links to Gear in the video and shoot:
*Sony A7Riii-
*Sony 24mm G Master-
*Rotolight Neo 2- www.rotolight.com, promo code: jasonlanier10
*Rotolight Aeos- www.rotolight.com, promo code: jasonlanier10
*Westcott Halo- https://www.fjwestcott.com/45-round-halo?acc=1c383cd30b7c298ab50293adfecb7b18
I want to thank you for joining me on my blog for this review. Please drop a comment below and let me know what you think about the lens and if this review was helpful to you. Also let me know what gear you’d like me to review in future episodes.
Instagram links to the awesome models from the shoot:
*Emily Rinaldo- @em.explores
*Victoria Lucie- @victoria.lucie
Thanks!
Jason
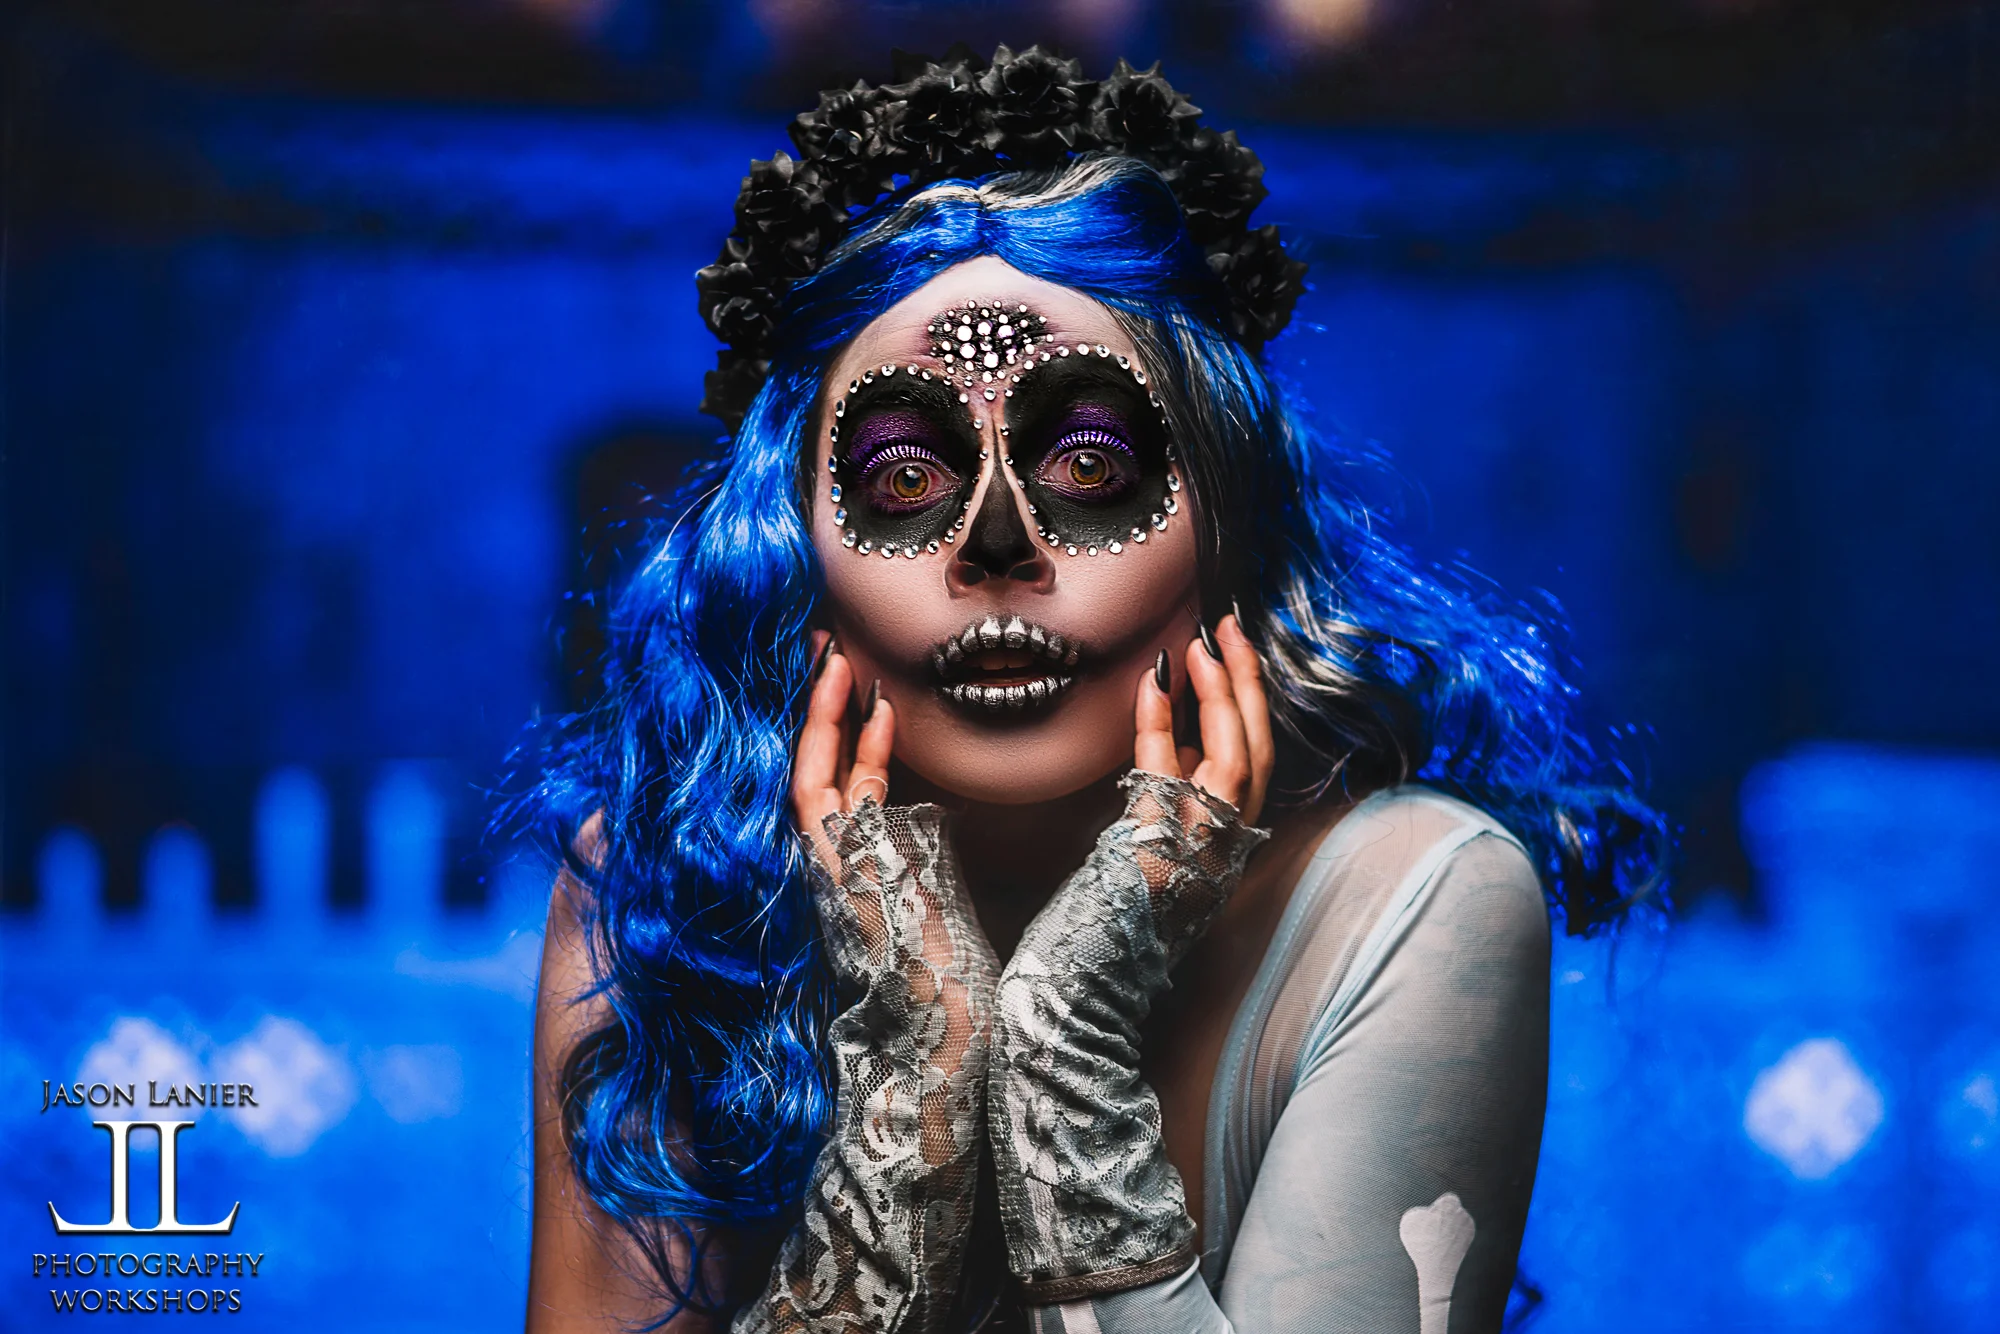
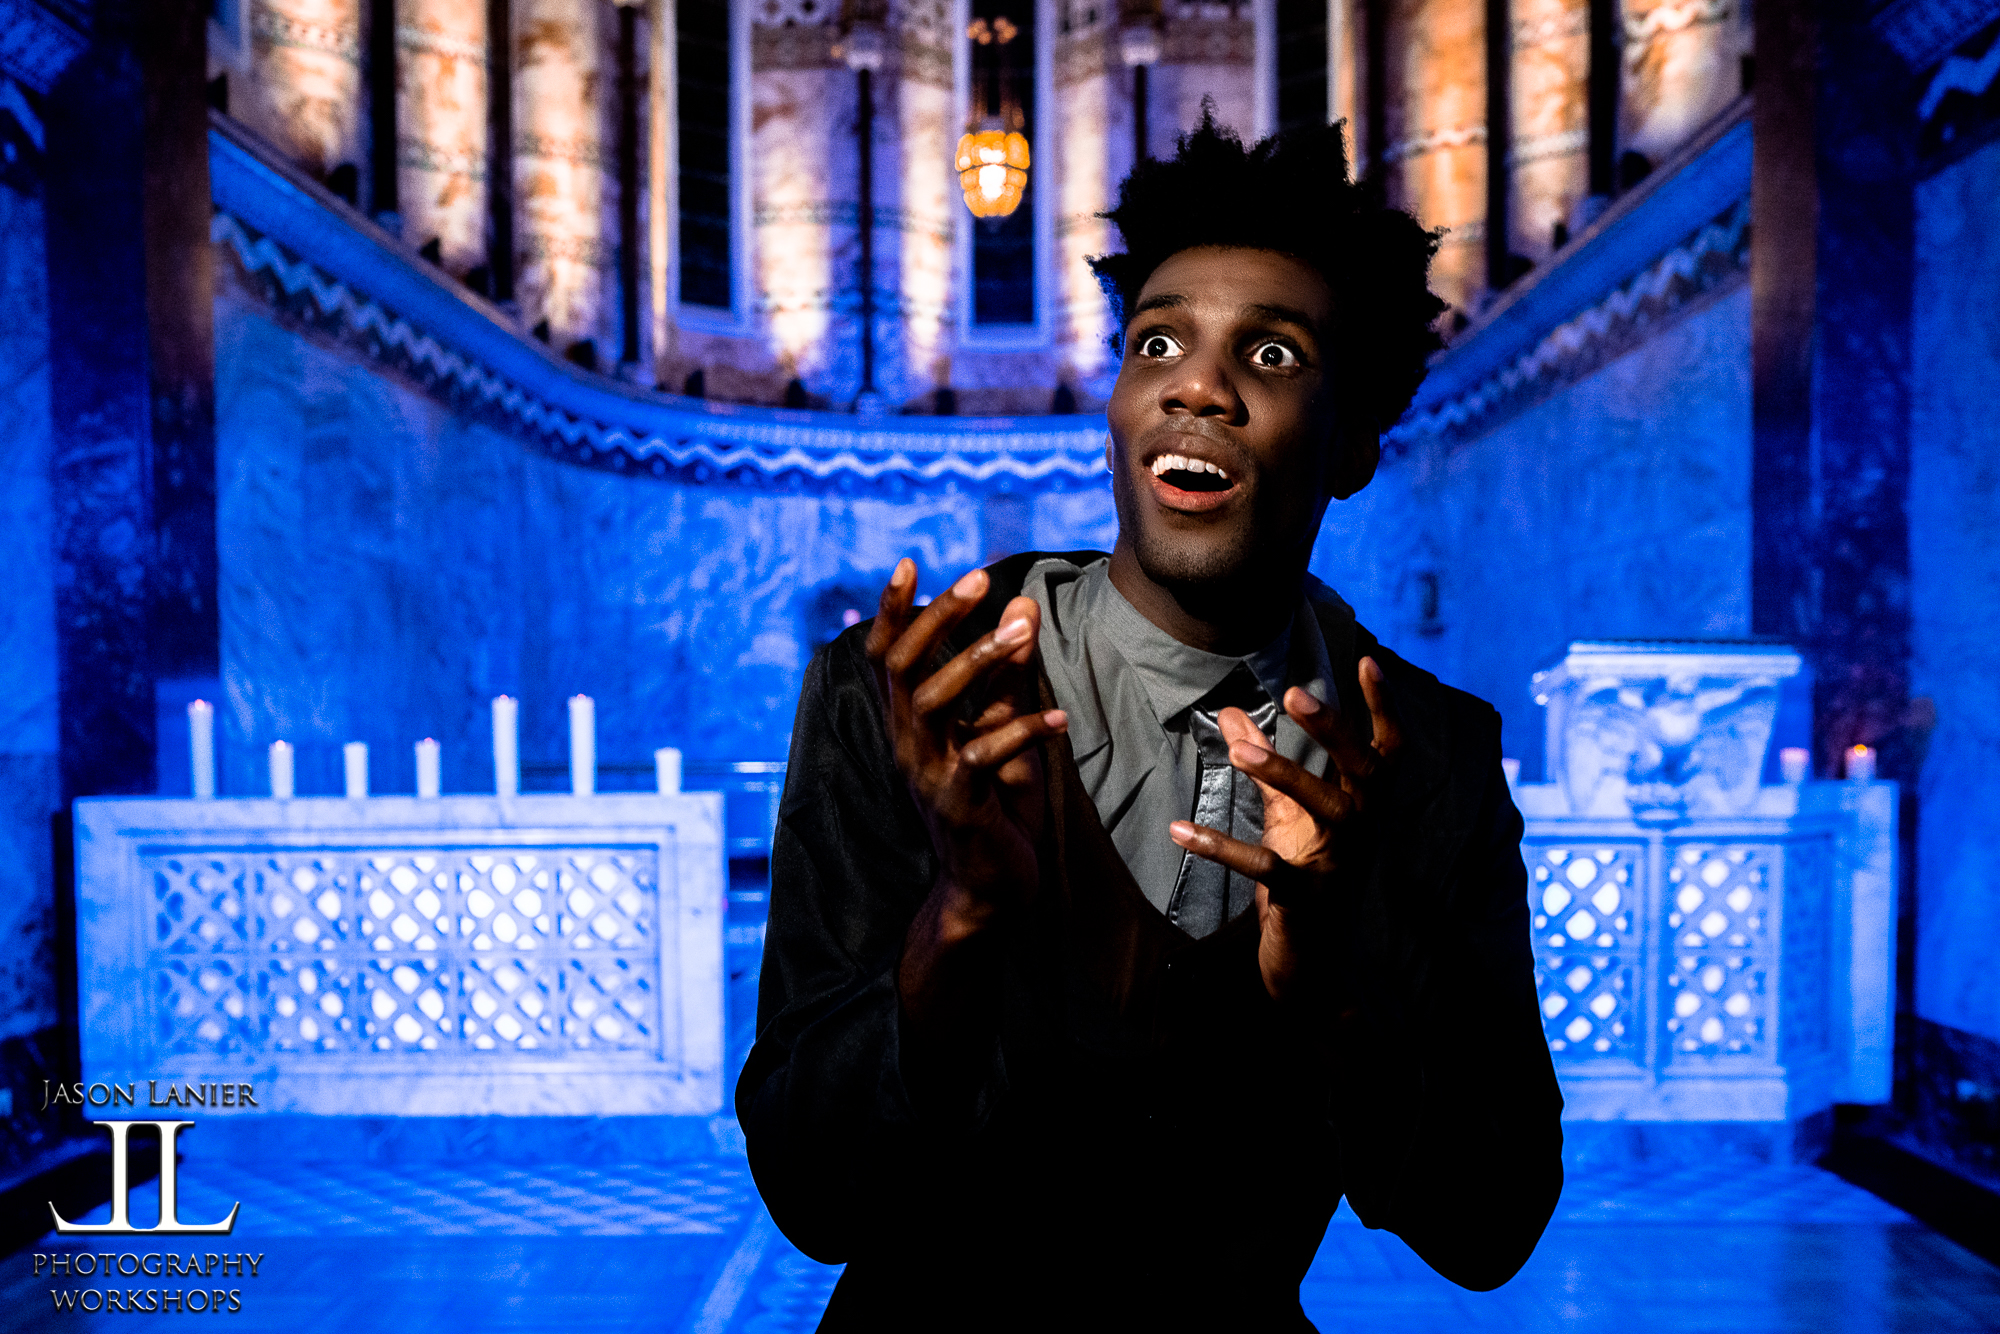
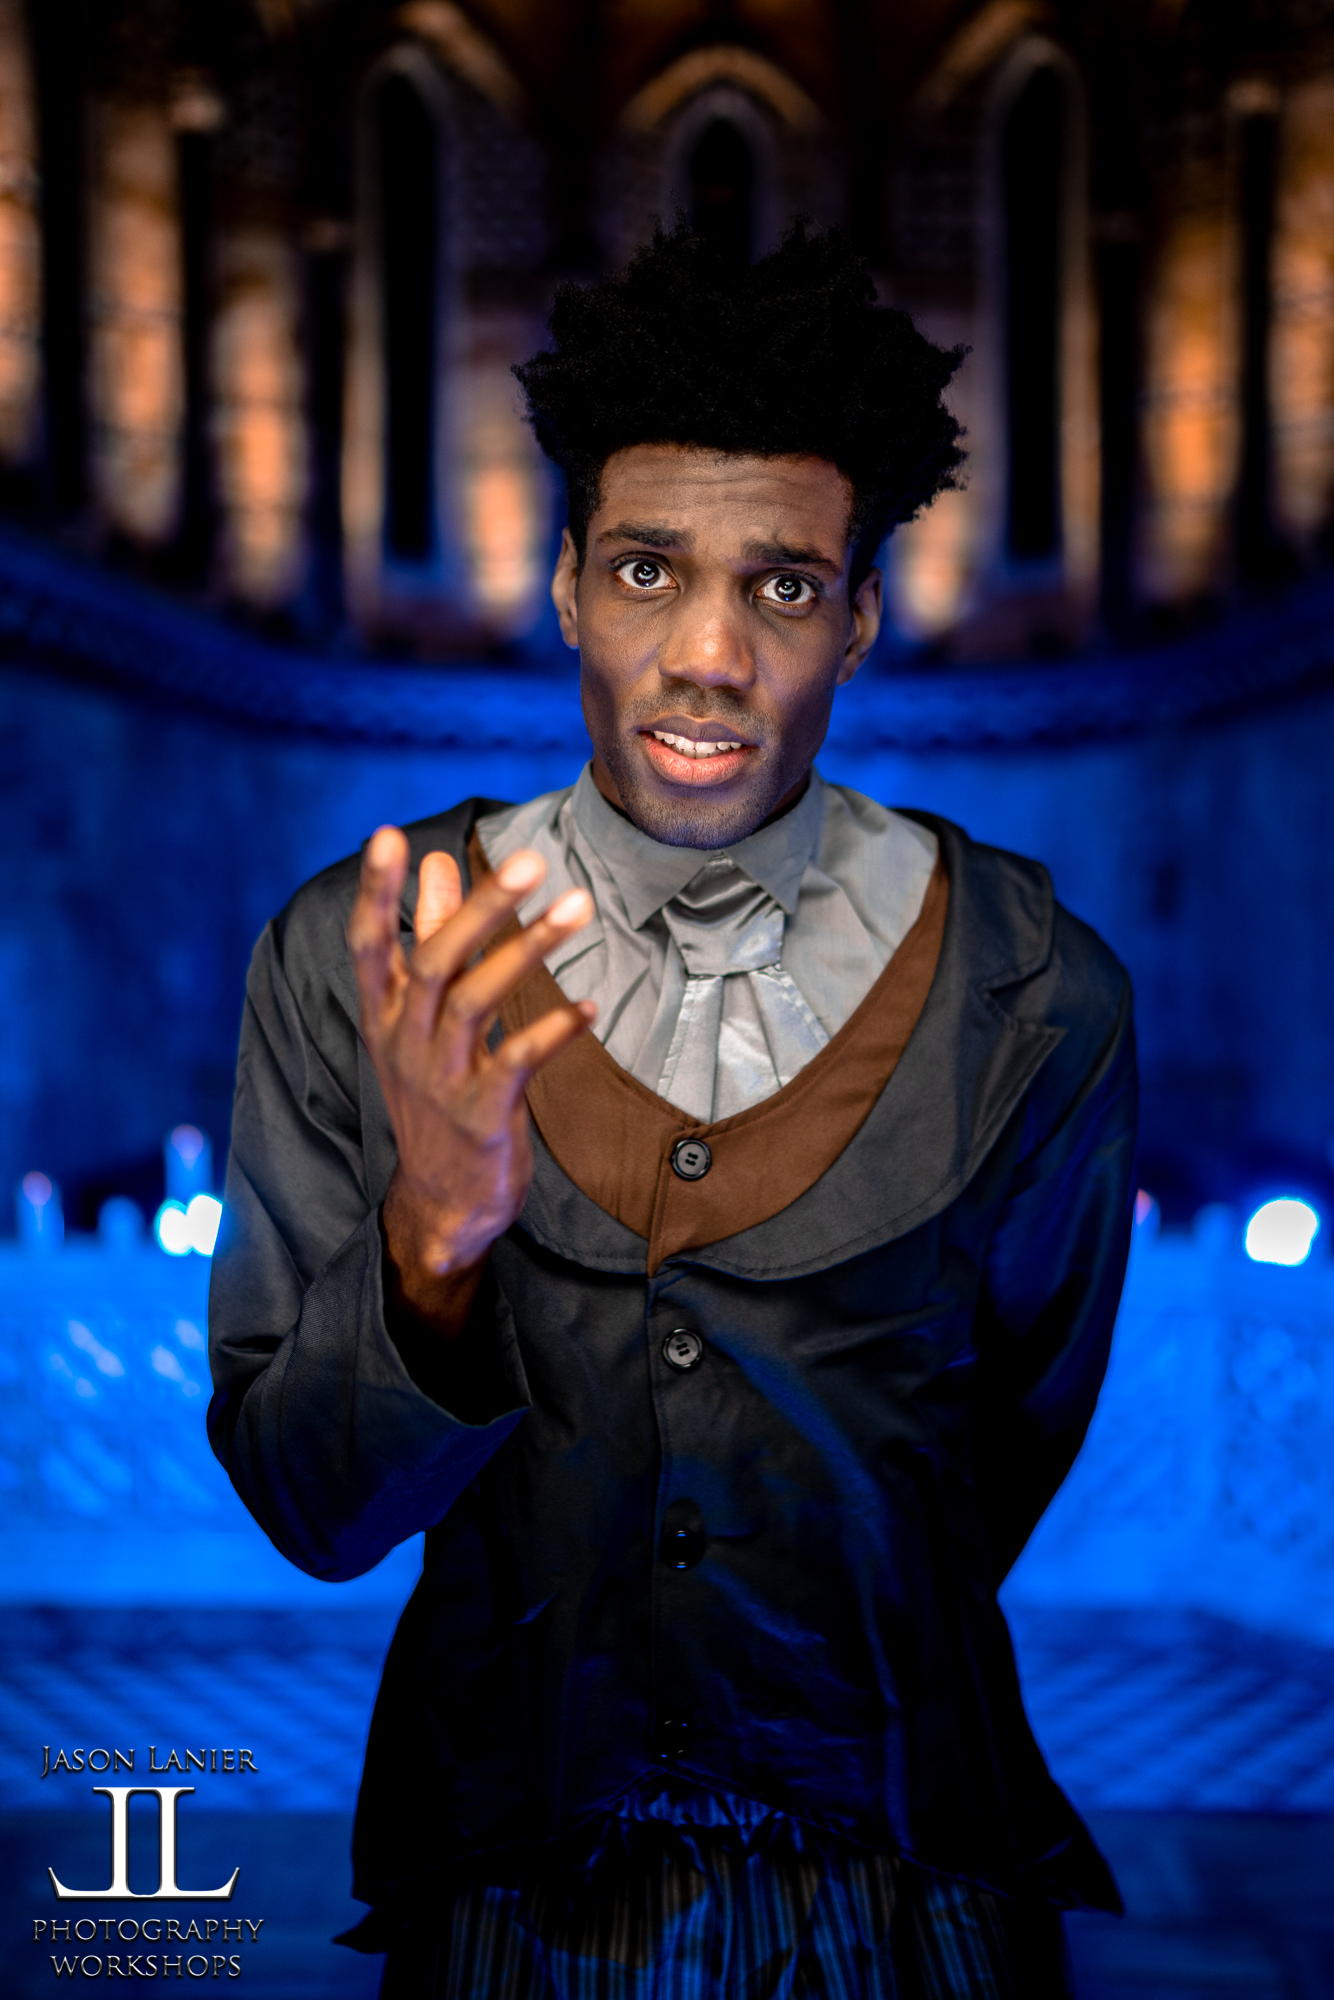
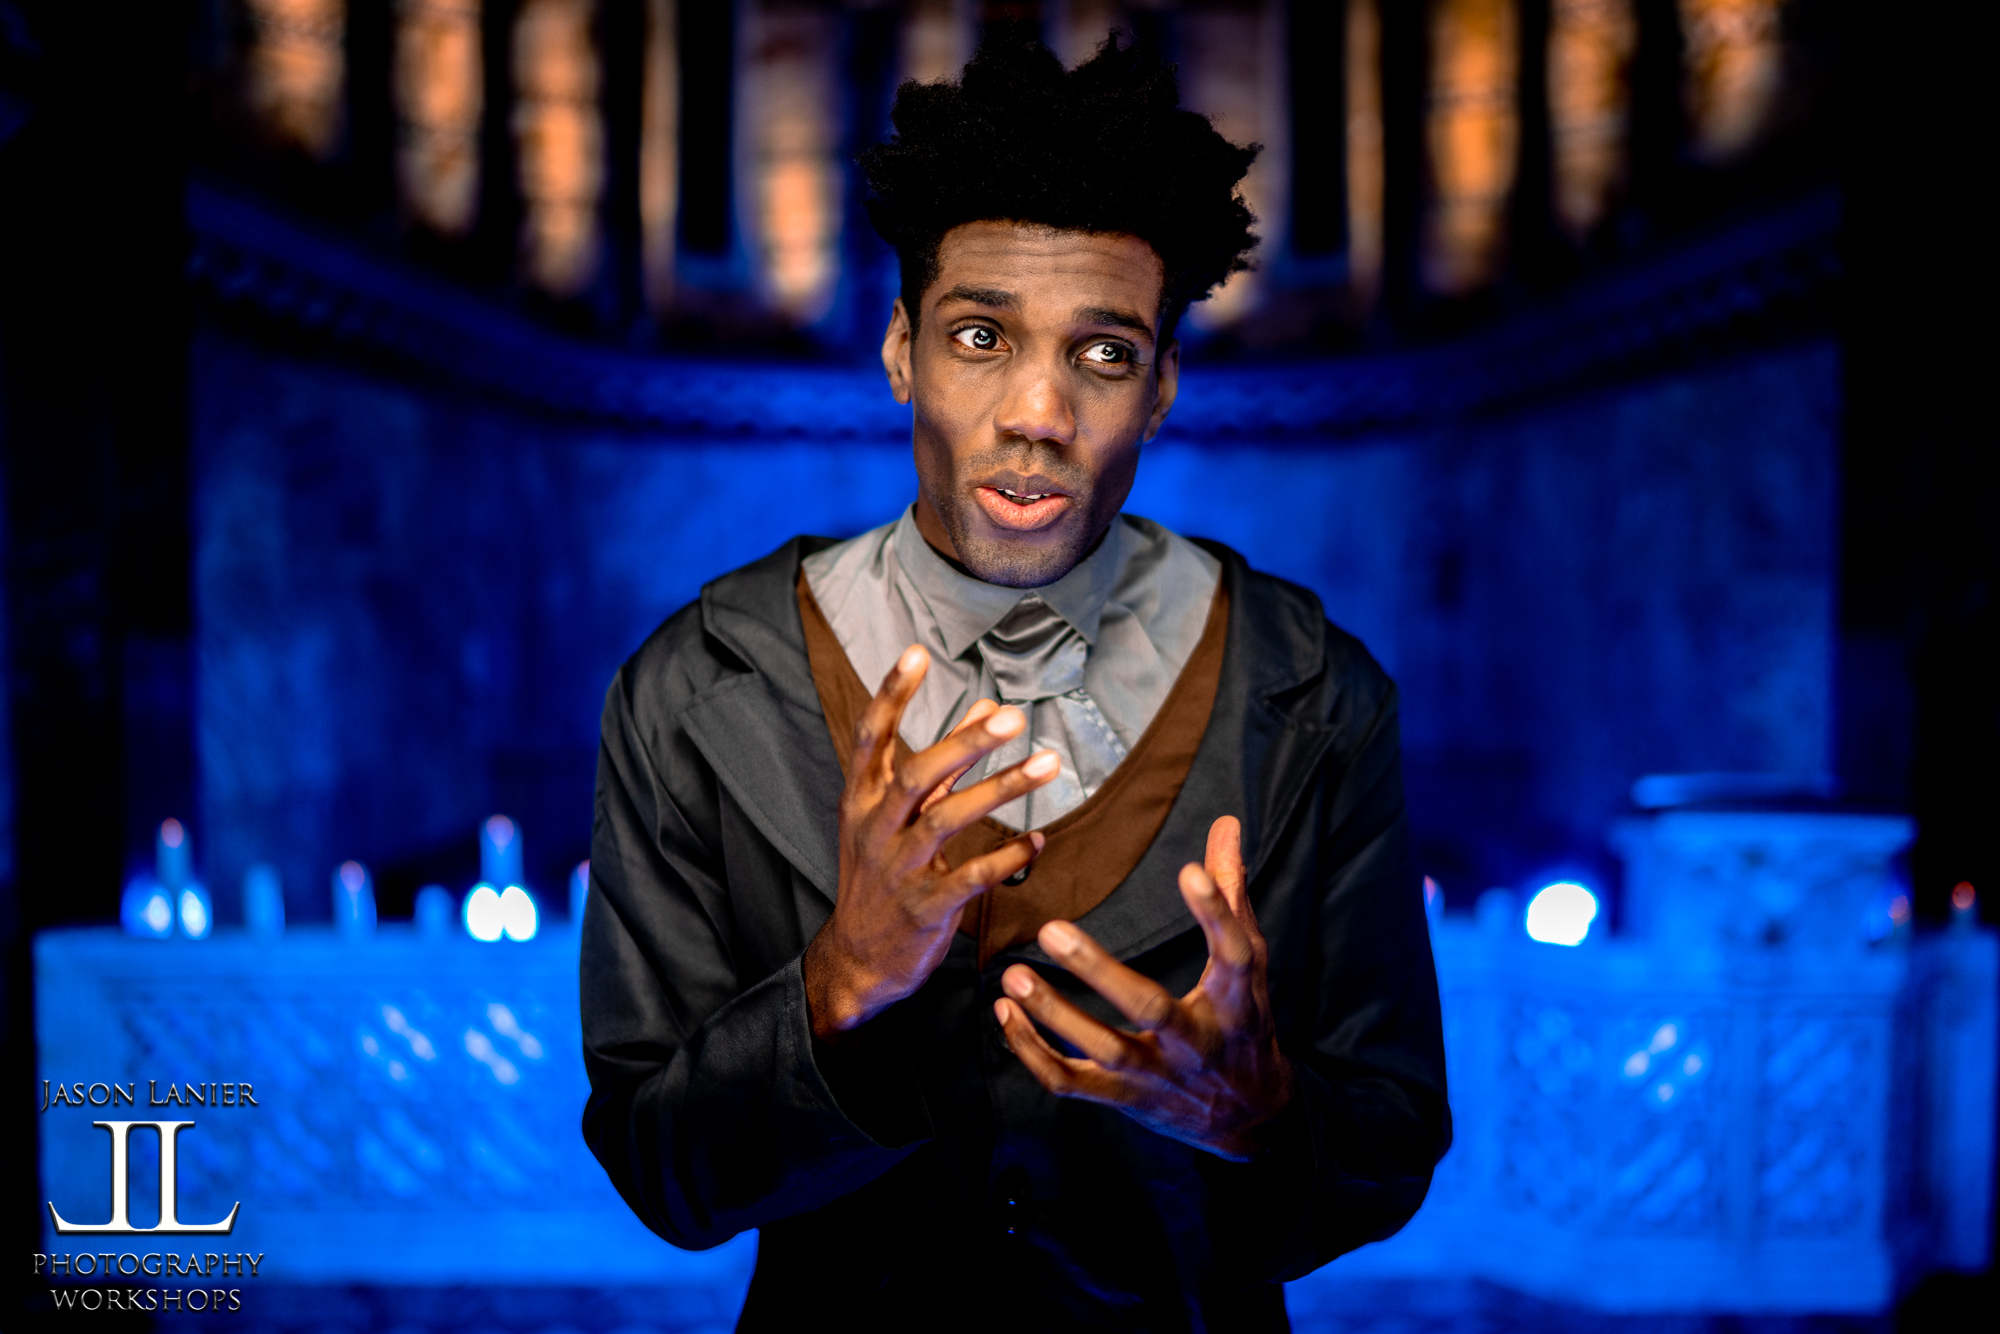
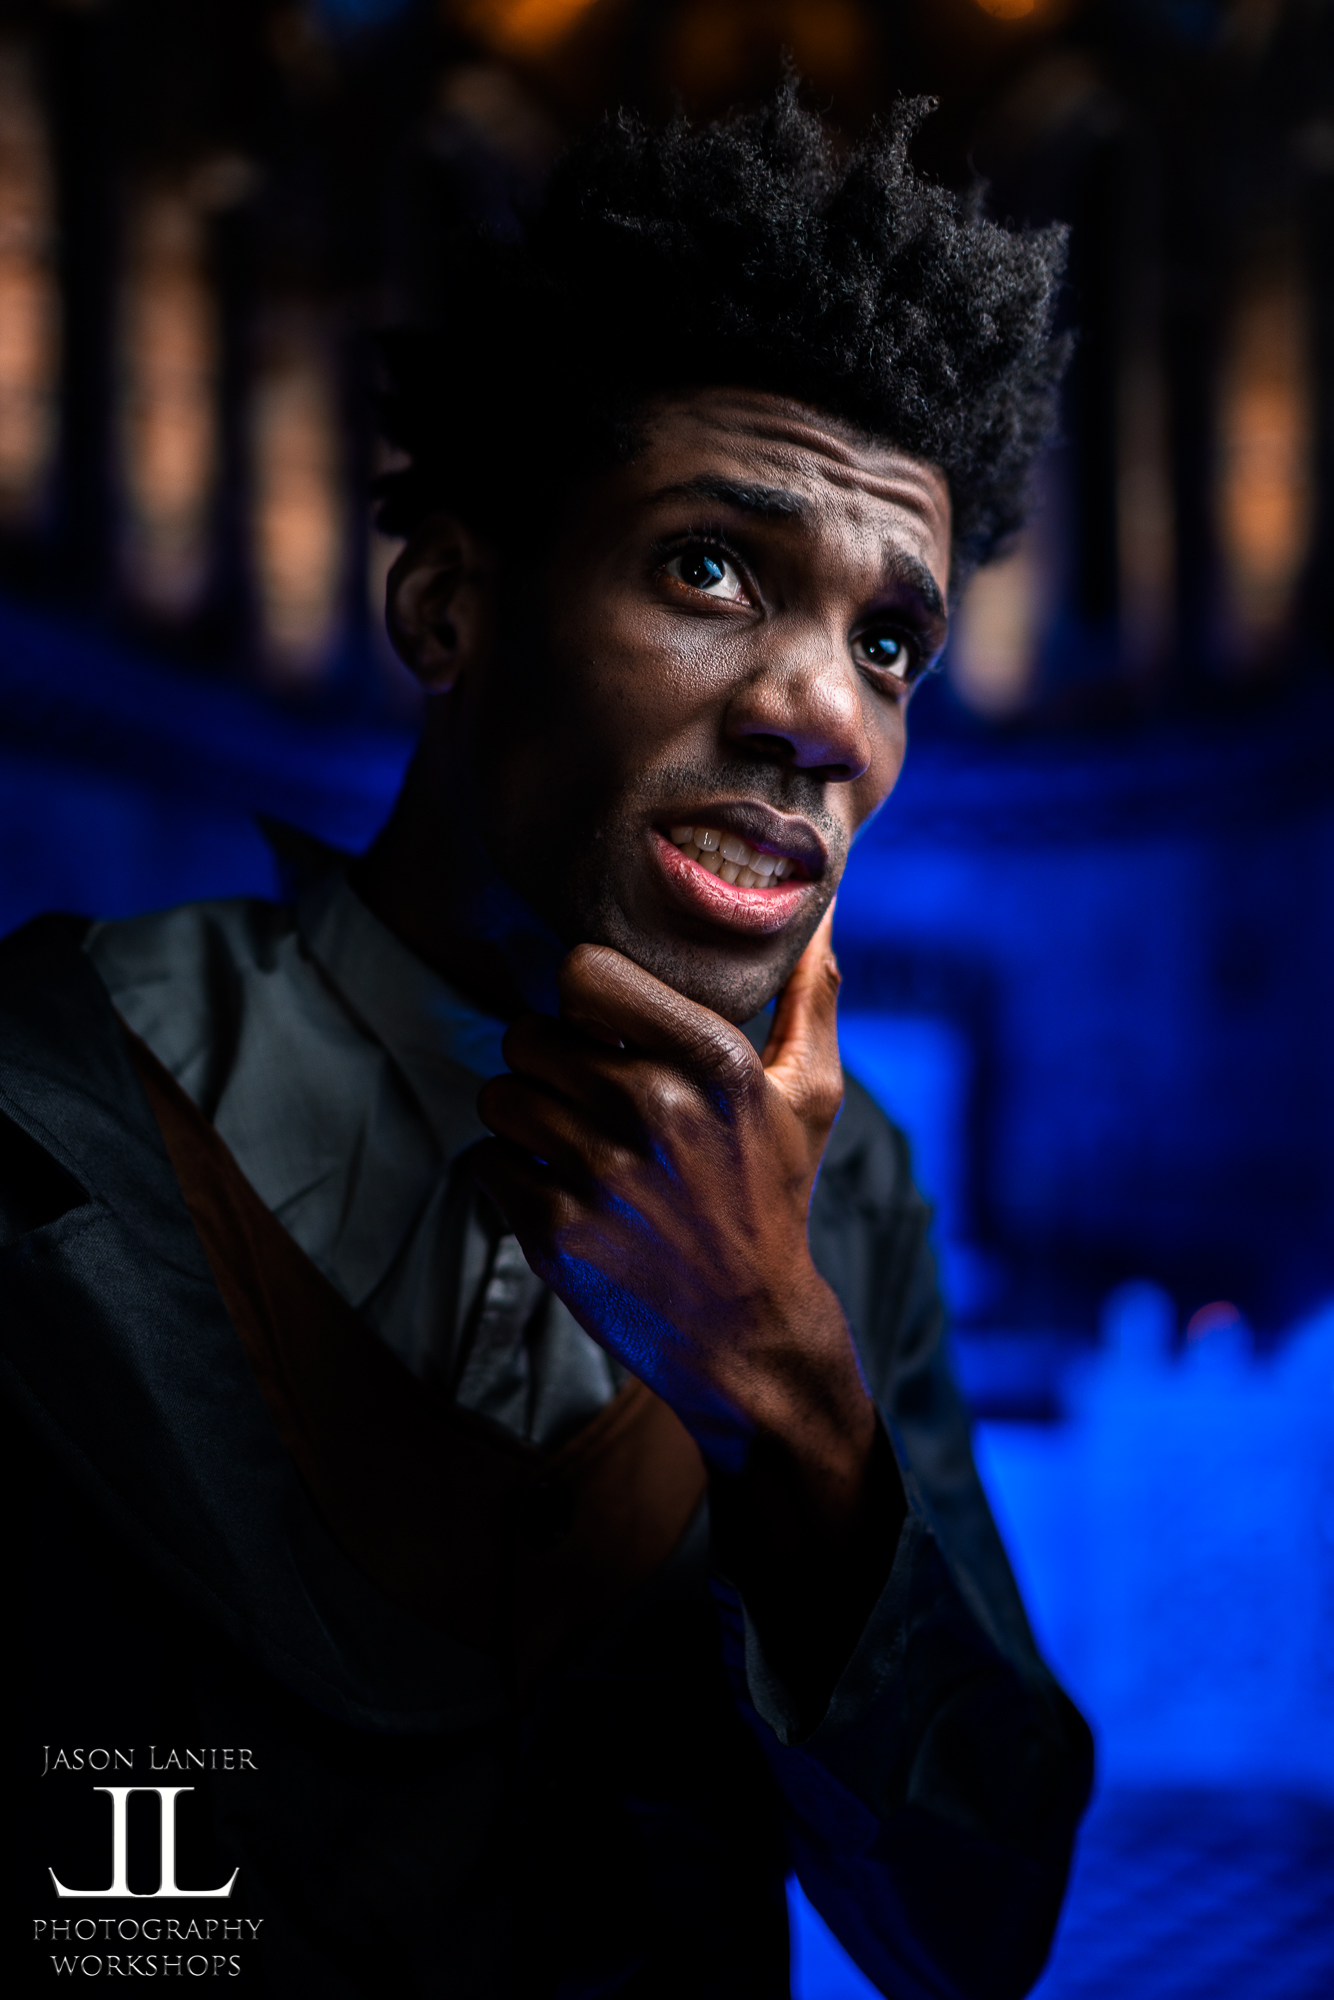
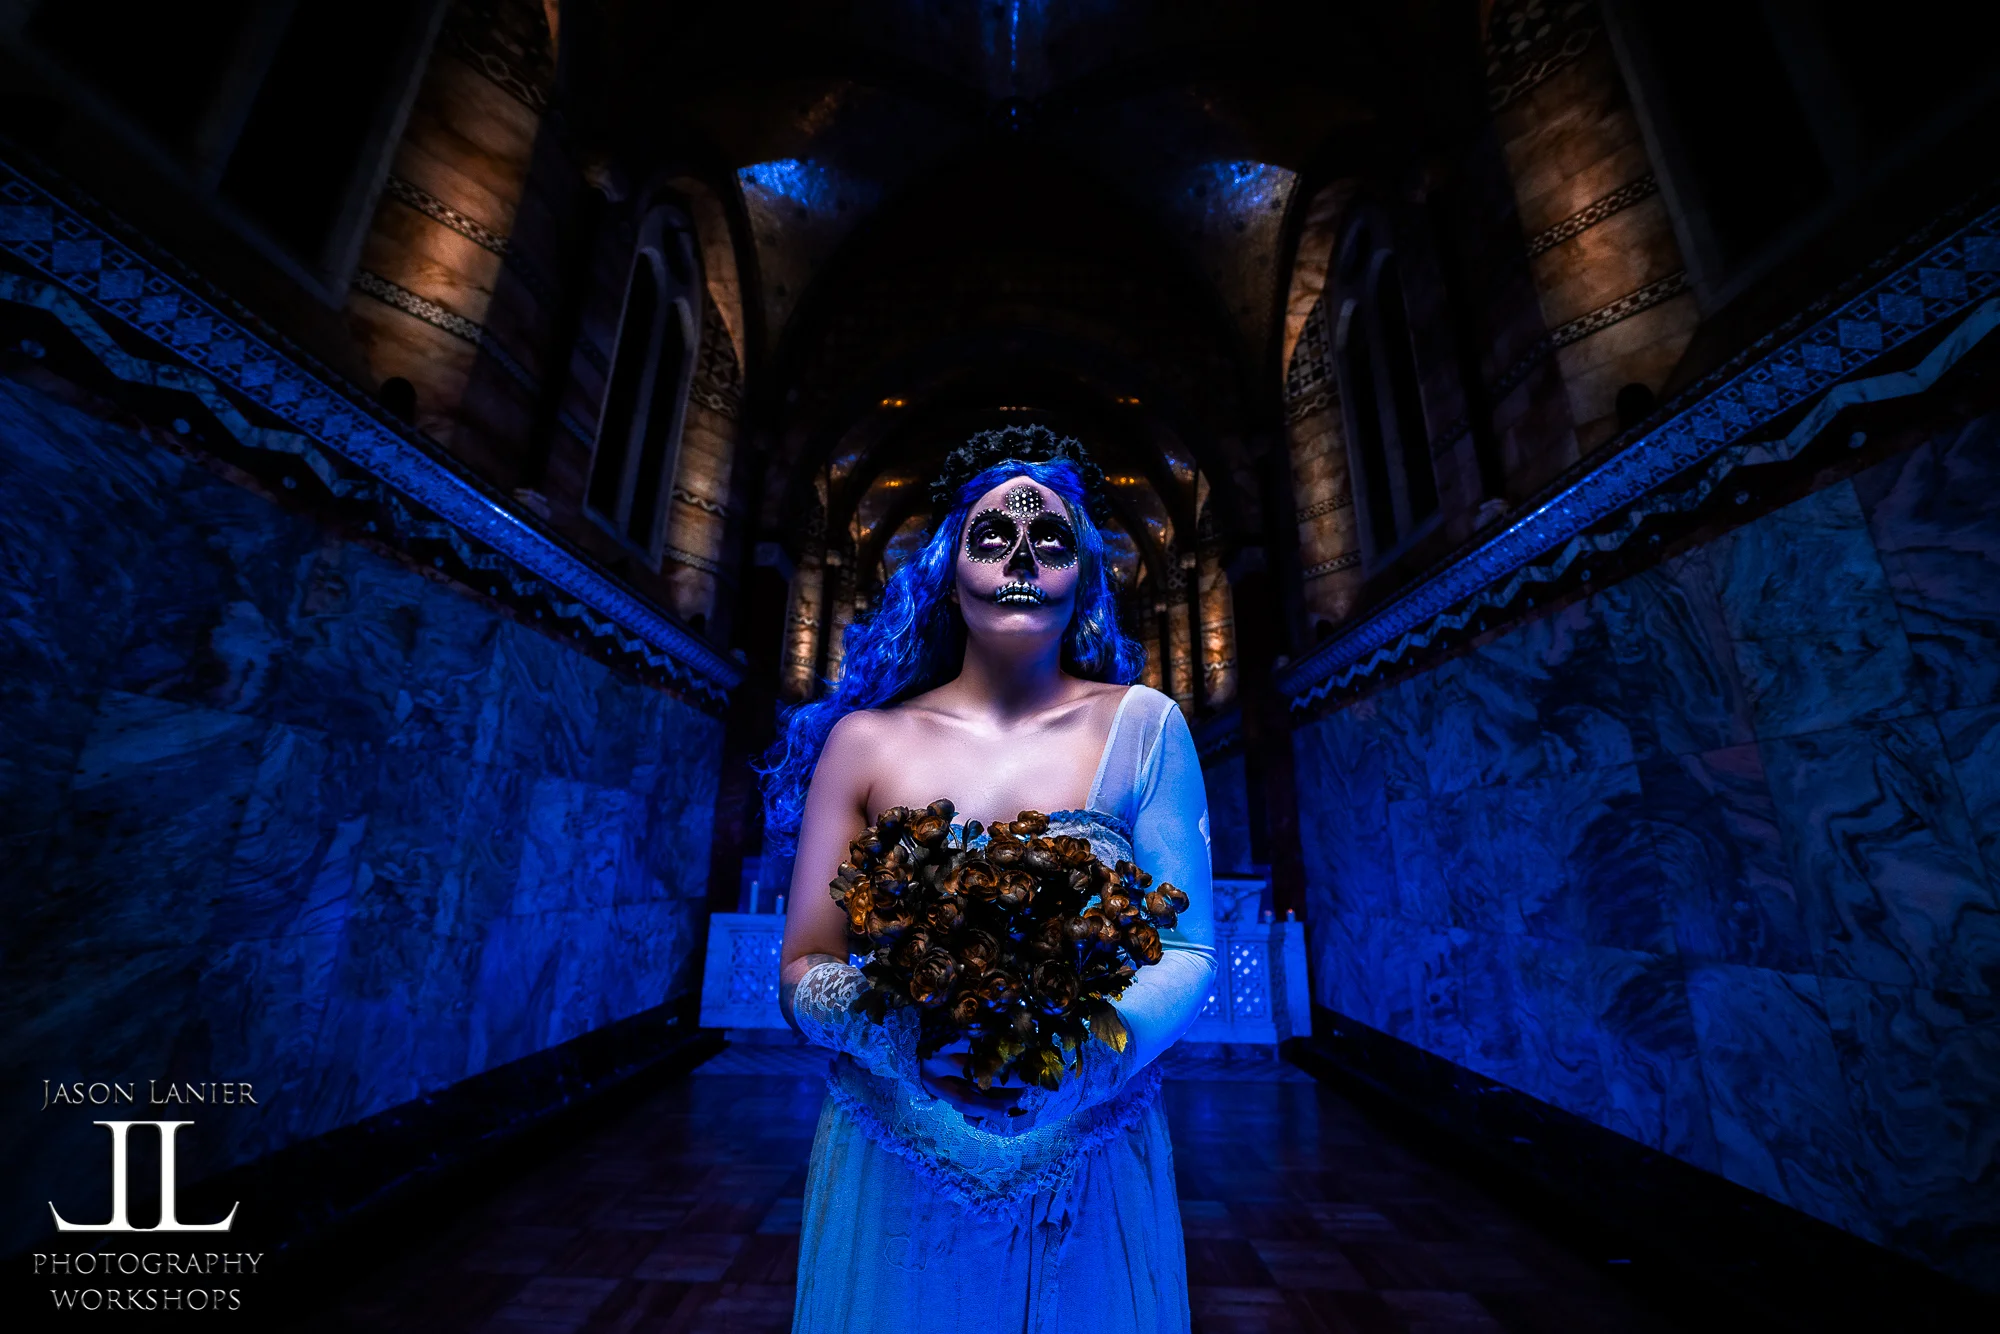
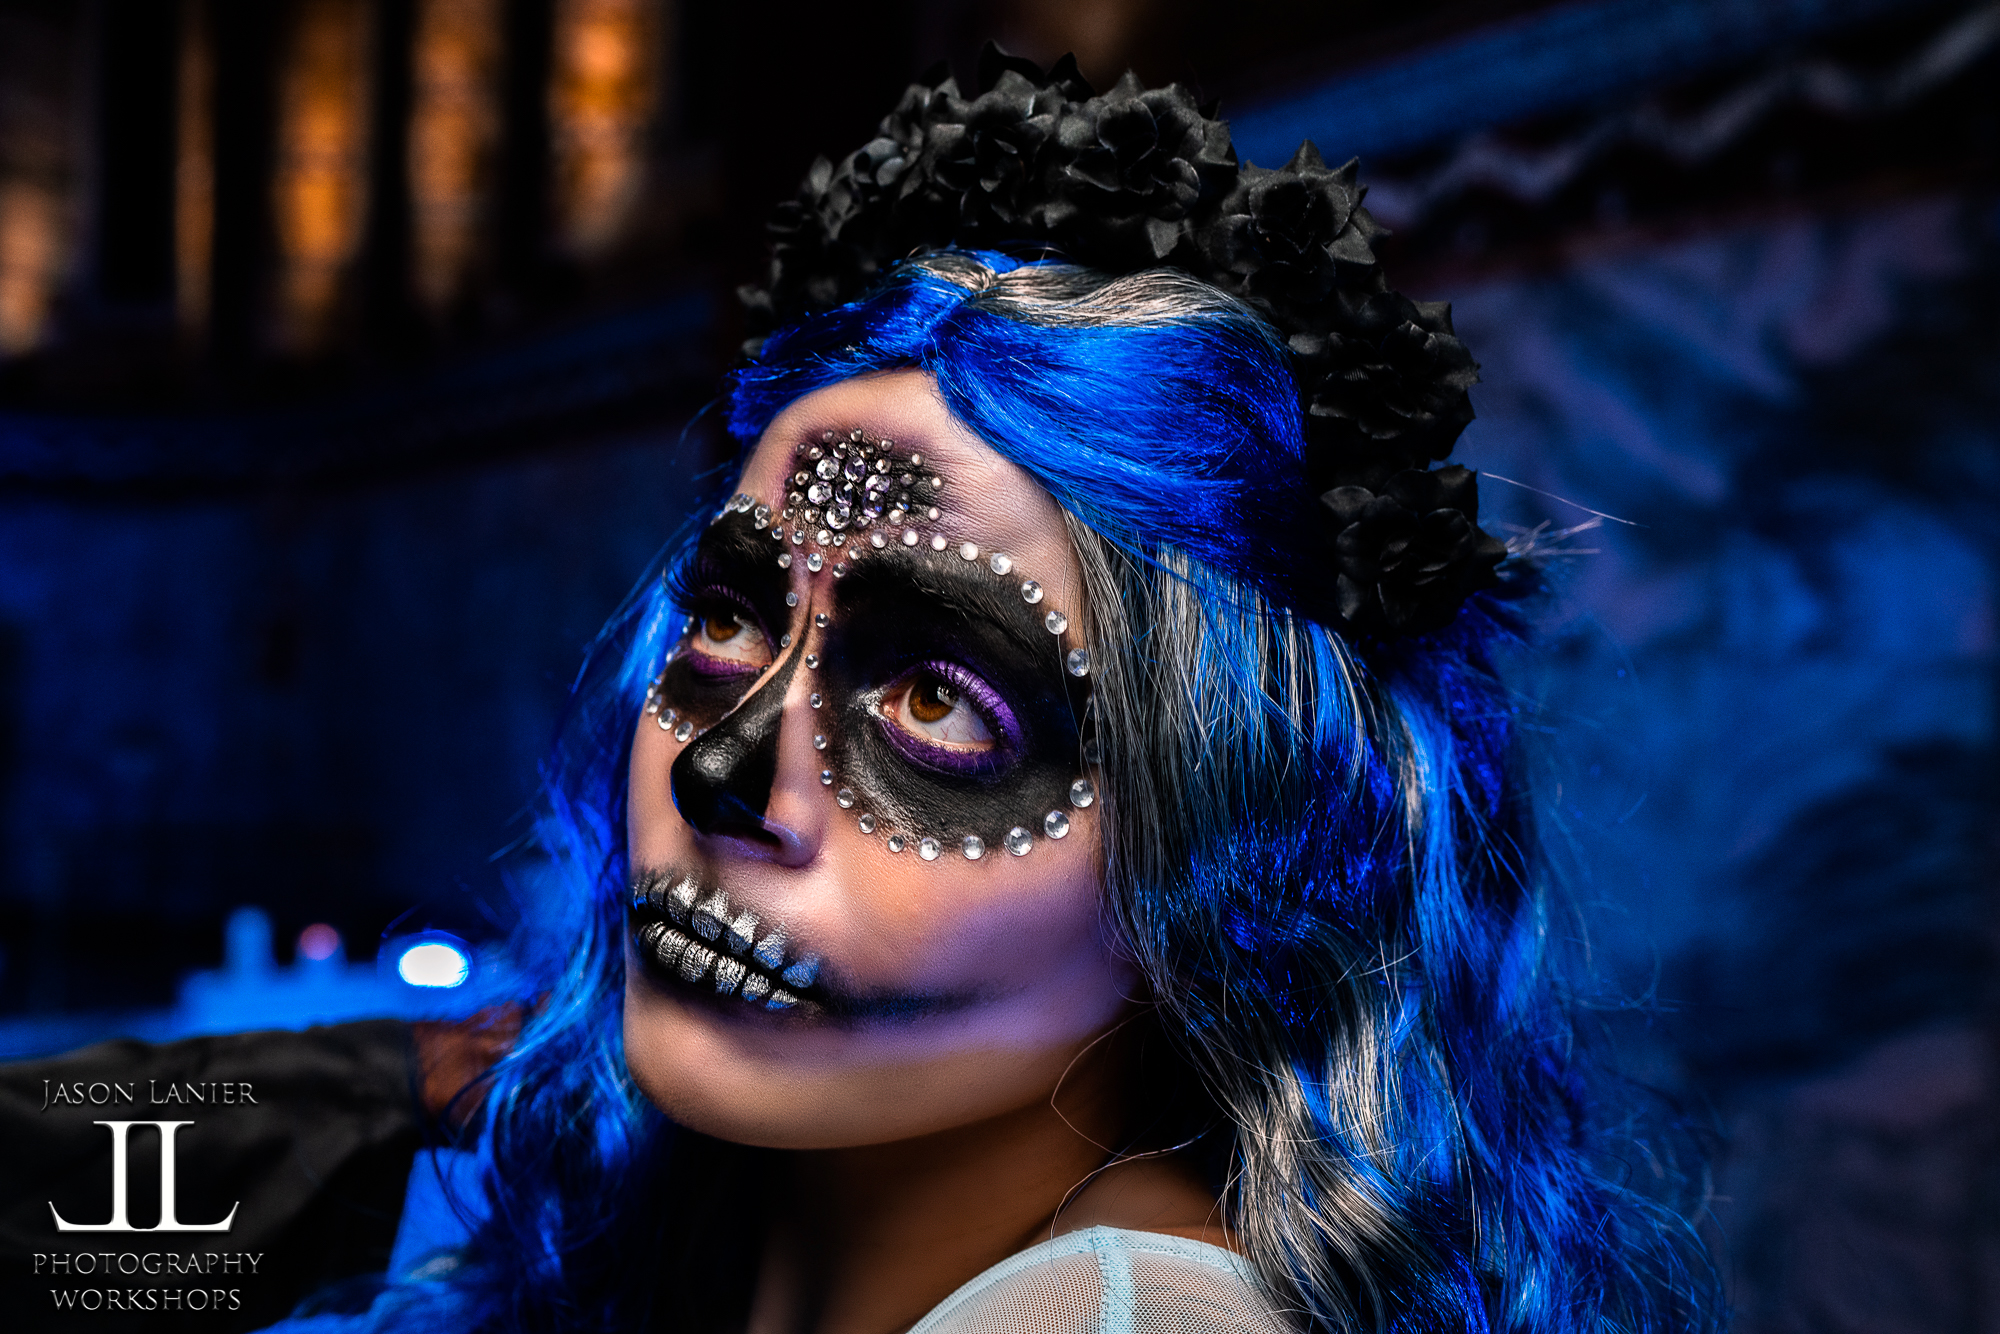
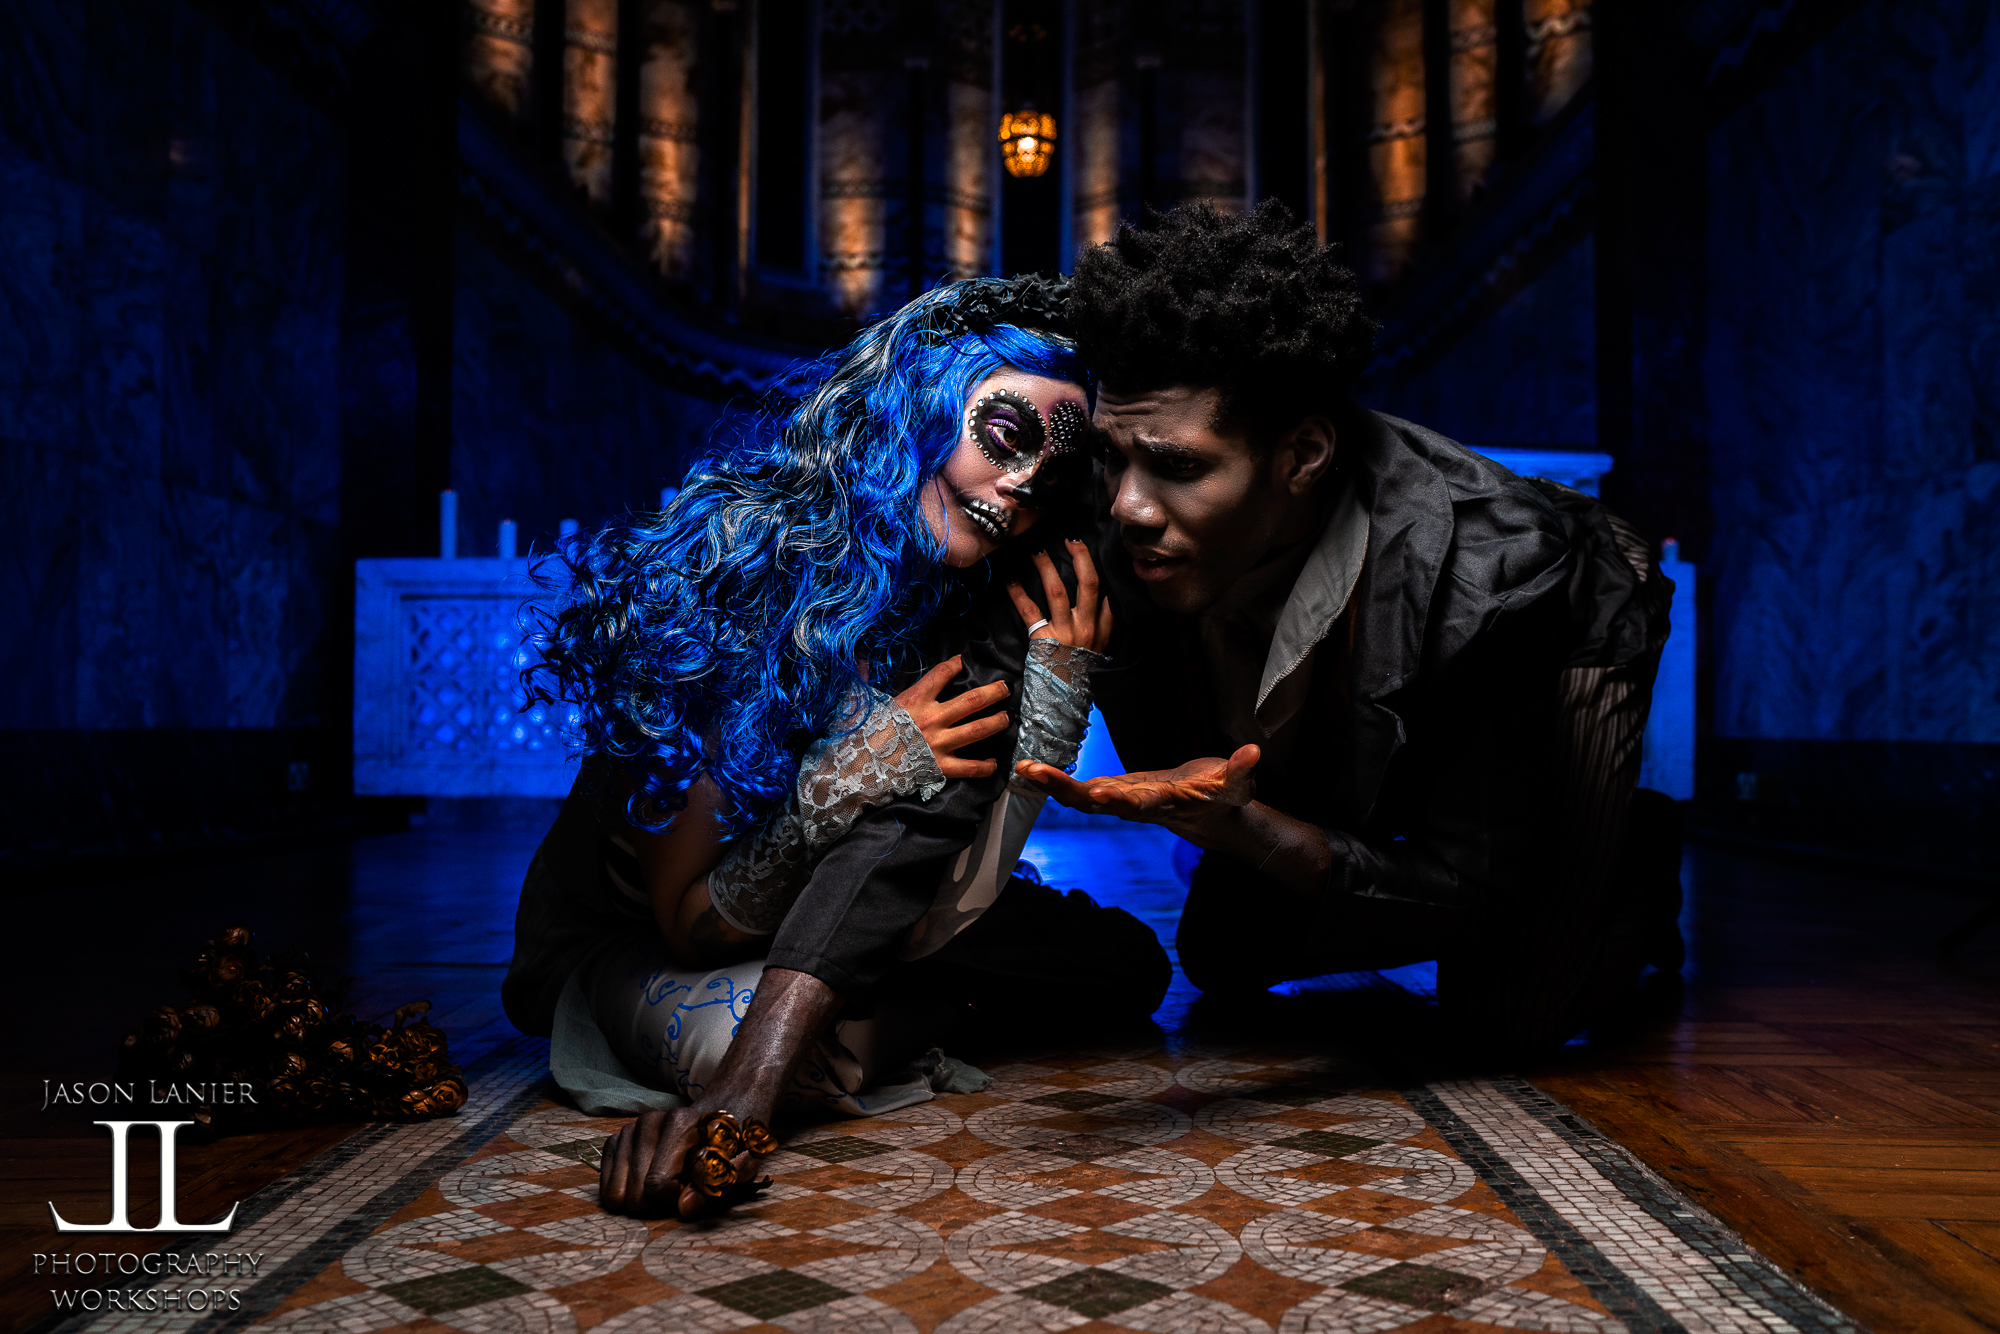
On Halloween 2018 I had the opportunity to do a very special shoot with the Rotolight team at the Fitzrovia Chapel in London, UK. It’s always pretty surreal getting to visit and shoot in some of these exotic locations and we wanted to do something really fun for Halloween. Click below to watch the video of this shoot!
My model Emily and I arrived at the chapel that’s tucked away in the center of London. This is an old chapel surrounded by big modern buildings and can’t be seen from the street. You have to navigate the CRAZY traffic in London (I mean I really HATE London traffic), park in one of the crazy parking lots that charge $60 for a couple of hours and THEN you drag your stuff all the way to the shooting location.
SO, after doing all of that, you certainly hope that the location is WORTH it. Was it?
YES.
TOTALLY WORTH IT.
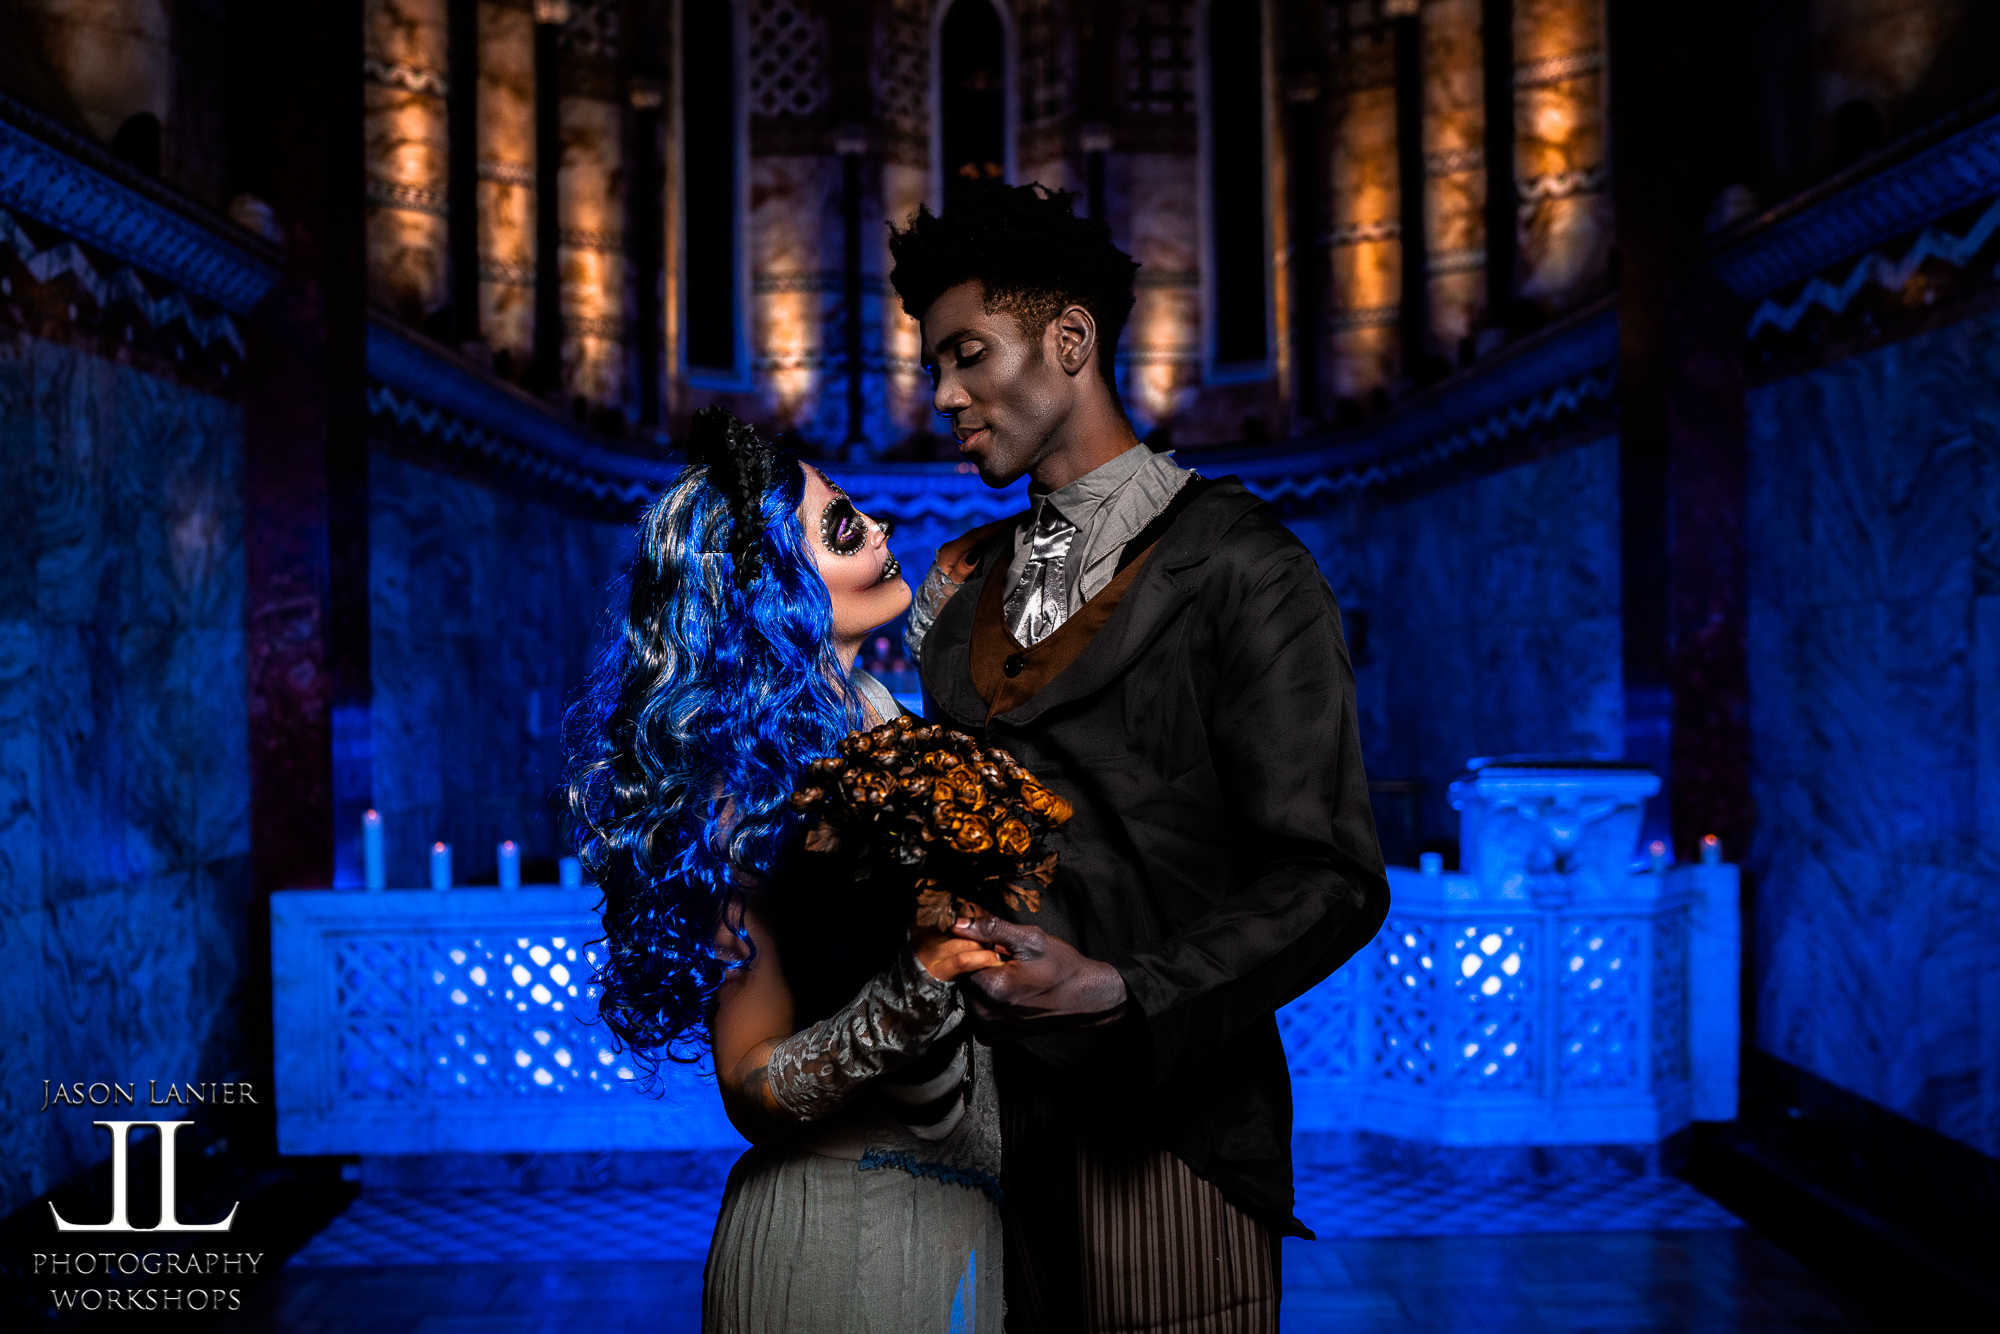
So I got Emily settled into the chair for hair and make up where she started the transformation into the Corpse Bride with her Corpse Groom Lawrence waiting for her:
The biggest challenge when first walking into the church was trying to figure out how to take the ambient lighting down as it was very warm and convert it into the kind of cold blue tones that you’d want for a corpse bride (day of the dead) kind of shoot. So we killed all of the lighting in there and started lighting it up with blue lighting from all of the lights from the Rotolight Ecosystem. In this shoot we used the Rotolight Anova Pro 2, Aeos, and the Neo 2.
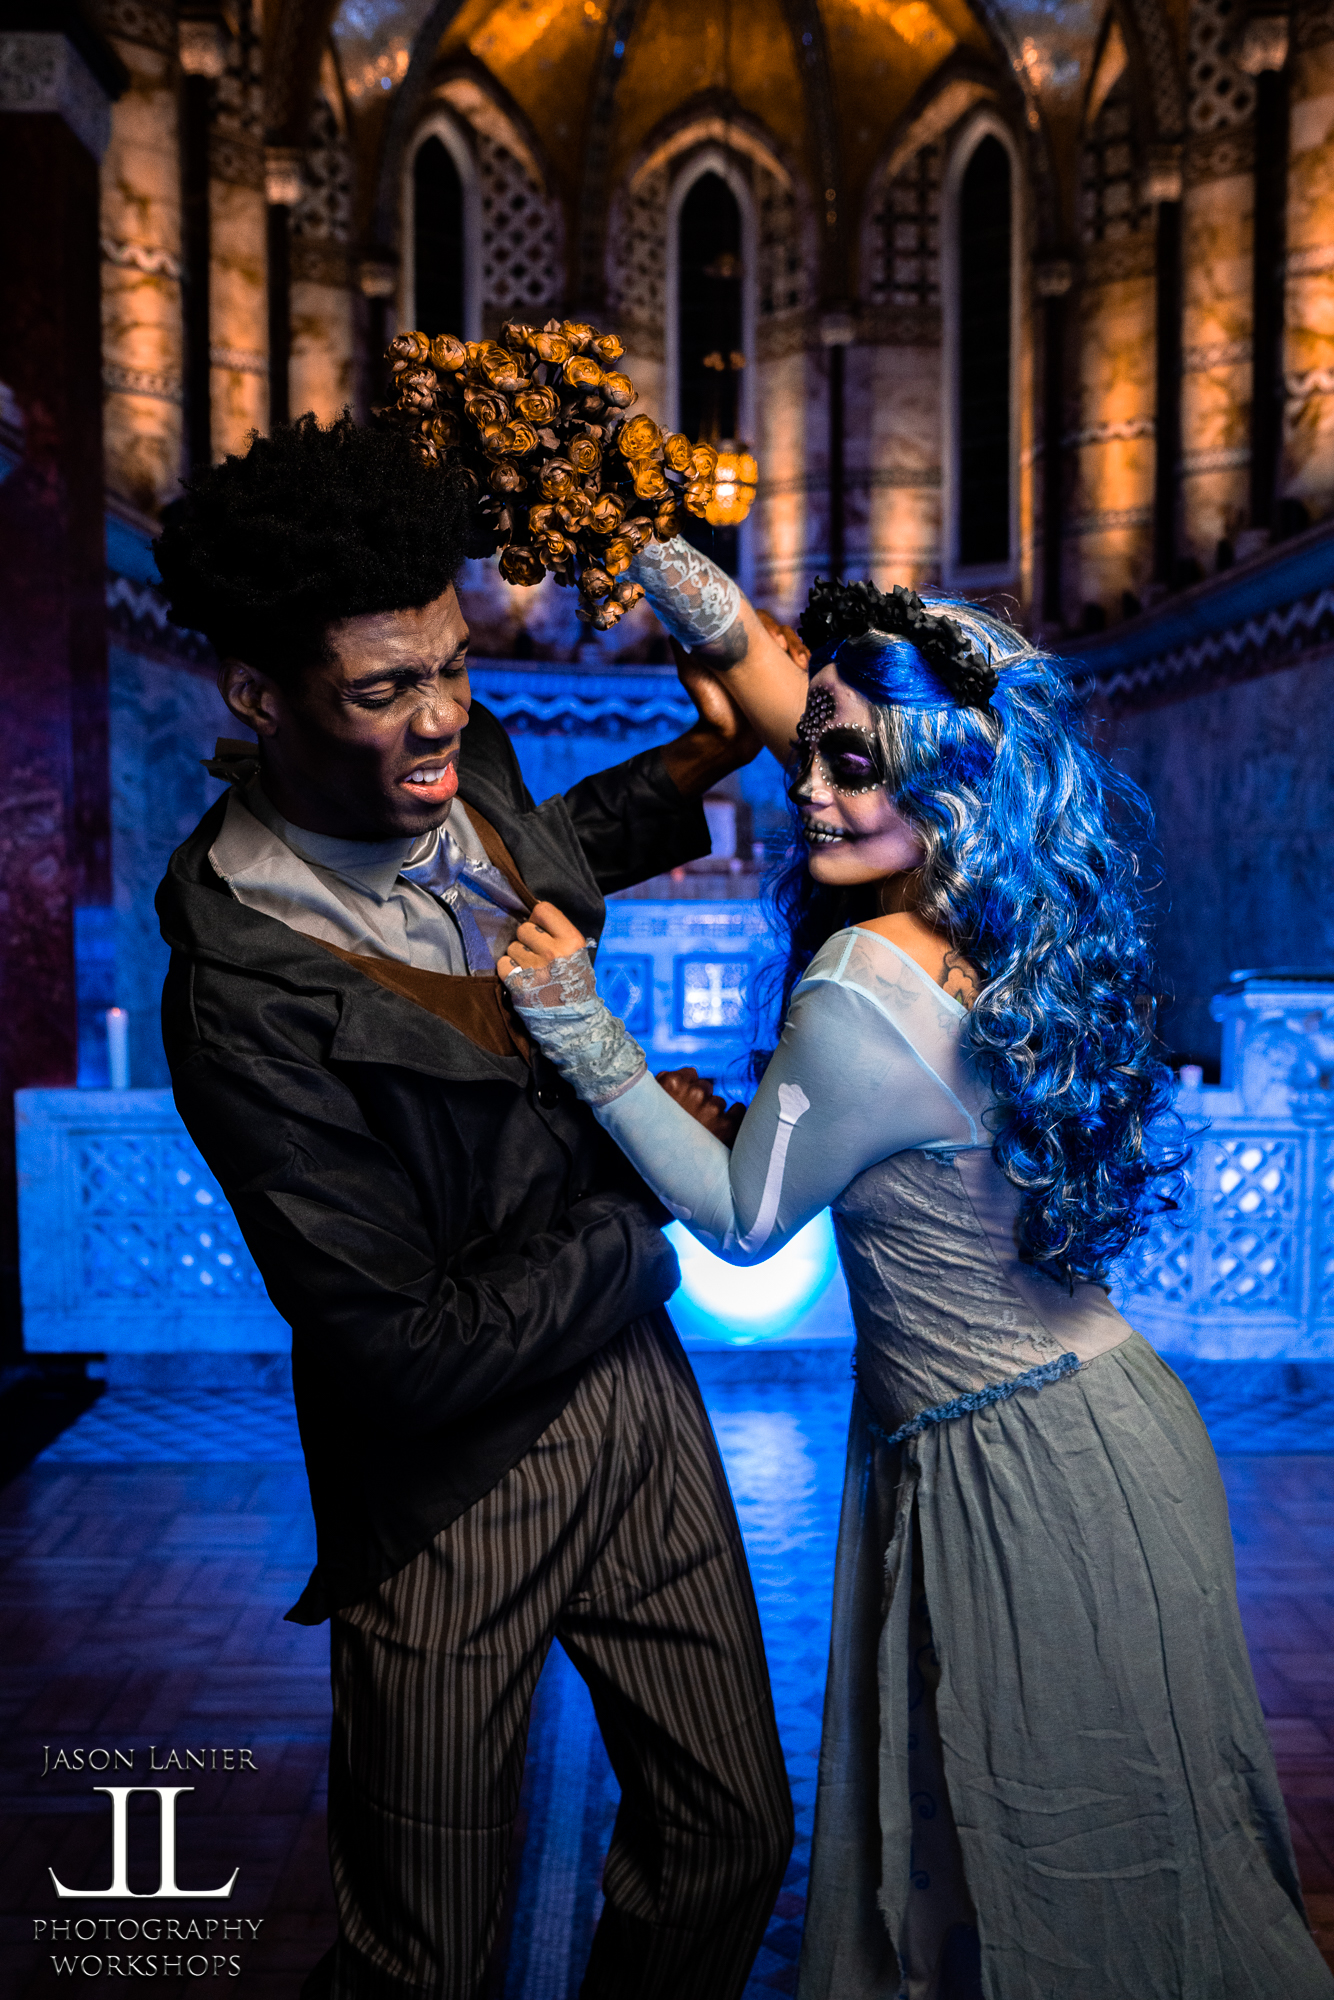
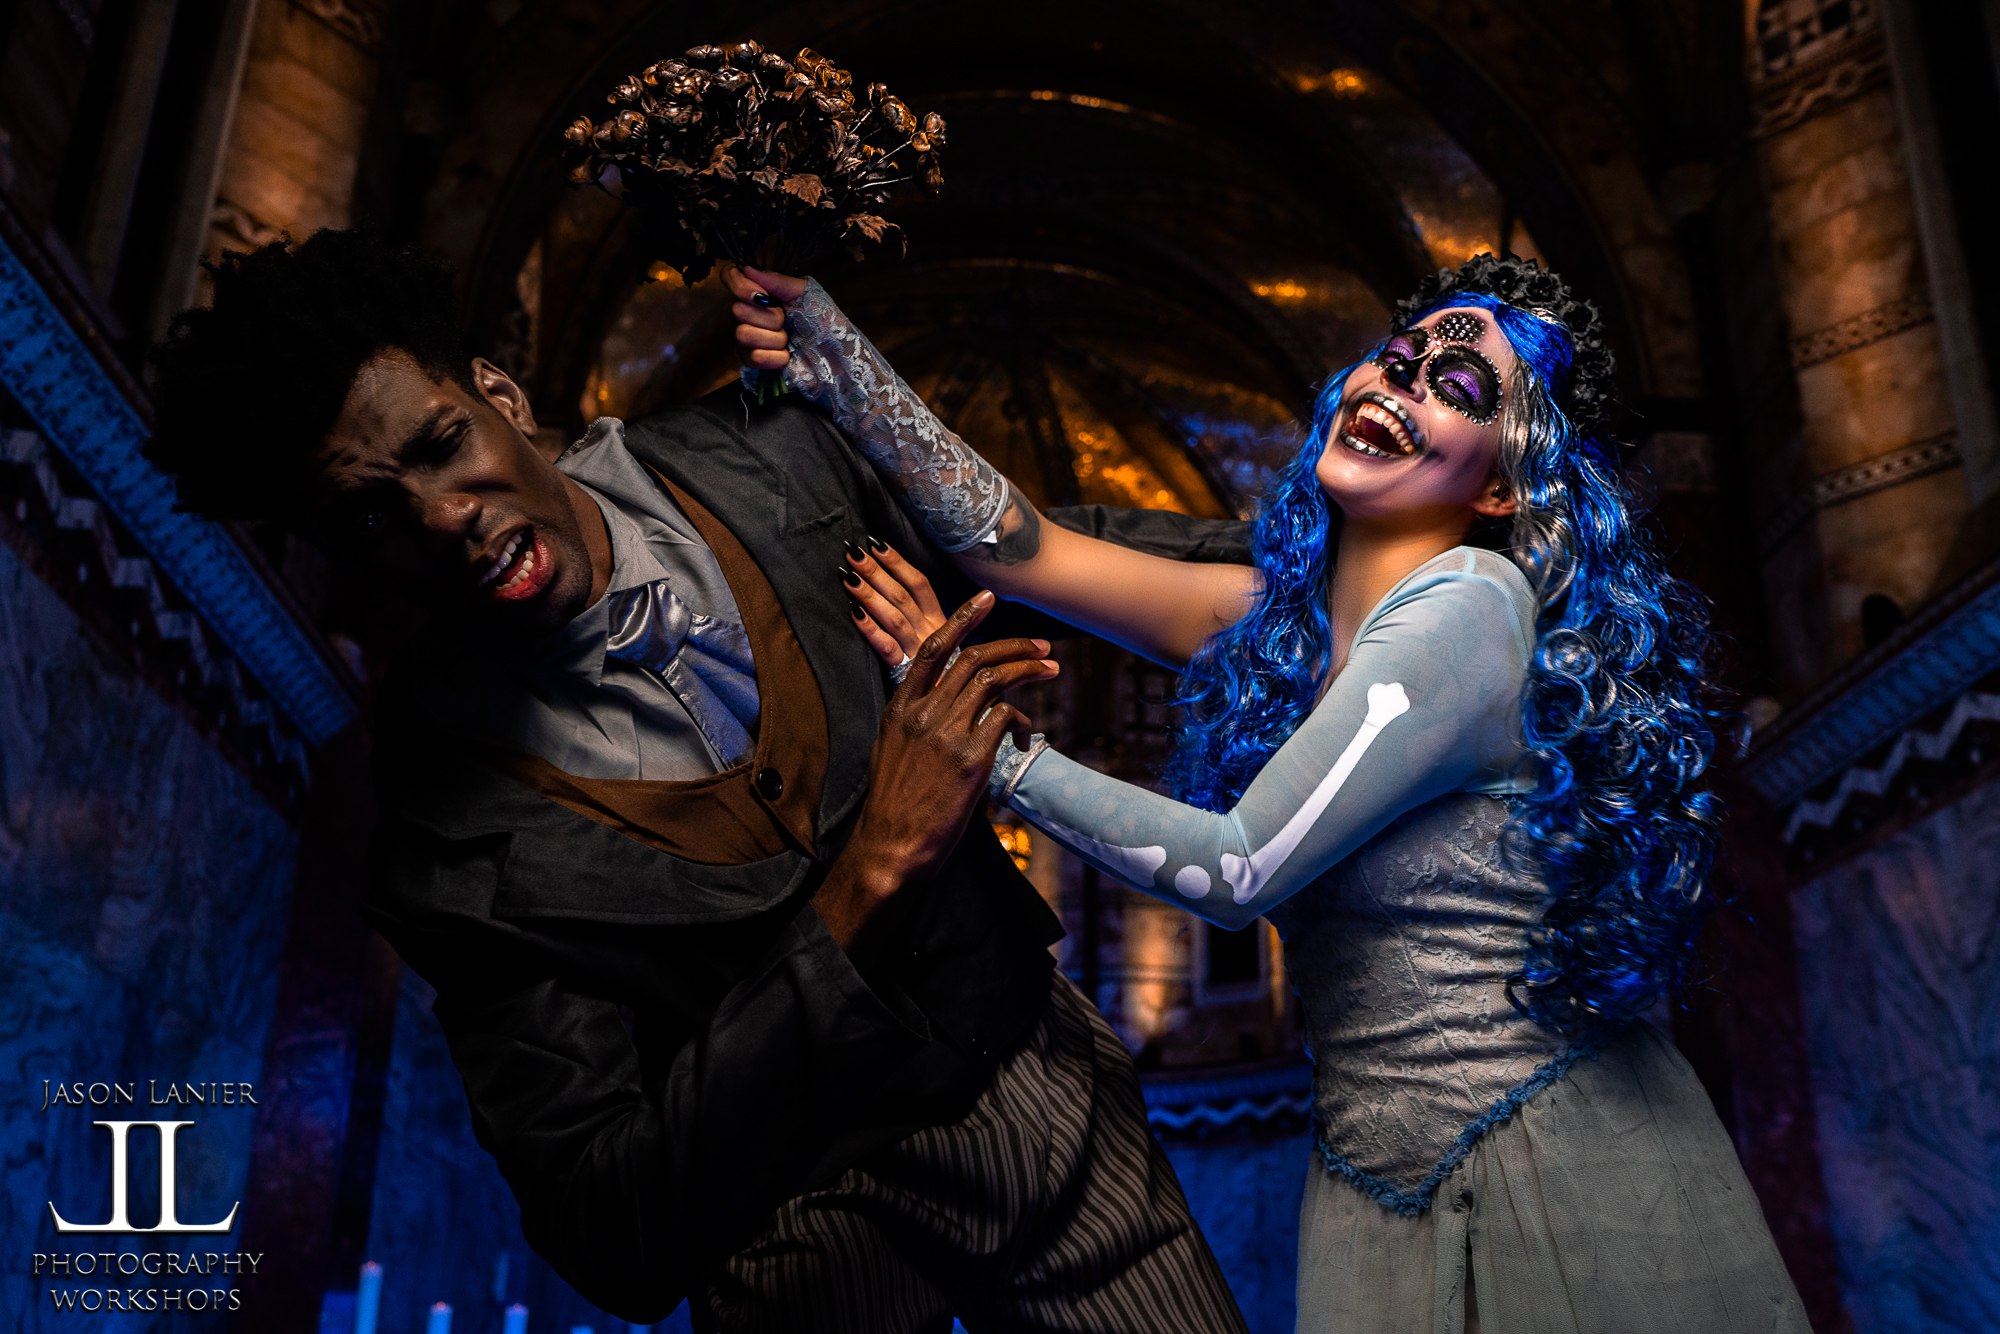
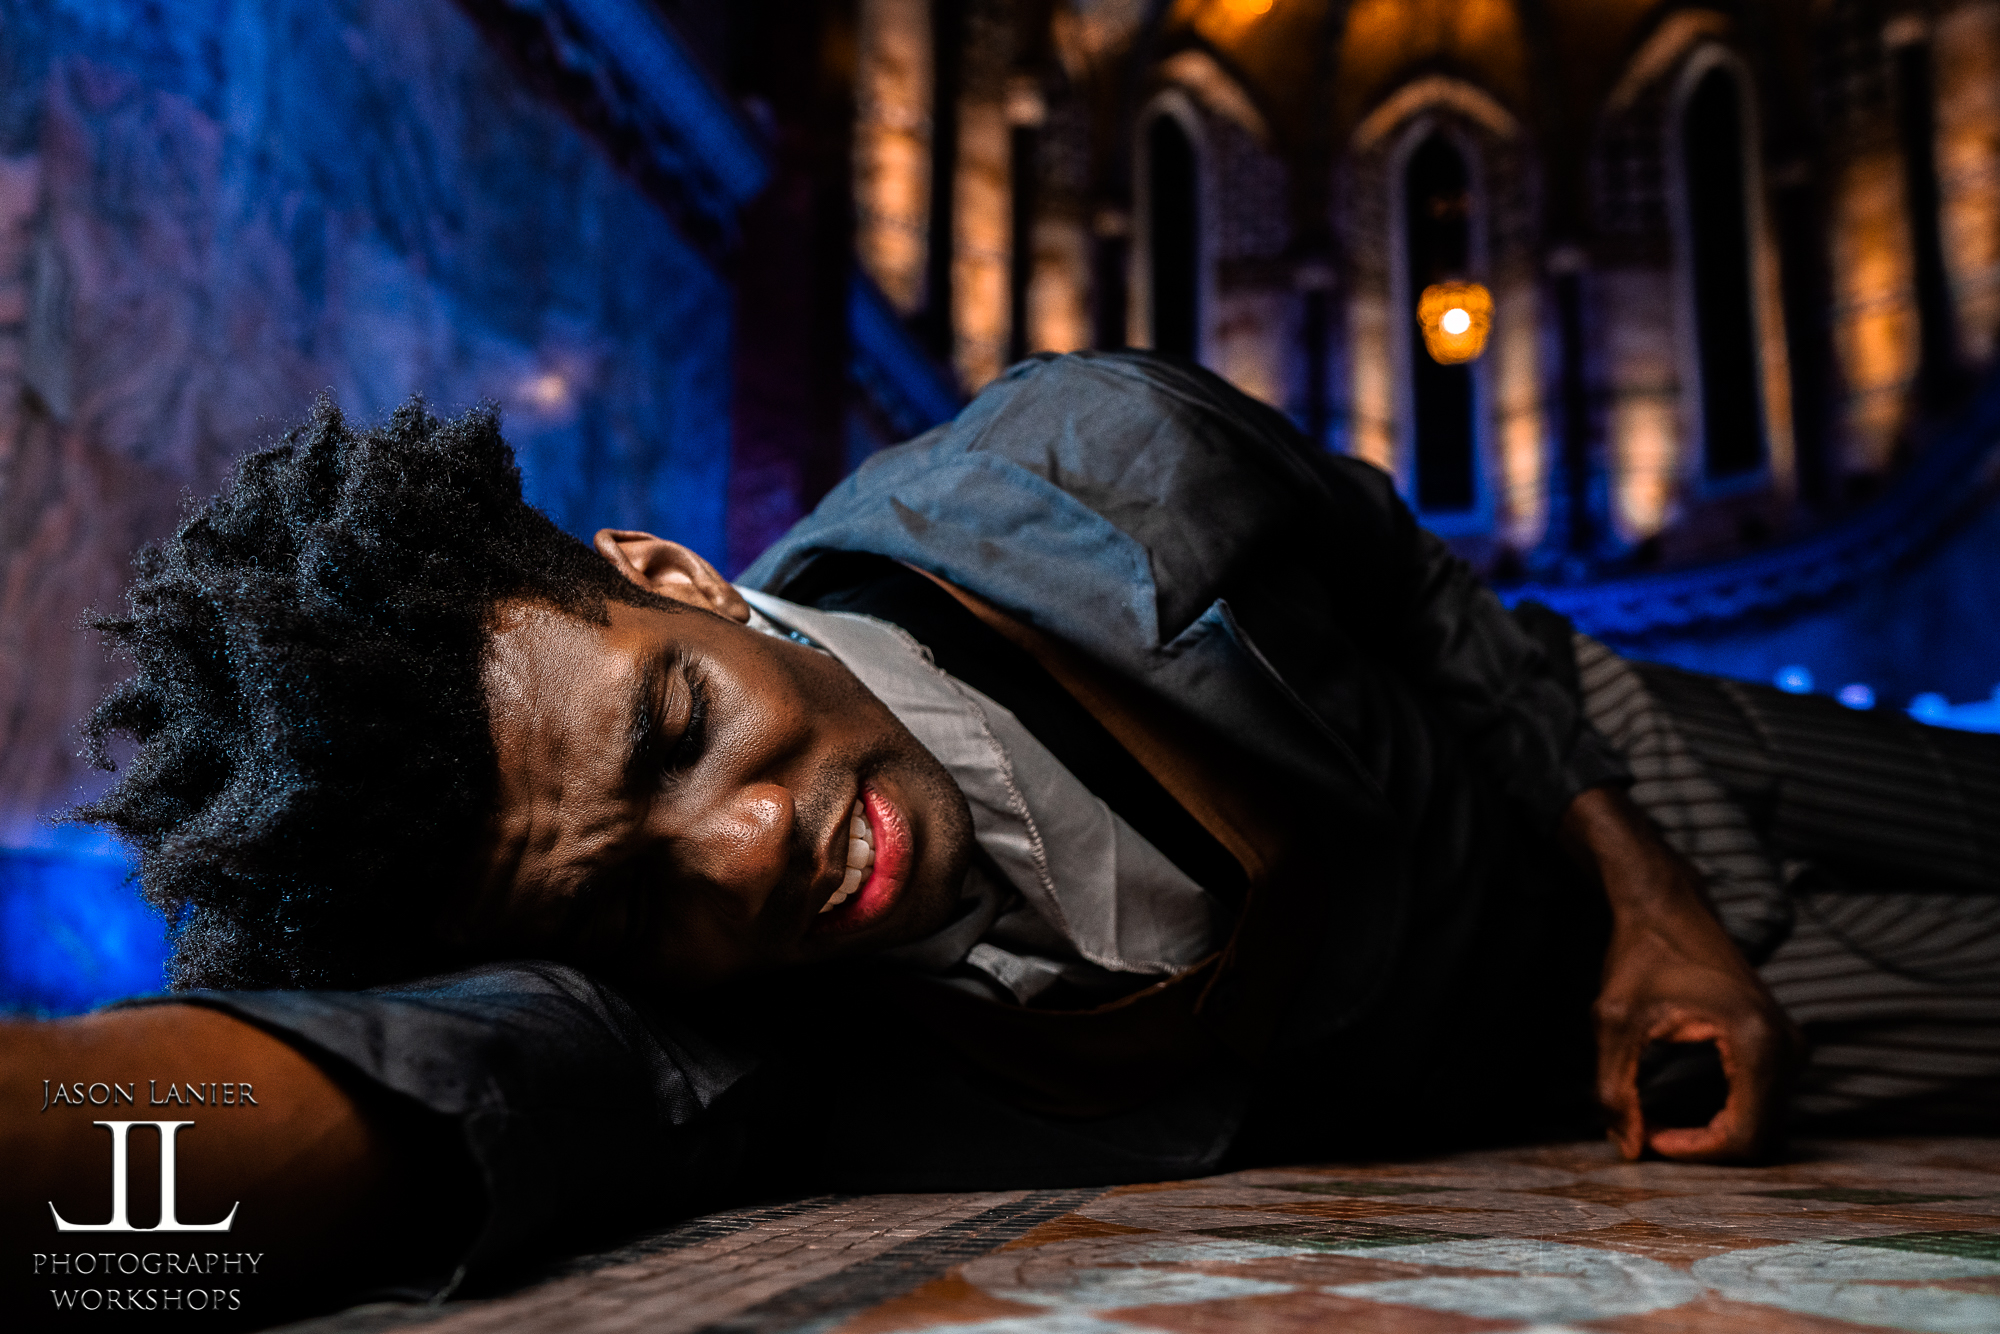
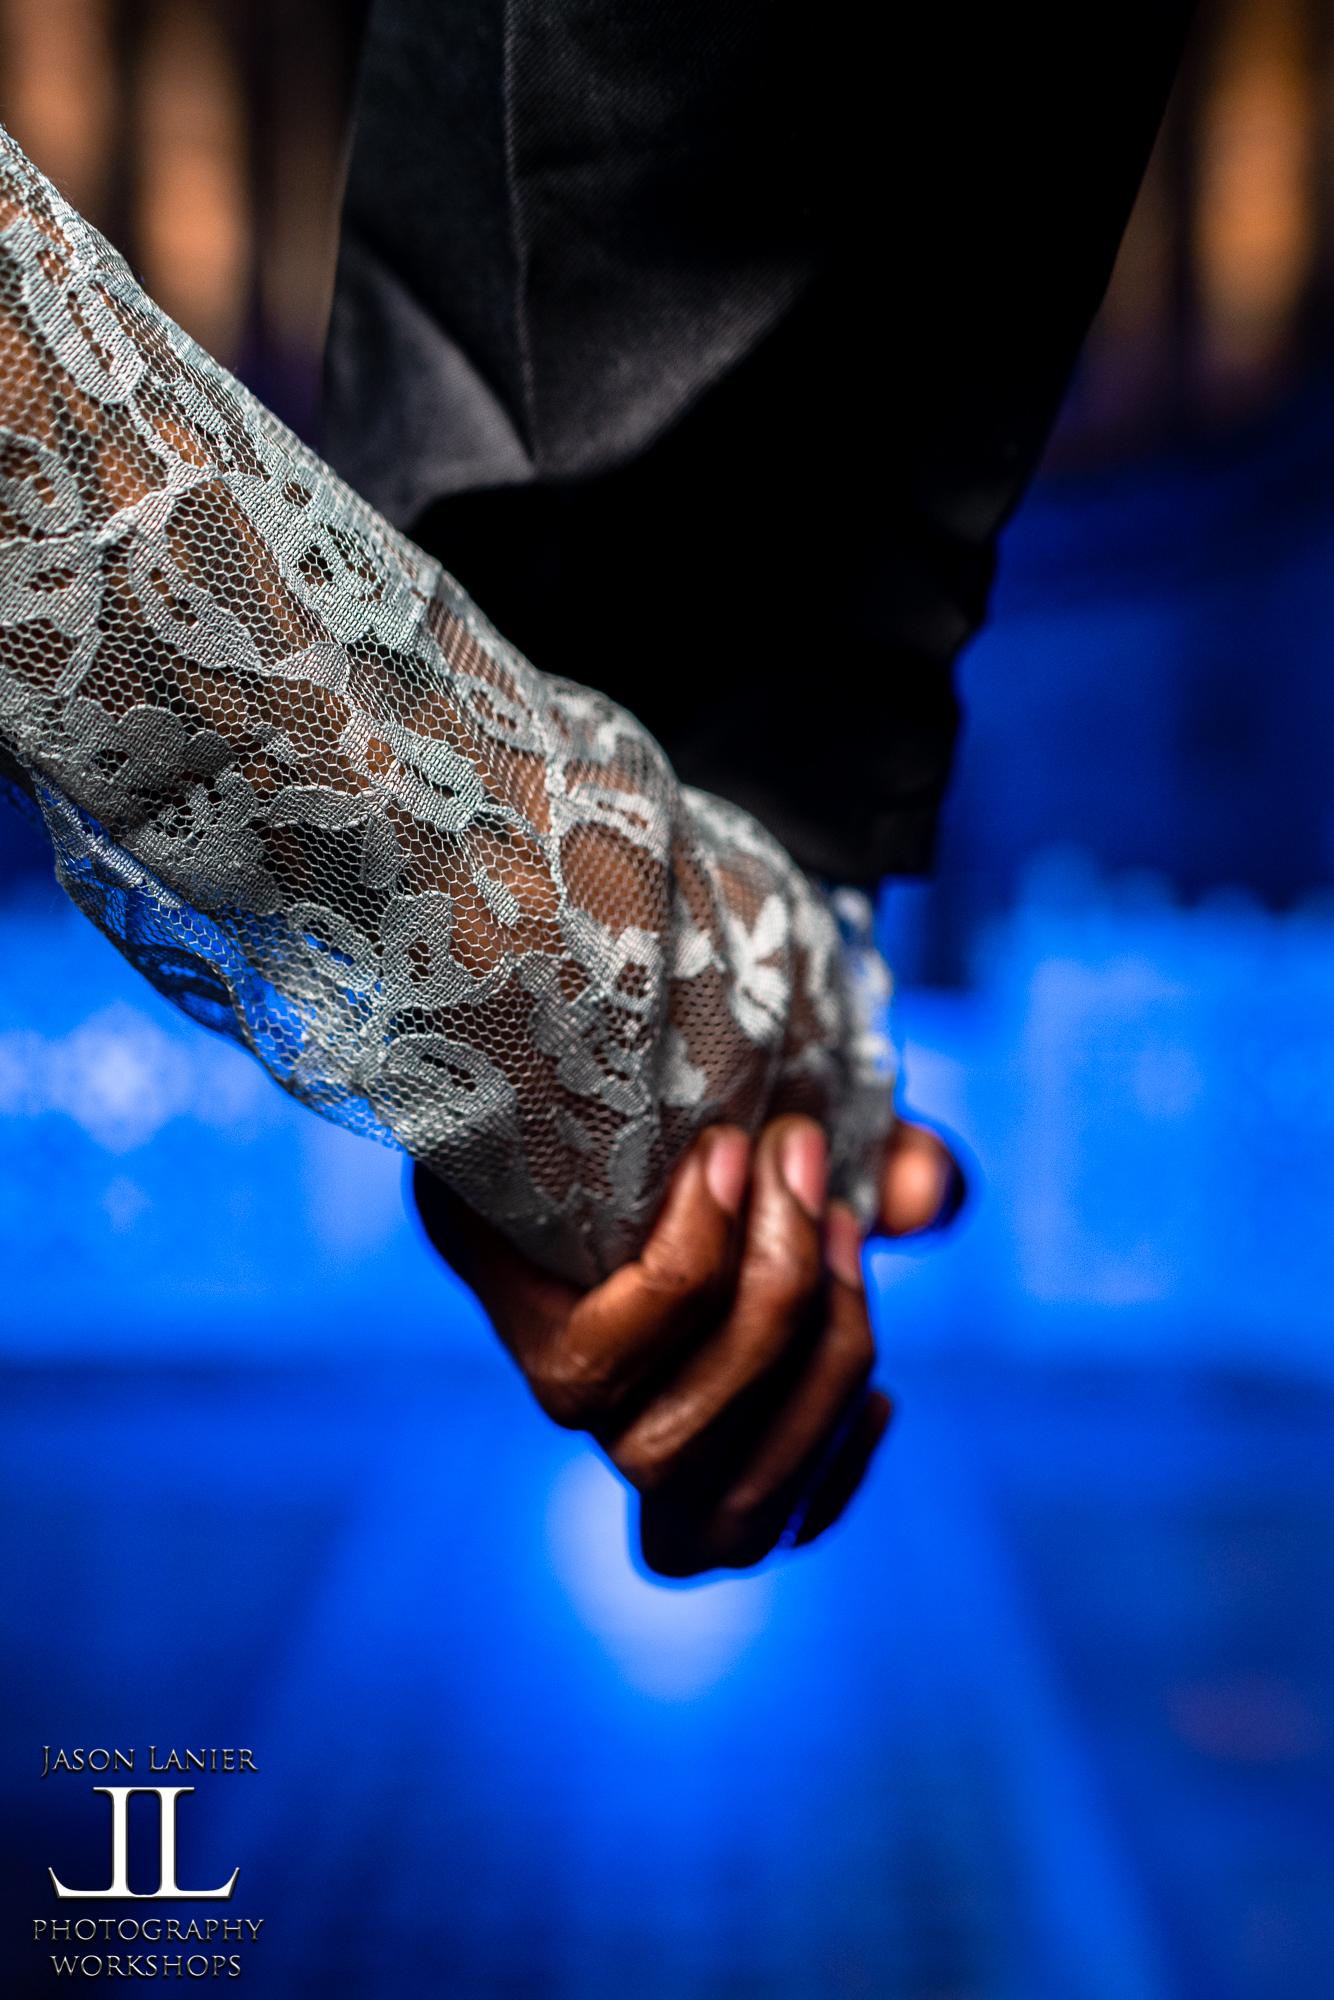
The Motion Blurr teamed based out of London filmed the shoot for me and did a great job. Below are the shots from the shoot. I really wanted to craft this as a story and I believe the shots below show the story unfolding even more than comes across in the video of the shoot.
I can’t thank Emily and Lawrence enough for their hard work in making all of this happen. They both did a terrific job of getting into the characters and going for it.
Below is a list of the gear used in the video:
*Sony 85mm G Master
*Sony 35mm Zeiss
*Westcott Halo- https://www.fjwestcott.com/45-round-halo?acc=1c383cd30b7c298ab50293adfecb7b18
*Westcott Eyelighter- https://www.fjwestcott.com/eyelighter?acc=1c383cd30b7c298ab50293adfecb7b18
ROTOLIGHT GEAR: To receive a 10% discount and FREE shipping on the Rotolights used in this video please visit www.jasonlanier.com/rotolight
In November 2018 I was blessed with the opportunity to work with three amazing brands, two of whom I’m very familiar with…at some very historic venues no less, the Fitzrovia Chapel, Pinewood Studios, and the amazing Chethams Library in Manchester, UK.
This started a few months ago when I received a call and was asked if I’d be able to fit this event into my schedule….and I was like, “How do I say no to this?”
So I got my Assistant Emily with me on a plane to London following our workshops in Richmond, VA and New York City and we took off to the ever amazing United Kingdom.
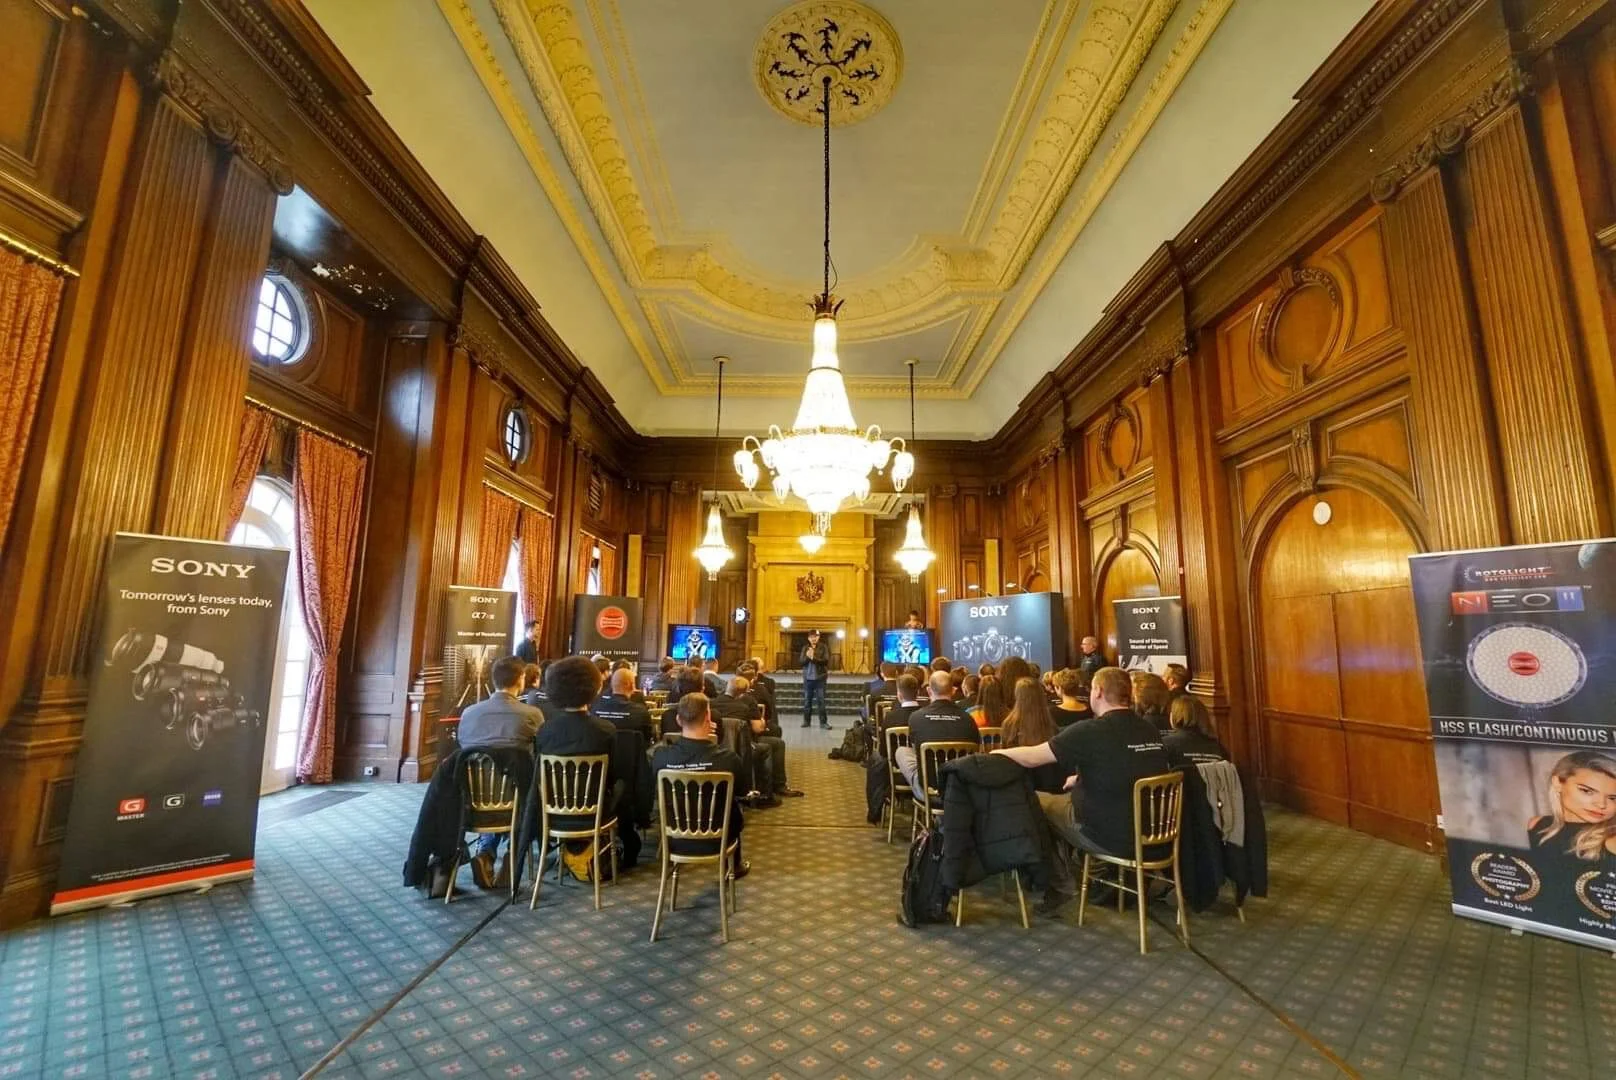
Our first stop was an appearance at the Camera World Live Event where I did a speech for Sony and Rotolight called, WYSIWYG- What You See Is What You Get. I get to do a lot of conventions and events and I love them all…but getting to see so many people for some jam packed events was an honor I’ll never forget. We did have a security guard outside of the event tell me I wasn’t allowed to put my elbows on the couch…but that’s for a later conversation lol.
To check out the second of my two appearances there please click the video below:
Following the appearances at the convention some brave photogs ventured out into the very cold night air of London for a photo walk. We had a beautiful model named Sarah come out for that and we of course had the ever able Emily there as well.
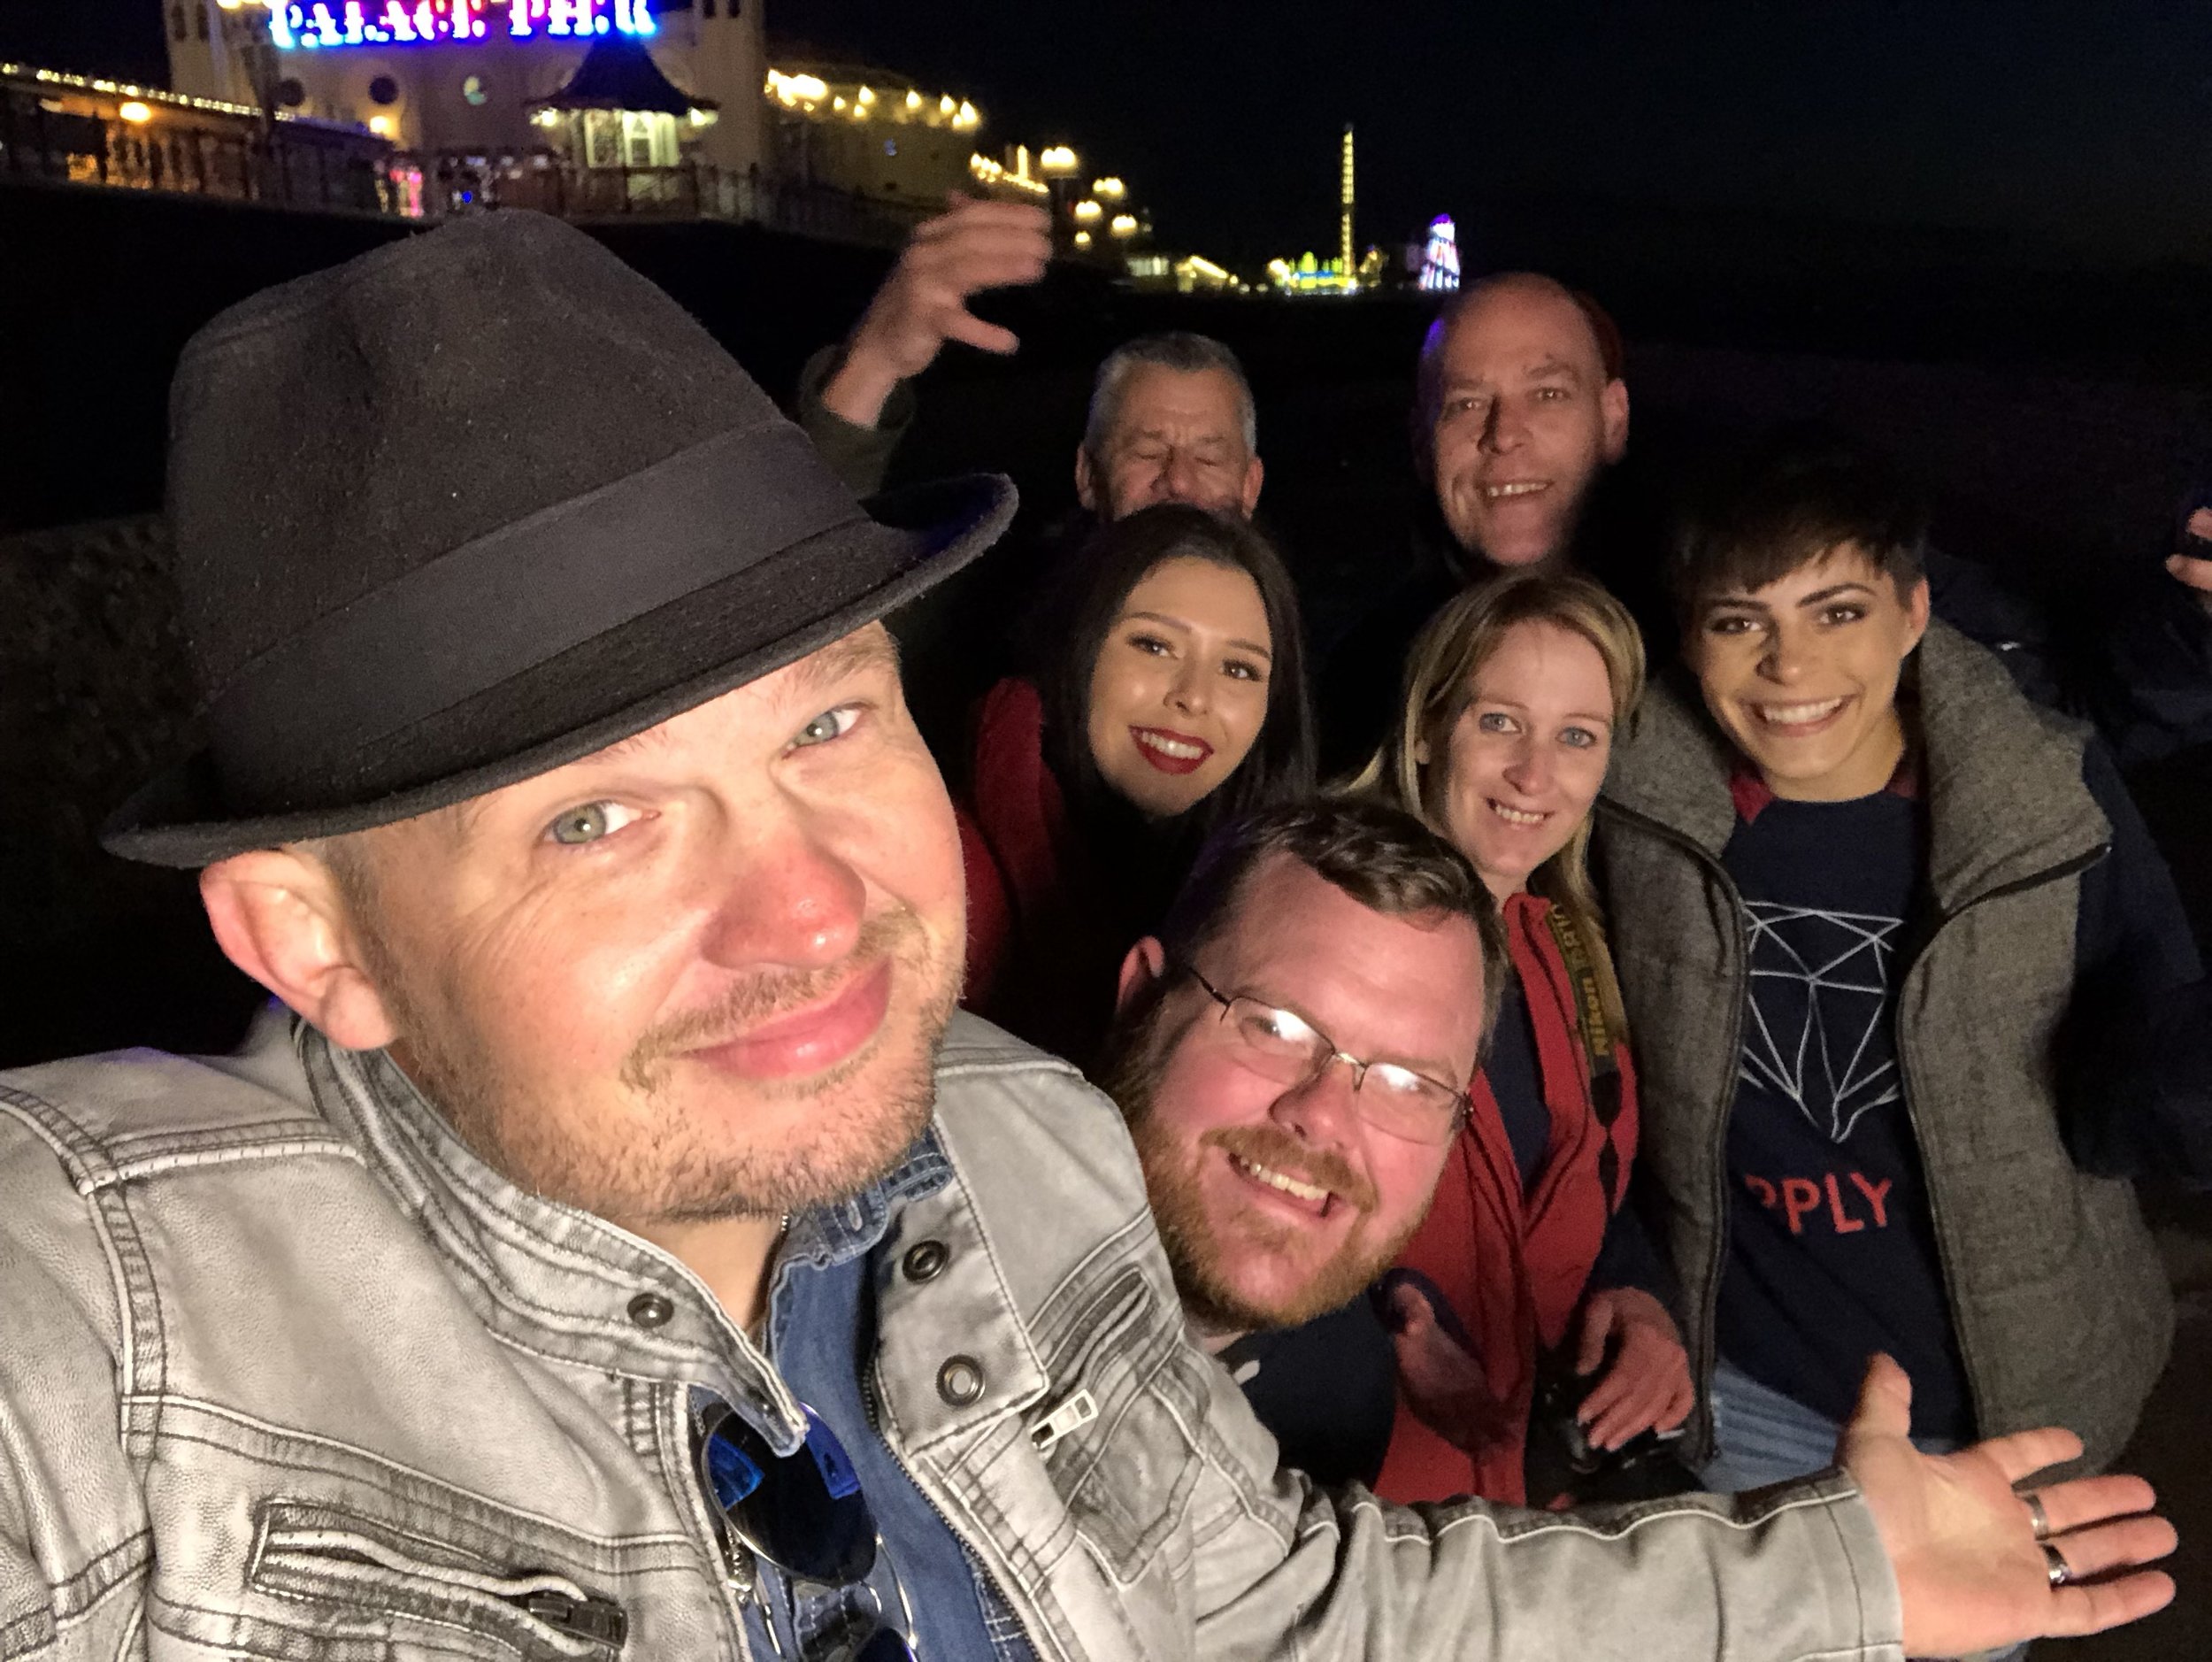
Following this event Emily and I made a quick pit stop down in Brighton for a fun photo walk on the pier that was a ton of fun! This was great as I’d never been to Brighton before. I’d say the toughest thing about this particular trip was the fact that the jet lag STUNK! Man with so many events the jet lag was tough to shake. Emily threw water on me a few times to get me to wake up. Be careful around here if you’re sleepy, she’ll use a defribillator on you! A big thanks to Darren Fellows for coming down to help with this photo walk as well.
Following Brighton Emily and I returned back to London to get ready for our Jack the Ripper Shoot! I have to give a lot of credit to Emily for this shoot. Without her efforts it just wouldn’t have happened. You can check out the shoot and video by clicking below:
That was seriously one of the most fun shoots I’ve ever had the privilege to shoot. But we weren’t done there! Rotolight had contracted me for a commercial shoot at the historic Fitzrovia Chapel that we did just a day later. A videography crew called Motion Blurr was hired to document the event. That video will be coming out soon….but in the meantime check out this image of Emily taken at the shoot! This was done with her and a male model named Lawrence and both of them did just great. It was in a chapel and they did play the part of a married couple so…..officially I’ve shot Emily’s wedding lol.
We ended that shoot and had a tight turnaround because the next morning we were due at the historic Pinewood Studios to give a full days worth of presentations for Sony, Rotolight and Jessops Camera. This was such a fun event where I got to work with so many talented and amazing photographers who were Jessops trainers who came there to learn more about the synergy between Sony cameras and Rotolight LED Lighting. This was a fantastic day to be indoors because the rain and cold were out in full effect that day. Many laughs were shared. And it was such an honor to have so many of the Jessops trainers that were a part of Fedora Nation.
After that it was a travel day from London to Manchester to get ready for our once in a lifetime event where I got to do workshops for Sony, Rotolight and Jessops at the historic Chethams Library. While the team was prepping for the event I was able to grab a few moments on the piano which was so exhilarating for me. Being able to play a grand Yamaha piano at such a historic place was something I’ll never forget, and I’m so grateful that my Assistant Emily was able to capture this moment with her phone:
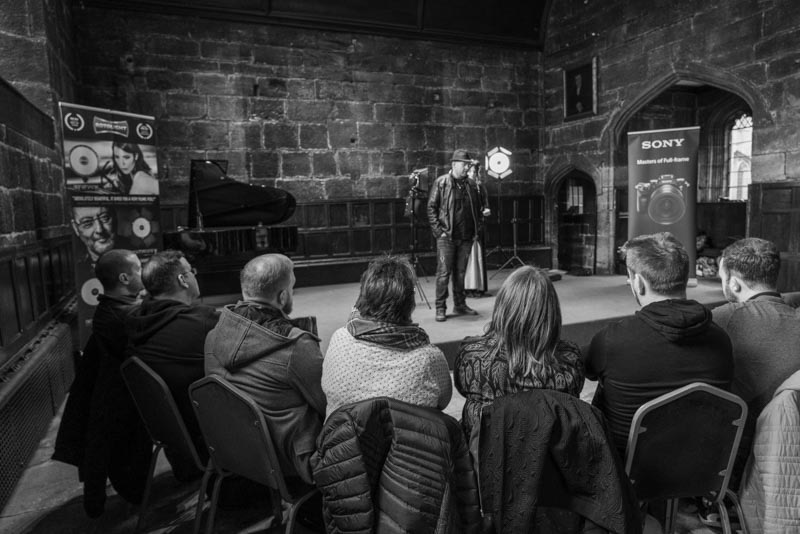
Following that we did an event for two separate groups of photographers who came to learn about Sony and Rotolight, again working with the amazing folks from Jessops. It’s such a pleasure to be able to present for multiple sponsors when the products tie together so well.
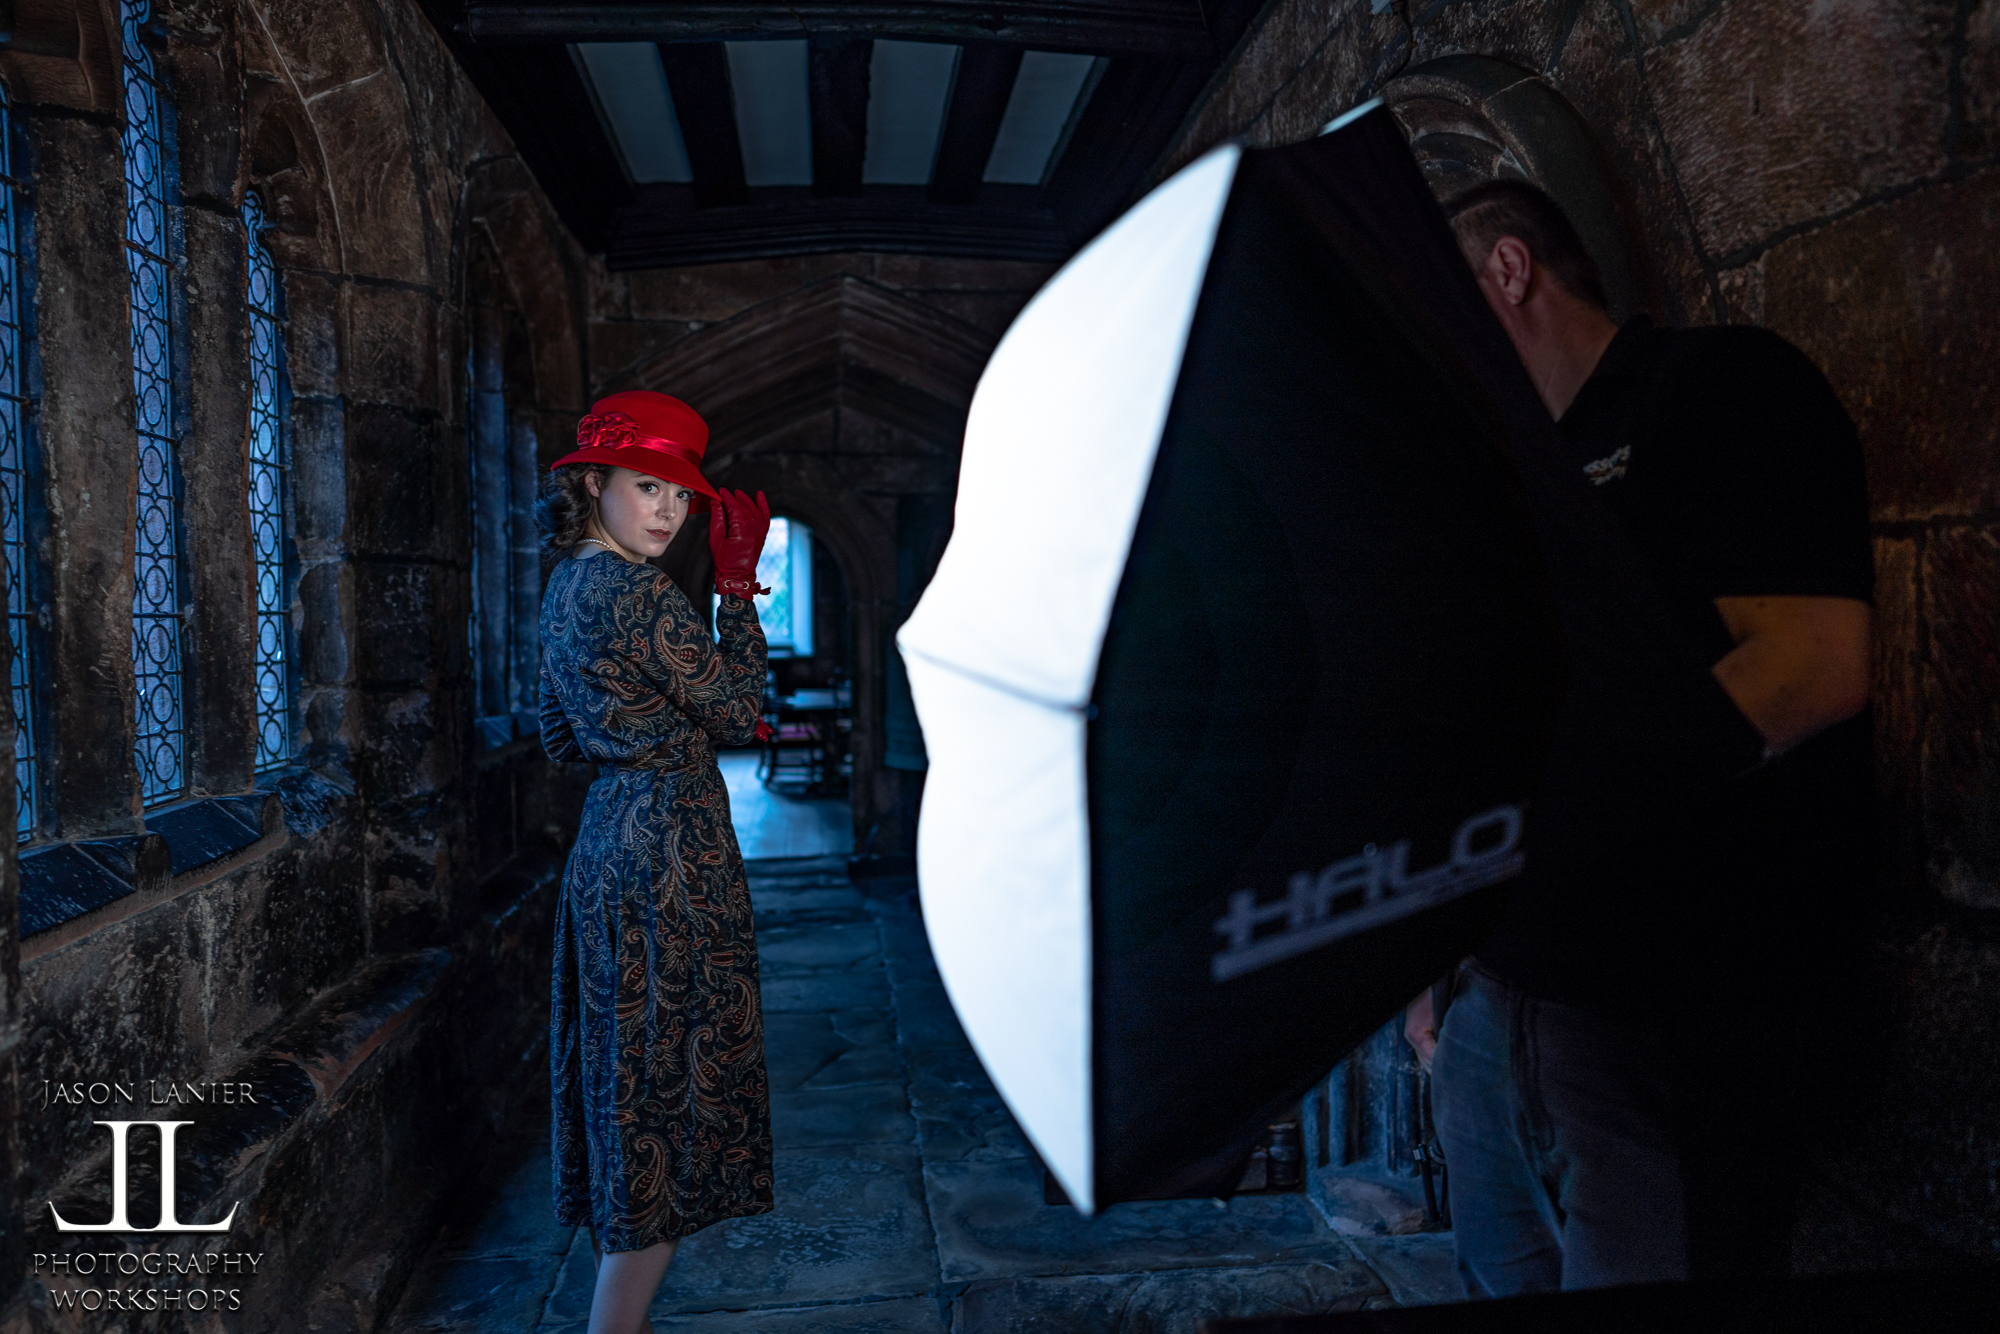
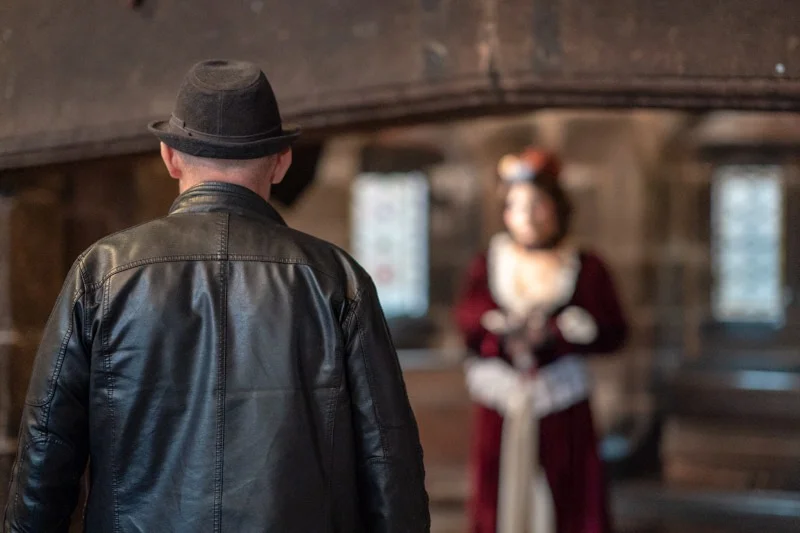
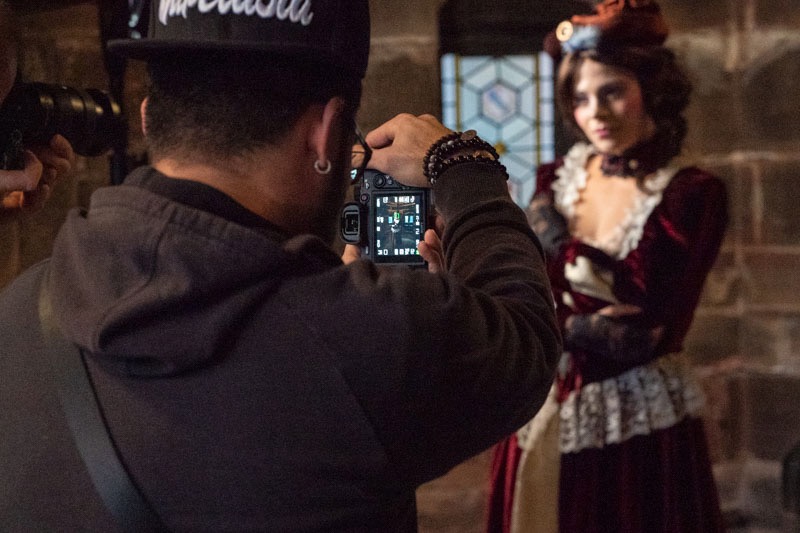
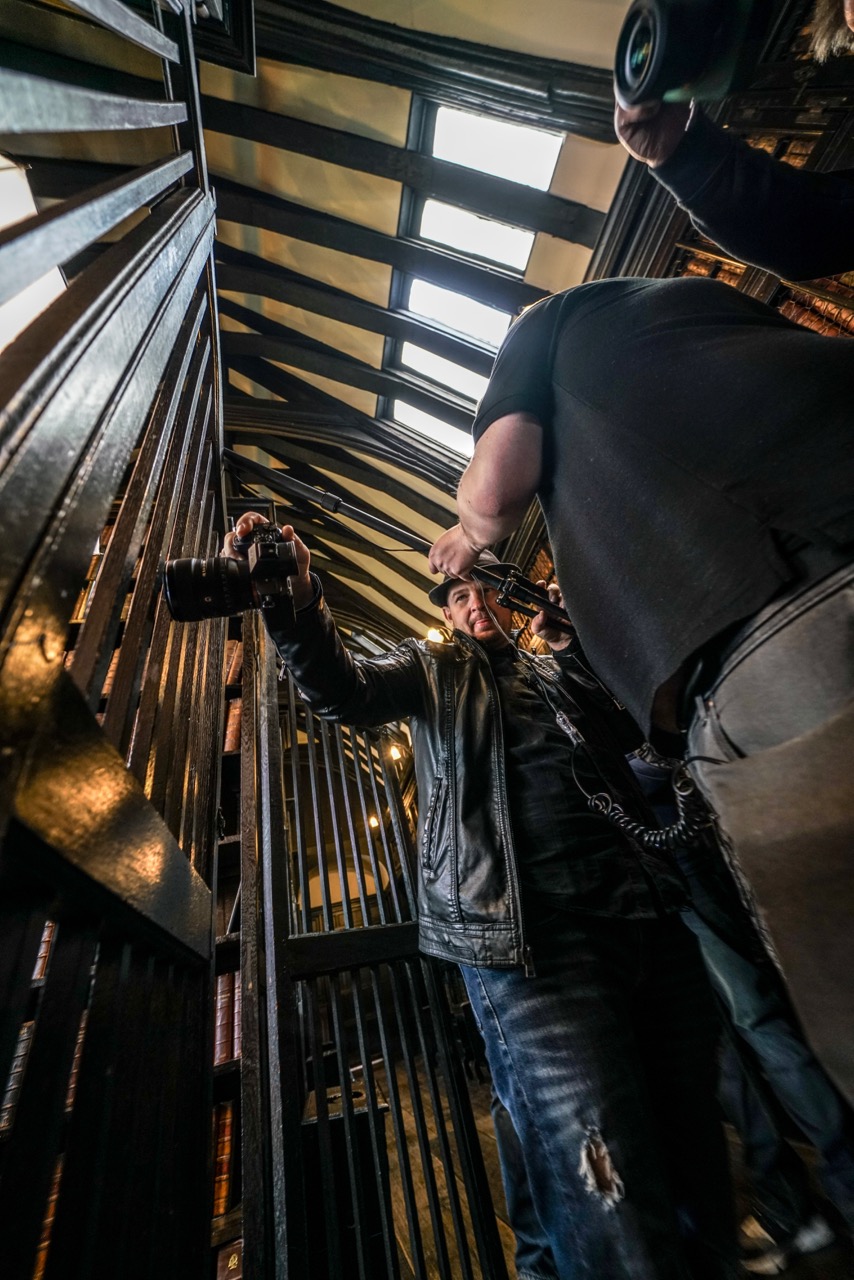
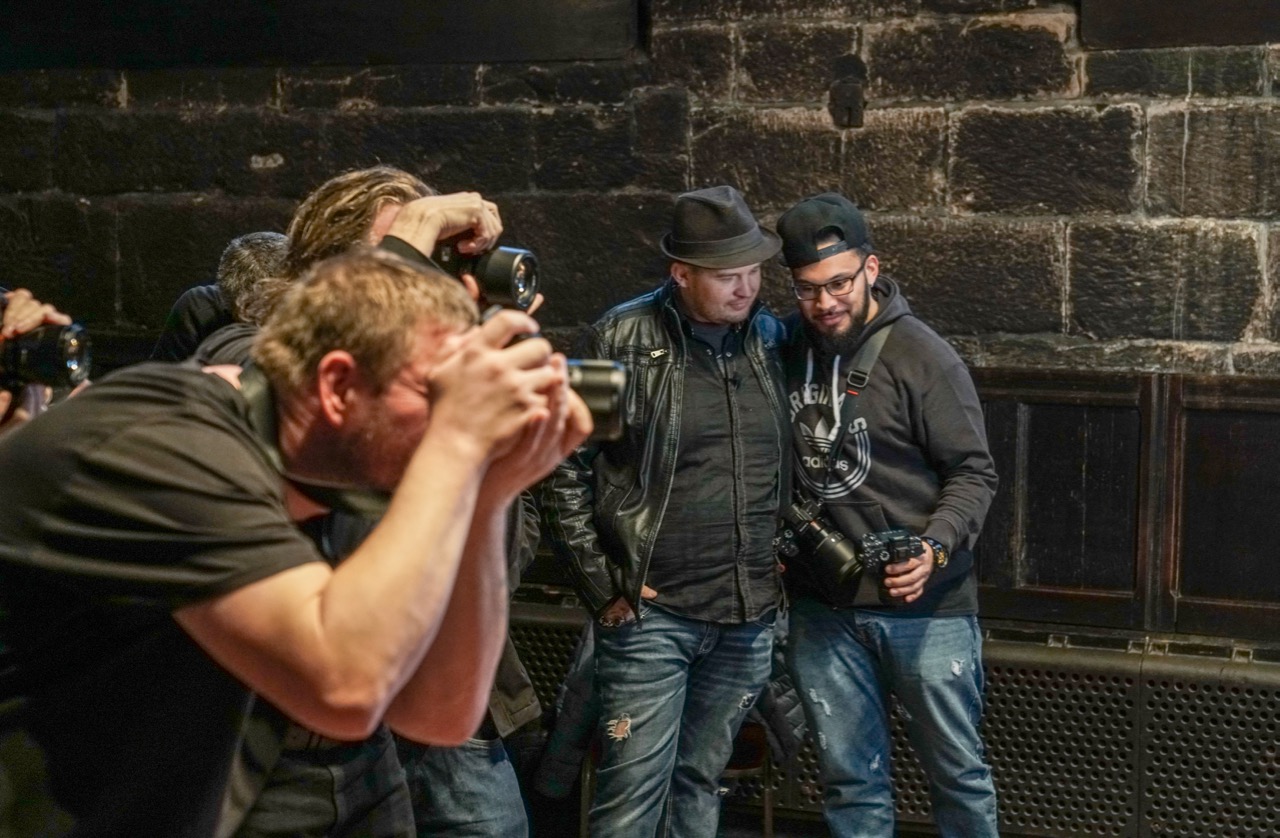
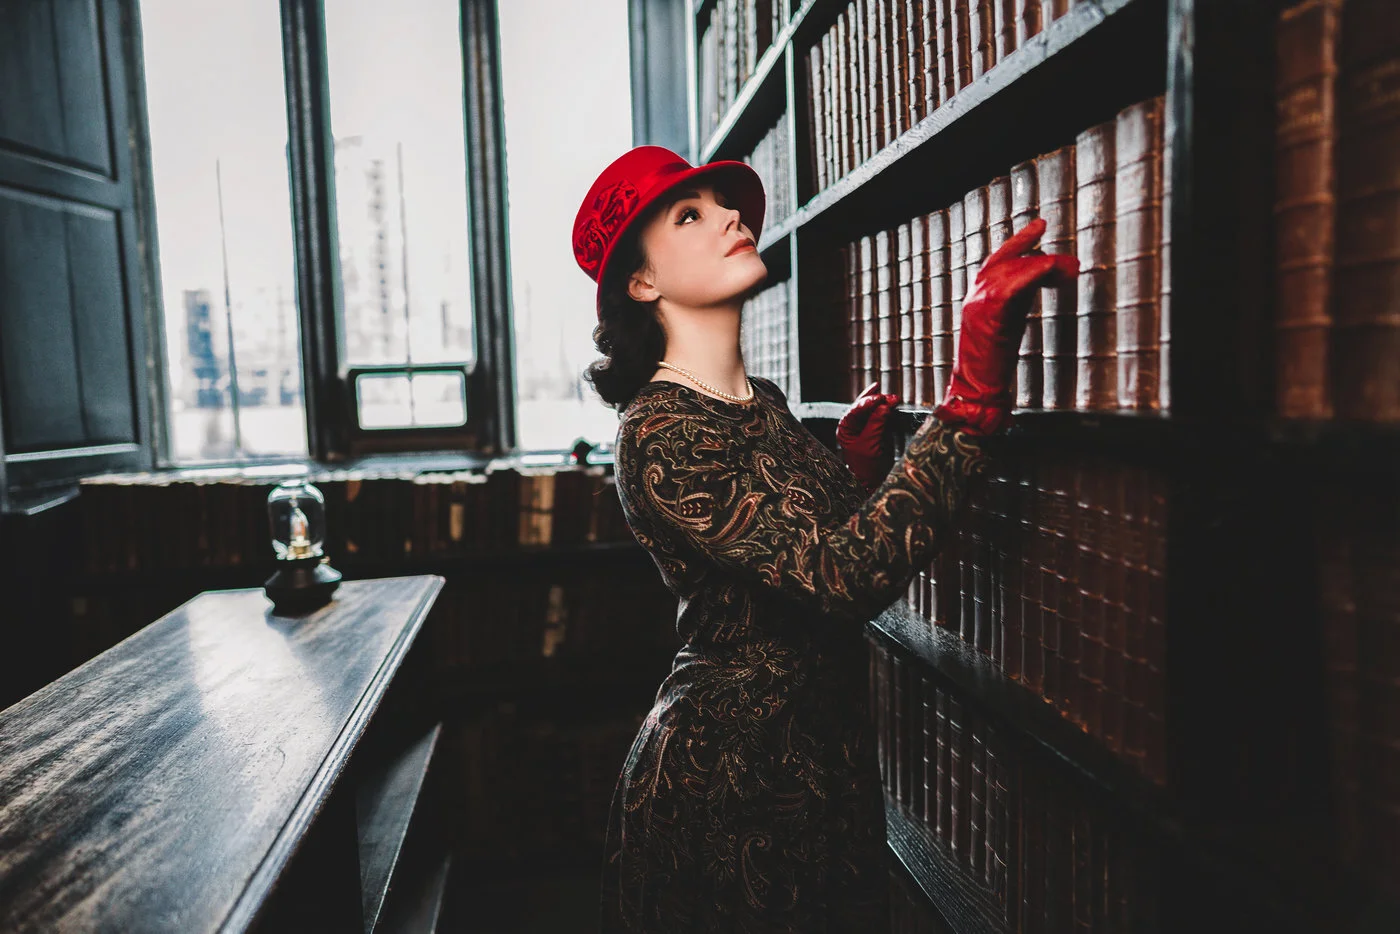
This was a truly historic and fun event to do. I mean, how many photographers get to shoot in a library from the 1600’s that also has had scenes from Harry Potter shot there? Wow, what a blessing! We had some vintage clothing for all of the models. During the breaks between the two sessions I was able to quickly do some private shoots with the new Sony 24mm G Master with both Emily (my amazing muse) and another awesome model named Victoria.
Following the event at Chethams we went out with a few brave souls that were willing to go out into the cold for one last Photo Walk. This was quite a way to end the 2 week trek as we braved not only the cold…but also some drunk dudes, some unruly minors who liked to smoke, and some fans who wanted to say hello. But luckily the group was lively and we had a phenomenal time.
I can’t thank everyone enough for making this all possible. Emily was a tremendous help on this trip that was the longest of my career (because it was also tacked onto stops in New York City and Richmond before we even came to the UK). It wouldn’t have been nearly as successful as it was without her.
A big thanks to my sponsors Sony, Rotolight and Jessops. Sponsors can be such a tremendous support and help to open up doors. A super big thanks to my man Rod Gammons. He’s a real friend. Mark Baber, you know I love you! And last but not least my family at home. I couldn’t do it without the support of my wife and boys. I love you guys so much!!
Here are the production BTS shots from my time at Chethams Library. Thanks to Rotolight and Sony for taking these. Also stay on the lookout for more videos to come from these events.
I can’t wait to work with all of them again. Next up is speaking for Rotolight and Sony at the Profusion Convention in Canada!
Thanks for reading…:)
Jason