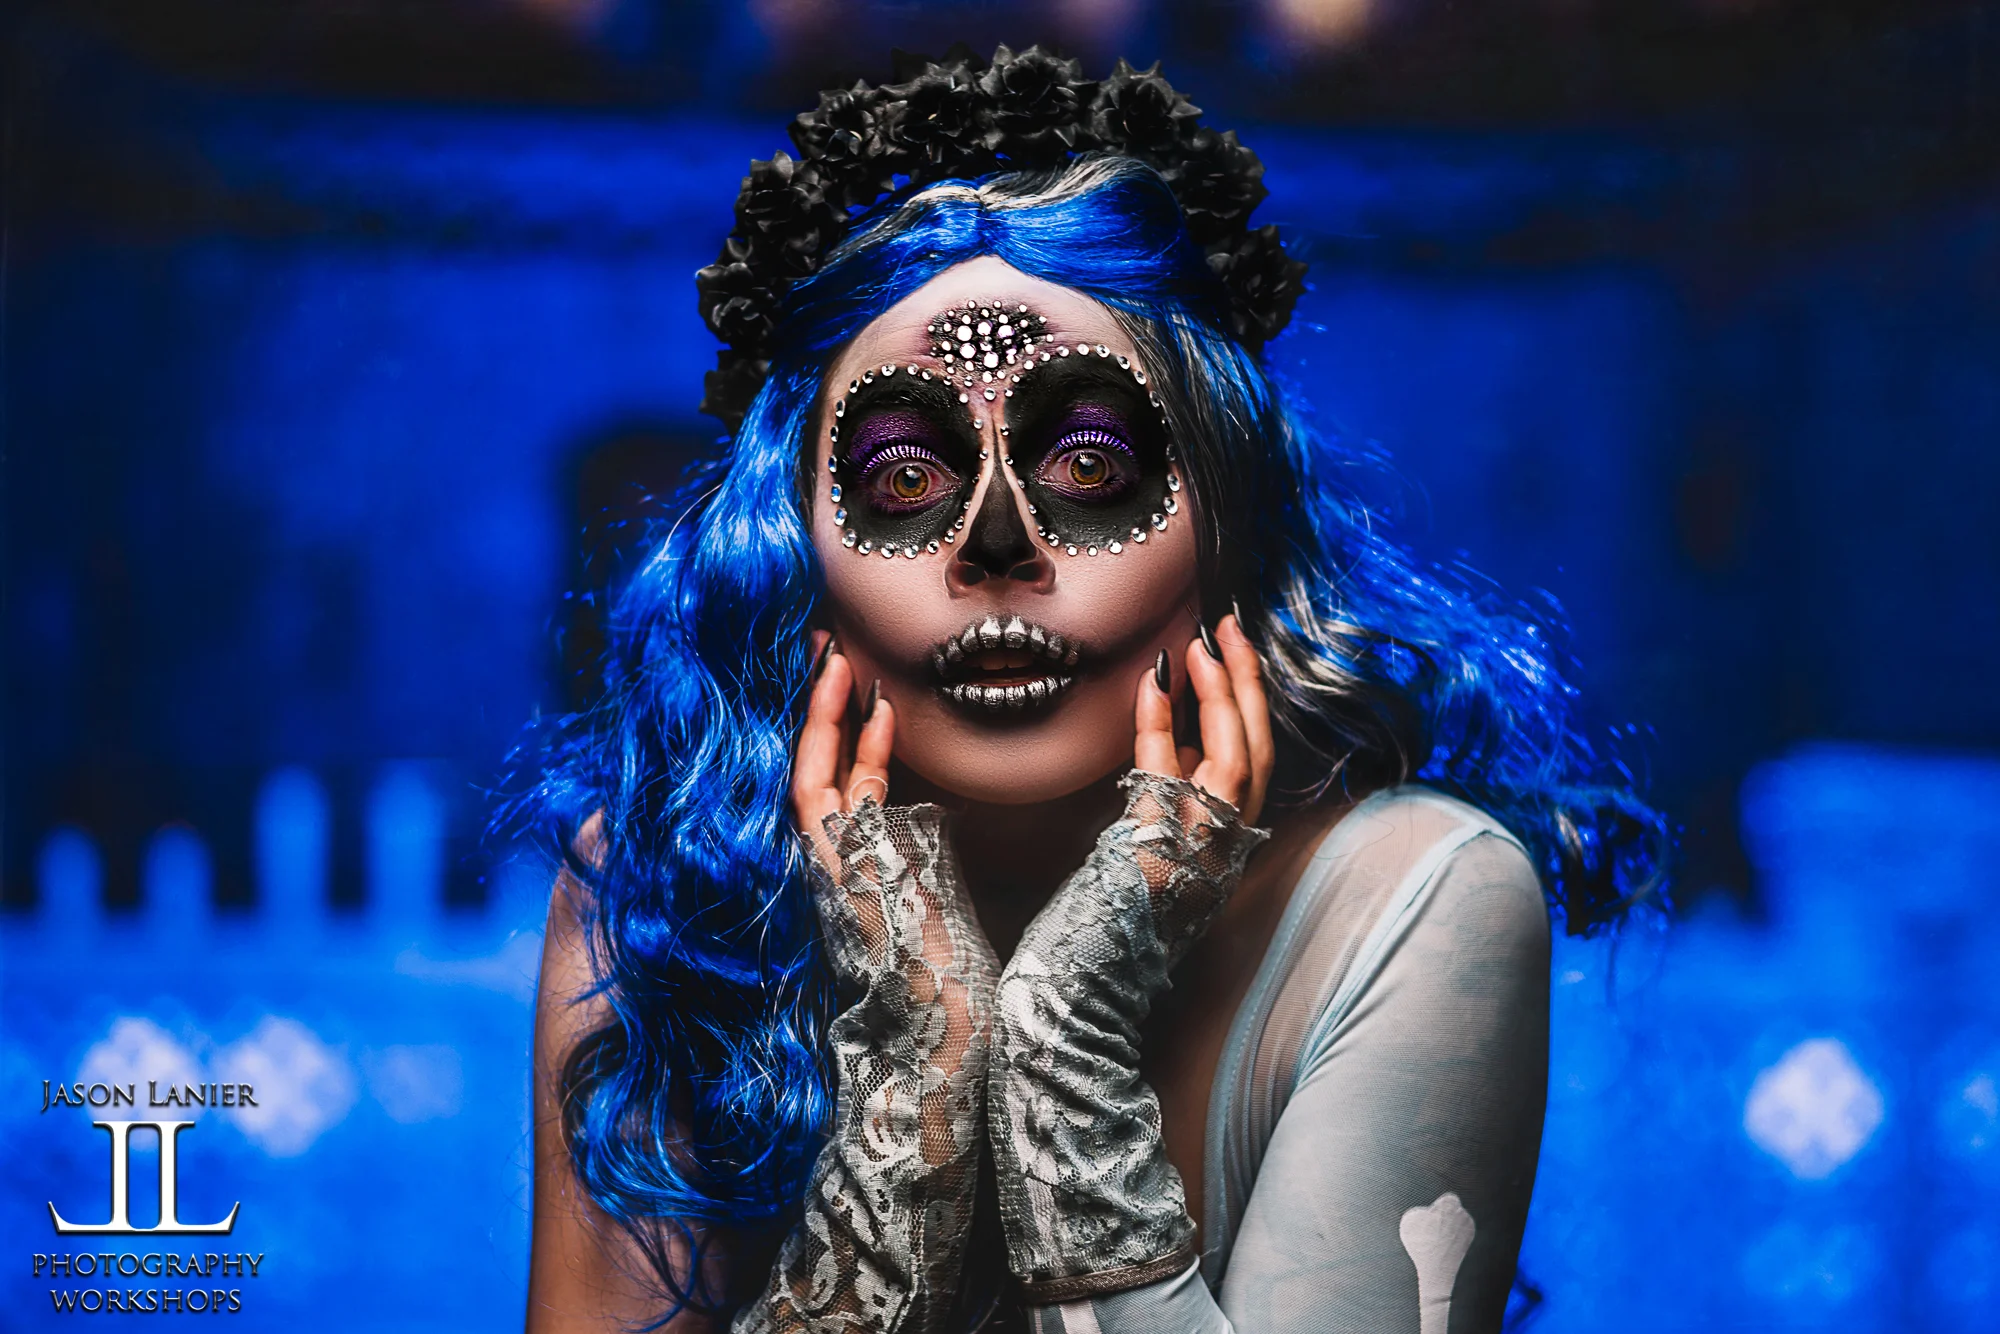
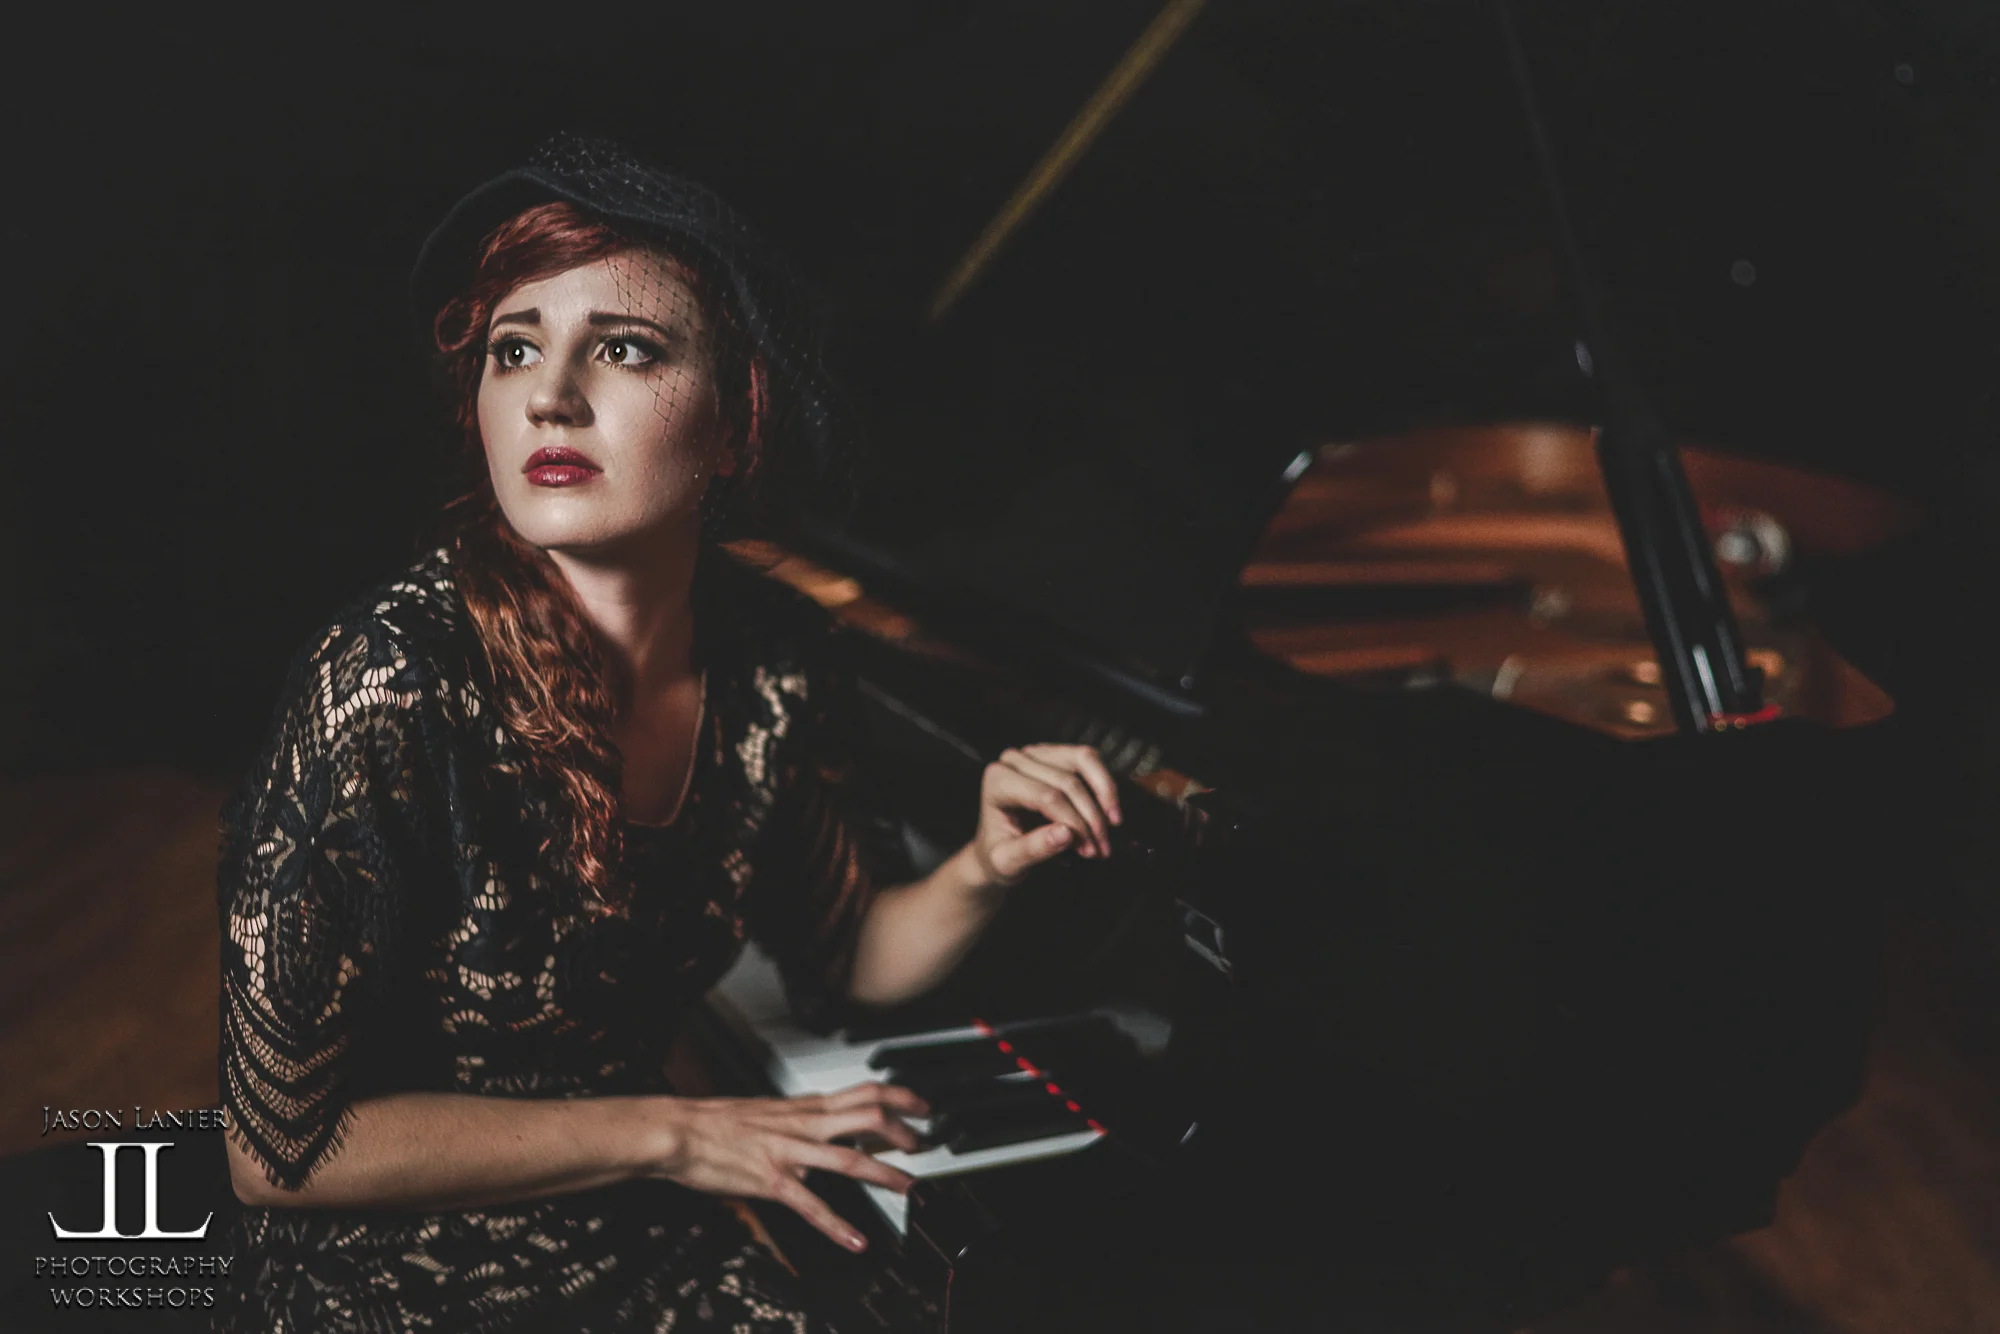
Viewing entries tagged
rotolight aeos

Huge Savings!  Rotolight 2 Aeos Bundle Kit (50% Off)

Comment

Huge Savings! Rotolight 2 Aeos Bundle Kit (50% Off)

If you haven’t heard, Rotolight is having a HUGE savings on their 2 Aeos Light Bundle Kit. Below, Jason Lanier (@jasonlanierphotography) and Emily Rinaldo (@em.explores) have provided a demonstration video below to show you what you can do with this extremely versatile kit. In an abandoned farmhouse in Jacumba, California Jason used two Aeoses to light Emily. One light was a key light, the other was placed on the ground, held upright by the battery pack (that’s included in the kit) to illuminate the hay and accent the bottom half of the scene. The lights used were unmodified in LED mode during the day. They created extremely soft, stunning, and timeless portraits.

For more information about this and other bundles offered by Rotolight and Jason Lanier please visit: www.rotolight.com/jasonoffers To take advantage of the particular gear used in this video as part of the bundle please visit: https://www.rotolight.com/product/aeo... Promo Code: JLAEOS-02

Wrap-up: In this video, Jason uses two Rotolight Aeoses in LED mode. One light used as a key light and the other used as accent lighting from down below. This is also one of the first shoots ever where Jason uses the Sony A99ii, Sony's premier DSLT camera.

Lenses used for the shoot include the Sony Zeiss 24mm f/2, the Minolta 50mm f/1.7 and the Sony Zeiss 85mm f/1.4.

**Links to Gear
*Sony A99ii- https://bhpho.to/3goMUYH *
Sony Zeiss Distagon 24mm- https://bhpho.to/3gmCetC
*Minolta 50mm f/1.7- not currently sold
*Sony Zeiss Planar 85mm- https://bhpho.to/38sBcJV

We thank you for watching and invite you to stick around and watch a few more videos while you're here! Please let us know what you think in the comment section below as we would love to hear from you!

Thanks,
Jason Lanier Photography

Comment

Canon Project Part #3- Blending and Balancing Artificial and Ambient Light Using the EOS R by Jason Lanier

2 Comments

Canon Project Part #3- Blending and Balancing Artificial and Ambient Light Using the EOS R by Jason Lanier

Welcome to the Canon Project Part #3- in this episode we look at how the Canon EOS R performs with LED lighting. This all takes place at a workshop I taught for the Georgia Professional Photographers of America at the North Georgia Tech College in March 2019.

This shoot represented the demonstration portion of the workshop where I was helping the attendees understand how to blend and balance artificial lighting with the available ambient lighting to create results that mimic what Hollywood does with their lighting set ups.

So what does it mean to blend and balance light to match ambient settings? This is a subject that some photographers struggle a little bit to understand and I’m hoping that the blog article and especially the video help to explain it for people who are eager to learn.

In essence this is the process of bringing down the power of your artificial lighting and pulling up the exposure in your camera to make the two exposure levels blend and balance together. This usually means increasing your ISO while turning down the power on your flash or LED light. To see the demonstration of this please check out the video to see how it’s done.

Below are images taken with the Rotolight Aeos using the Canon EOS R with the

RF 50mm f/1.2 and RF 28-70mm f/2 lenses.

Below are images taken with the Rotolight Neo 2 using the Canon EOS R with the RF 50mm f/1.2 lens.

So how did the Canon perform in this shoot? It did really well. I did most of the shoot using the Canon RF 50mm f/1.2 and a few using the RF 28-70mm f/2. I’m really impressed with the sharpness of these lenses and as to be expected the camera performed great with the Rotolight system as all the mirrorless cameras do. Can you use the Rotolights with non mirroress systems? Of course you can, but they perform the best with mirrorless cameras thanks to WYSIWYG (What you see is what you get).

I really liked the colors coming out of the Canon EOS R as I have with all of the shoots we have coming out. So drop a comment down below and let me know what you think!

To see the entire Canon Project videos please visit:

www.jasonlanier.com/canonproject

**LINKS TO GEAR**

*Canon EOS R- https://bhpho.to/2FPwh7P

*Canon RF 50mm f/1.2- https://bhpho.to/2FUvfr5

*Canon RF 28-70mm f/2- https://bhpho.to/2FCH9pI

**ROTOLIGHT PRODUCTS**

During the month of April 2019 there is a HUGE sale on the Rotolight Neo 2 and the Rotolight Aeos. If you visit www.rotolight.com/jasonoffers you can get significant savings off of these two lights plus free batteries and free shipping.

If you are viewing this AFTER April 2019 you can still receive a discount on all rotolight products visiting www.rotolight.com and after selecting your products, use the promo code: JASONLANIER10 to get 10% off all products and accessories as well as free shipping to most countries around the world.

I really hope this video helps photographers out there. Thank you in advance for watching and thanks for being here!

If you haven't already make sure to check out Parts 1 and 2 of the Canon project where we review the Canon EOS R in natural light and strobe shooting scenarios.


Jason

2 Comments

Making it RAIN!  Epic High Fashion Portraits in the Water using Off Camera Flash- 7 Foot Parabolic by Jason Lanier

2 Comments

Making it RAIN! Epic High Fashion Portraits in the Water using Off Camera Flash- 7 Foot Parabolic by Jason Lanier

Any photographer who’s been shooting long enough outdoors has had his or her bouts of shooting in the rain. While it can certainly be challenging, it can also be very rewarding to give you some results that are different than what you create on a regular basis.

Well, there are some studios out there that actually offer rain INSIDE of a studio setting. What they do is set up pipes that pass water through with holes in them that drop water down into a studio setting that has the proper drainage and water collection set up to make it possible to shoot with rain indoors.

I recently did a shoot with my muse Emily (you can find her on IG at @em.explores), at FD Photo Studio in Los Angeles. The obvious benefit to shooting indoors vs. outdoors is the fact that it allows me to set up lighting in ways that would be very difficult or impossible to set up under normal rainy conditions.

Here are some of the pics from the shoot:


**Links to Gear:

*Rotolight Products- to get a 10% discount and FREE Shipping on any Rotolight products please visit: www.jasonlanier.com/rotolight to get the promo code now!

*Sony A7Riii- https://bhpho.to/2zu1lJu

*Sony Zeiss 35mm- https://bhpho.to/2IDrv28

*Sony Zeiss 50mm- https://bhpho.to/2FmytlK

*Matthews Scrim- https://bhpho.to/2IE2HH9

*Westcott 7 Foot Parabolic- https://bhpho.to/2ICi3vP

This was a very fun shoot done at FD Photo Studio in Los Angeles. This was shot using the Sony A7Riii with both the 35mm and 50mm Zeiss lenses.

Lighting was set up using the Rotolight Aeos inside of a 7 foot parablic umbrella with a Rotolight Anova Pro 2 used as a kicker light and another Rotolight Aeos used as a fill light.

The model is the beautiful Emily Rinaldo who can be followed by going to Instagram and following her @em.explores.

We hope you enjoy the shoot and invite you to stick around and watch a few more videos while you're here. Don't forget to click on SUBSCRIBE and NOTIFICATIONS so you're updated every time a new video is released!

Thanks,

Jason

2 Comments

Creative Lighting using a Micro Four Thirds Camera- the Olympus OMD Mark 2 by Jason Lanier

1 Comment

Creative Lighting using a Micro Four Thirds Camera- the Olympus OMD Mark 2 by Jason Lanier

Back in November 2017, the kind folks over at Olympus sent me a test kit for the EM-1, Mark 2, which is the OMD Mark ii. I was excited to see what it could do particularly because of it’s weather proofing body specs.

Well, like it can many times, life and career got busy. This little micro four thirds camera sat in my office for over a year. The people over at Olympus were more than patient and just urged me to give it a try when I found the time to do so.

**To receive 10% off any Rotolight product and get FREE shipping please visit www.rotolight.com and enter the promo code: jasonlanier10

Fast forward to the end of 2018 when the mirrorless marketplace was changed by Nikon, Canon, and Panasonic entering the full frame mirrorless sector.

These new cameras ushered in a renewed sense in me to try out some different mirrorless cameras. As someone who believes in the future of mirrorless I had devoted the past 5 years to Sony, the leader in the mirrorless game.

But, with these new cameras coming out, it made me think, why not try all of them? First I tried the new Nikon Z7, and then when preparing for a number of shoots in Los Angeles, I saw the Olympus bag sitting in the corner of my showroom.

I immediately felt bad for the gear feeling like I had neglected it for nearly a year and a half. So, on a whim, I picked it up and decided to give it a go at my studio shoots in lieu of my Sony gear. I still took my Sony gear in case I was unhappy with the Olympus, but I felt it was high time to see what this camera could do.

So my model Emily and I went down to FD Photo Studio in Los Angeles to do a number of shoots. We first planned on doing just 1 shoot with the Olympus, but it turned into a complete week of shooting with that little guy as I really put it through it’s paces.

This blog post isn’t a complete review on the camera but rather a post on just the creative lighting shoot I did with it. Why? Well, because most people (myself included) don’t usually associated micro four thirds cameras with shooting in lower lighting conditions.

Using the Rotolight Lighting system I set up the Anova Pro 2 as my key light, another Anova Pro 2 as my rim and accent light on the back wall, and a Neo 2 as a rim/accent light on my model Emily, placed directly behind her.

If you watch the video you’ll see the progression of the shoot as I share production shots showing how things were set up and how we ended up with the final results that you can see in the shots below:

All of these images were taken with the Olympus 25mm f/1.2 lens shot wide open at f/1.2. The lens actually performed really well and as always, the LED lighting by Rotolight was a perfect fit for the mirrorless system.

I fired all 3 lights using the strobe mode instead of continuous LED so I could get double the power output out of the lights.

To see the complete set up and shoot please make sure to click on the video to see how it all went down. I had a great time shooting with the camera and can’t wait to share more shoots with all of you.

For more information about my workshops and what we do please visit www.jasonlanier.com/register today! Don’t forget to click on SUBSCRIBE AND NOTIFICATIONS on my Youtube Channel to get updated every time a new video is released.

Thanks!

Jason

1 Comment

Shooting the Corpse Bride- a Cinematic Story Telling Shoot at the Fitzrovia Chapel in London by Jason Lanier

7 Comments

Shooting the Corpse Bride- a Cinematic Story Telling Shoot at the Fitzrovia Chapel in London by Jason Lanier

On Halloween 2018 I had the opportunity to do a very special shoot with the Rotolight team at the Fitzrovia Chapel in London, UK. It’s always pretty surreal getting to visit and shoot in some of these exotic locations and we wanted to do something really fun for Halloween. Click below to watch the video of this shoot!

My model Emily and I arrived at the chapel that’s tucked away in the center of London. This is an old chapel surrounded by big modern buildings and can’t be seen from the street. You have to navigate the CRAZY traffic in London (I mean I really HATE London traffic), park in one of the crazy parking lots that charge $60 for a couple of hours and THEN you drag your stuff all the way to the shooting location.

SO, after doing all of that, you certainly hope that the location is WORTH it. Was it?

IMG_5325.JPG

YES.

TOTALLY WORTH IT.

So I got Emily settled into the chair for hair and make up where she started the transformation into the Corpse Bride with her Corpse Groom Lawrence waiting for her:

IMG_5322.JPG

The biggest challenge when first walking into the church was trying to figure out how to take the ambient lighting down as it was very warm and convert it into the kind of cold blue tones that you’d want for a corpse bride (day of the dead) kind of shoot. So we killed all of the lighting in there and started lighting it up with blue lighting from all of the lights from the Rotolight Ecosystem. In this shoot we used the Rotolight Anova Pro 2, Aeos, and the Neo 2.

The Motion Blurr teamed based out of London filmed the shoot for me and did a great job. Below are the shots from the shoot. I really wanted to craft this as a story and I believe the shots below show the story unfolding even more than comes across in the video of the shoot.

I can’t thank Emily and Lawrence enough for their hard work in making all of this happen. They both did a terrific job of getting into the characters and going for it.

Below is a list of the gear used in the video:

*Sony 85mm G Master

*Sony 35mm Zeiss

*Westcott Halo- https://www.fjwestcott.com/45-round-halo?acc=1c383cd30b7c298ab50293adfecb7b18

*Westcott Eyelighter- https://www.fjwestcott.com/eyelighter?acc=1c383cd30b7c298ab50293adfecb7b18

ROTOLIGHT GEAR: To receive a 10% discount and FREE shipping on the Rotolights used in this video please visit www.jasonlanier.com/rotolight

7 Comments

My First Shoot Ever using the Sony A7Riii- shooting in Raw at a Penthouse in NYC

4 Comments

My First Shoot Ever using the Sony A7Riii- shooting in Raw at a Penthouse in NYC

In late October 2017 Sony announced a camera that should be a big seller for them, the Sony A7Riii.  The predecessor to the A7Riii, was the A7Rii, a very popular and widely acclaimed camera.

While in town in New York City for the PhotoPlus Expo I was able to get my hands on the new Sony A7Riii with the brand new 24-105mm FE lens that was announced at the same time as the A7Rii and give it a go for a night.  I had my Photographer's Unite Event planned at a Penthouse in Manhattan and I used the opportunity to put on a live shooting demonstration in front of the crowd as they got to witness my first shoot ever with this camera.  Below is a video of the shoot:

But most of you are probably here to see the images that came out of the camera right?  Well, they are posted below.  All of the images were shot in raw, developed using Capture One, and enhanced using Photoshop.  I'll post the images by the lens that was used to capture them.  Settings for all the images are included in the video:

Images captured using the 85mm Sony G Master

Images captured using the Sony Zeiss 35mm f/1.4:

---Gear used for the shoot---

**Sony A7riii-  https://bhpho.to/2ztvVDo

**Sony 24-105 G lens- https://bhpho.to/2zs27qp

**Sony 85mm G Master-  https://bhpho.to/2A2V83D

**Sony 35mm Zeiss-  https://bhpho.to/2zsIUoP

To save money and get FREE shipping on Rotolight products please visit:

**Rotolight Neo- www.jasonlanier.com/rotolight

Below is a link to the models in the video:

*Maddi- www.instagram.com/lalunetta

*Jade- https://www.instagram.com/jade.gallowayy/

*Alyssa-  https://www.instagram.com/aly_182/

I thank you for watching and invite you to stick around and watch a few more while you're here. We have plenty more videos coming with the Sony A7Riii and will also devote an entire playlist to that camera, so make sure to check that out as well.

Don't forget to click on subscribe and notifications on my Youtube Channel www.youtube.com/jasonlanierpros so you're updated every time a new video is released.  Thanks for being here!!!

Jason

4 Comments