Comment

Watermarking your photos online- making it hard for people to steal your images!


Watermarks- make 'em loud and proud! So many times in this digital era we have our images "stolen" or used without permission. In my opinion this is wrong on all accounts, but if we don't do something to protect ourselves I truly believewe are asking for it. I know we shouldn't "have to" do it, but we need to stop being naive in our belief that just because people shouldn't that they won't.

People will always steal, and I'd dare those reading this to be honest with themselves and ask if they've ever downloaded a song they haven't paid for. Personally I've never downloaded a song or movie that I didn't pay for, but back in the old days I did make mix tapes by sharing friends' cassette tapes with each other.

Solution 1. Make a good sized banner on the bottom of your image so everyone can know where the image came from. Sometimes people are just excited to show your image, so it's important that you give yourself credit because more often than not, they won't.

Solution 2: Put your name in three or more areas across your image diagonally so it crosses many different areas of your shot. I do it at 25% opacity. This means any user will not be able to crop it in Facebook without your name appearing. They'd have to take it into Photoshop and clone it out which is time consuming. On top of that the images that I post on FB are so low res that their attempts to edit them will not succeed, there's just not enough data there to do it.

In summary, stop whining about people using or taking your shots without your permission and do something about it. Be proactive rather than reactive. If you've done all I mention above and they still do it, go to war with them. Because at that point they've shown that they are willing to do whatever it takes to steal your shot.

Until next time, I hope this helps!

Comment

Comment

San Francisco Casting Call for Female Models and Couples


Casting Call for Female Models and Couples for San Francisco- if you are interested in modeling for me next week on Tuesday or Wednesday, or Thursday (May 29th, 30th, and or 31st, 2012) this is your chance! I am looking for the following looks and people:

*People- female models and possibly male models if they are currently in a dating relationship with the female models that are accepted. I need chemistry!

*Themes- pin up, high fashion, wedding, and something wild. Remember, you will be providing the wardrobe so it will depend on what you own or will buy or rent for the shoot. The "Something Wild" means if you have a crazy idea that you want to shoot let me know what it is and maybe we can do it.

*Body Types- looking for fit people in the age range of 18-35. I do not shoot minors. What does "fit" mean? Look at the pics of the people on my Facebook page. I'm not looking for ultra-thin (emaciated), in fact I prefer "Normal" or "The Girl Next Door" looking people. In other words if you have a "tummy" like me this isn't the shoot for you.

*Compensation- this is a TFI (Time For Images) shoot meaning you will receive images for FREE from me for each day that you shoot with me/us. You will be required (standard practice) to sign a release prior to the shoot. I won't shoot you if you don't have a signed release.

*Wardrobe- I will NOT be providing wardrobe, that will be your responsibility.

To be considered please send me an email at JASON@JLPROS.COM with the following information. You will NOT be considered if you do not send me all the information I ask for below:

**3 pics of yourself showing 1 close up shot of your head/face, and two showing your body. Pics using your camera phone are just fine, they don't need to be professional.

**Measurements- please provide them. If you aren't sure try to measure yourself or have a friend help. For female models if you don't know your measurements please provide your bust size.

**Date and Time Availability- the more available you are the higher chance you have of being chosen. But if you only have 1 day available and it works for me you could be chosen so make sure to reply if you want to be considered.

**Clothing- please tell me what type of clothing you want to wear for the shoot. If you are chosen you will be required to send me pics of you wearing the outfits prior to the shoot.

I usually receive A LOT of response and I try to take as many people as I can, BUT I can't choose everyone. I look forward to hearing from you!!!

Comment

Comment

Picture Settings for Facebook using Lightroom


Picture Settings for Facebook- I get asked a lot what the right settings are for posting shots in Facebook. The main concerns are posting a shot that looks really good, but at the same time isn't large enough so someone can steal it. The key things for posting images onto Facebook are Quality, size, and resolution. I use Lightroom to export all of my images onto Facebook, and here are my settings. I've included a snapshot picture to show you what I do:

*Quality: Between 65-67.
*Resize to Fit (LONGEST EDGE) 1000 pixels
*Resolution: 200 PPI (Pixels per inch)

These are my settings and they work great for me, hope it helps!


Thanks!!


Jason

Comment

Comment

New York Central Park when it rains


Central Park when it rains- this image was taken last week during my workshop in New York. As anyone who has done a workshop with me will tell you, I shoot during any type of weather, rain or shine, snow or hail, we'll find a way to get a shot. Why? Because that's what it's like to be a real photographer. Sometimes you don't have another chance to just postpone the shoot. Well, it called for rain the two days of the workshop and we got some awesome pictures because of it. True, there isn't blue sky and clouds in this shot, but you have to look at what we did get. We got Central Park EMPTY....how many times does that happen? I got beautiful streaking water down the trunks of the Elm trees. There's always something beautiful to capture, you just have to look for it.

Next Workshop: San Francisco, CA- May 29th and 30th

Camera settings: Nikon D3, 1/125 sec at f/4.0, 30mm at ISO 100, flash did not fire. Taken at 4:57pm on May 15, 2012 by Jason Lanier in New York City, NY.

Comment

1 Comment

Solar Eclipse 2012


Tonight was a pretty awesome night as we were treated to a once in every 25 years treat Solar Eclipse.  This is the first one I've ever witnessed in my 37 years on the earth and I loved it.  I had to underexpose the shots significantly because it was still pretty bright in California when it occurred, but it was still pretty awesome.  Hope you like the pics!!

1 Comment

9 Comments

Batman Wedding Rings


"Bat Rings" this image was taken at my wedding last Saturday for Patrick and Christina at the Christmas House Inn and Gardens. It was so funny when I asked for the rings to do detail shots prior to the ceremony because when I did they all started laughing. It wasn't until they handed them to me that I understood why...they are a very fun couple and they were so excited to be unique in the rings they chose for their big day. Hope you like it!

Upcoming Workshops:

New York, NY- May 14th, 15th, and 16th
San Francisco, CA- May 29th and 30th
Honolulu, HI- June 17th and 18th

Camera settings: Nikon D700, 1/60 sec at f/4.5, 105mm at ISO 100, flash did not fire. Taken at 4:52pm on May 5, 2012 by Jason Lanier.

9 Comments

17 Comments

Active D Lighting Tutorial


Active D-Lighting turned to high, meaning it does everything it can to compensate for the darkness of the image.


Active D-Lighting turned off, meaning there is no compensation made by the camera to increase the dark areas in the image. I purposely shot a dark image to show the difference that Active D-Lighting can make.

I was asked recently to comment on the difference that Active D-Lighting can make with your images. Active D-Lighting is a term used by Nikon, the equivalent for Canon is called Highlight Tone Priority. Nikon describes Active D-Lighting as follows:

"Active D-Lighting optimizes high contrast images to restore the shadow and highlight details that are often lost when strong lighting increases the contrast between bright and dark areas of an image. It can be set to operate automatically or manually, and it's also possible to bracket pictures to get one with Active D-Lighting and one without."

In easier terms it means that the camera will help you adjust the exposure levels when you take a picture where you have a big difference between the dark areas and the light areas in the image. This is done automatically by the camera if you turn on the Active D function. The camera is defaulted with it, "off" so if you want it on you have to turn it on through the menu in the back of the camera under shooting.

So I left my D3 and D700 at home and took out my D7000 around the local lake to take some shots to show you what it does. I chose to use the D7000 because I wanted to use a camera that is more likely to be used by many more people as it's in the $1,000 range. Below is a rundown of the images and the different settings I used to get the shots. All of the images were shot in manual mode and all of them have been completely unedited. I had to use Screenshots from my Lightroom tab because the pictures will actually change once they are imported into Lightroom. Why? Because Active D-Lighting only applies to jpegs because the information must be baked in by the camera. So in essence this is the camera's way of editing the shot in the camera rather than afterwards. And the only way the camera can edit and save the image is if it's shot as a jpeg. So, if you are the kind of person that wants immediate gratification without having to edit afterwards, Active D-Lighting is great for you, otherwise stick to Raw and enjoy yourself!

The only possible workaround to this issue is if you use your Camera's software to import the images, otherwise it won't work with Adobe.


17 Comments

5 Comments

New Orleans Two Day Photography and Editing Workshop by Jason Lanier

Register for Las Vegas Shooting Workshop Extravaganza with Jason Lanier in Las Vegas, NV  on Eventbrite

Come join ME in the incomparable New Orleans, Louisiana February 28th and 29th 2012! I am offering all of the sessions either individually or as package bundles. You will save significantly when you buy them as package bundles as I believe these allow you the best opportunity to enhance your photography knowledge and skills. Please see below to see everything that is available:

*Tuesday February 28, 2012 9am-11am: Mini Prep Session- this mini session is meant to help prepare newer photographers for our Group Session shoot. If you are uncomfortable or don't know how to shoot in manual mode, meaning you don't know how to set your own shutter, aperture, and ISO to get the shots you want. This mini session is 2 hours of training together where I will help you grow comfortable with setting the exposure on your camera which will help you kick some major butt on our group session later that day. Great photography is about consisent practice, so doing this session right before the group session will help you reinforce everything in the group session, meaning you are really going to learn. You can purchase this session individually for $199, or you can save $150 and come for only $50 when you purchase it as part of one of our package bundle deals. So if you are looking for that major kick start to get you understanding your camera like a professional photographer, this session is for you!!

*Tuesday February 28, 2012 11am-6pm: Group Shoot: if you've ever attended another workshop where they just go around and take shots, this isn't that workshop. We go to REAL LOCATIONS with REAL MODELS, which means you will get REAL RESULTS. We meet in the hotel lobby and where we will then carpool to our locations to shoot. Travel time can vary between 30-60 minutes which gives us plenty of time to get to know each other and discuss our various needs prior to us shooting. I always keep my workshops flexible but below is a rough outline of the items that we will cover:

  • 11am- Meet as a group in the hotel lobby- don't be late as we will be leaving promptly at 11:15am.
  • 11:15-noon- travel and set up time for our shoot.
  • 12pm-2pm- Location #1: Posing using natural light and reflectors: start shooting where we will cover the following points of photography; quick review on shooting in manual mode. This will be a short review as we provide this training in the mini prep session prior to the group session. We will then review in depth the fundamentals of posing during this session using hands feet, creating space, posing with motion, etc. Posing is very difficult for many photographers and this first part of the group session will be completely dedicated to posing to really bring you up to speed on how to make your images with people look fantastic.
  • 2pm-3pm- Lunch break with Q&A session. We will find a quick place to eat (nothing fancy) that allows us the time to speak about the sesion we just completed and discuss what we're going to do next. Bring around $15-$20 to be able to eat!
  • 3pm-5:30pm- Location #2: Composition and Alternative Lighting- using what we learned in the session on posing, we will then incorporate our model and posing into creating great composition and will start using alternative lighting. This session we will work on how to compose the shot, what goes into making great compostion and the factors that are key to creating a killer shot. With the day starting to grow to a close, we will have the opportunity to shoot during the "magic hour" right before sunset which will be amazing. We will end the shoot at sunset which will allow us the chance to use external flashes, video lights, and some off camera flash to create some stunning results. Also make sure to bring your tripod as we will use it if the conditions are right.
  • 5:30pm-6pm- Travel back to our original location where we met to take you back. This time will allow us to have another Q&A in the car and review our shooting from the day.
**Weather concerns: Should the weather turn bad we will have other indoor locations we can shoot in. Weather is a constant friend or foe to photographers so learning to adapt to it is critical for your learning curve. Regardless of the weather we will find a way to shoot and make it amazing. Some of my most amazing images have come during rain, snow, cold, or extreme heat when I had to find a way to get it done. Regardless we will find great places and create beautiful imagery. Please also note that we will always make sure everyone has the opportunity to stay comfortable.

*Wednesday February 29, 2012 9am-4pm: Classroom/Editing Session- get ready to make some magic! In the classroom session we will take the images you took from the group shoot session and help you understand how to improve your workflow, and edit them the way you want! Below is an outline of the items we will cover:

  • 9am-9:15am: Review of the shooting session from the group shoot the day before. This will help you to cement some of your learnings from the day before, as well as answer any lingering questions.
  • 9:15am-9:45am- Gear Review: I wil cover everything that I use and give you my recommendations for what works and doesn't work. This will help you to save the time and money that I wasted when I started my career. I will answer individual questions from the group that helps everyone understand what they need depending on their interests. I'm not sponsored by any gear providers so my recommendations will be completely unbiased, and I won't try and sell you anything either!
  • 9:45am-10:30am- Business Tips: In this part of the session we will review the business tips that made me a success. Sometimes the best way to become successful is to find out how someone else did it and do what they did! We will cover how to make it in many different areas of photography built around my experience. Tips for pricing, finding customers, getting referrals, and making a great living will all be covered!
  • 10:30am-12:30pm- Lightroom: During this part of the class we will cover importing images, using external hard drives, creating separate catalogs for each shoot, using presets, creating presets, using the fundamental tools available in Lightroom, using a rating system, editing in Photoshop through Lightroom, and exporting your final catalog.
  • 12:30-1:30pm- Lunch: We will find a quick place to find a bite to eat as a group where we can discuss what we learned in the first part of the session. Make sure to bring $15-$20 for lunch.
  • 1:30-3:45pm- Photoshop: This will be where we start creating some magic! The most fundamental thing for photographers to learn and use are layers and masks as it changes your ability and opens up all possibilities. This session will also cover using my favorite filters, cloning the right way, and dodging and burning. It's impossible to teach everything about Photoshop, especially in two hours...but we will get you headed in the right direction!
  • 3:45-4pm- Final Q&A session: This will be your last chance to ask any and all questions you have before we have to say goodbye until next time.

*Please let us know if you will not have your own transportation so we can help you make carpool arrangements.

*Please make sure to wear comfortable clothing on all shoots and use your best judgment to make sure you bring appropriate clothing to factor in the time of day you will be shooting. You might want to bring an extra pair of sandles/shoes as I have been known to get feet wet quite frequently.

*Please bring snacks and bottled water as many of the places we go will not have any services available for food and beverage. We also highly recommend to use the restroom prior to our group shoot. We will always make sure to get to a restroom location during the middle of the shoot to give everyone a break when we go for lunch.

*Please bring all the gear you have including monopods, tripods, reflectors, flashes, etc. and plenty of batteries. Also make sure to charge all of your gear 100% prior to the shoot so you don't end up running out. Make sure to clear your memory cards and have at least 12gb available to shoot with. We personally recommend even more if you can. We will really encourage you to shoot in RAW so having the appropriate amount of memory is very important.


We can't wait to see you in New Orleans and look forward to an amazing time together!!!! For any questions please email us at info@jlpros.com, or give us a call at 213-494-7744 or 909-260-3332.


Thanks!


Jason Lanier Photography

5 Comments

6 Comments

Las Vegas Photography Workshop by Jason Lanier all around WPPI 2012

Register for Las Vegas Shooting Workshop Extravaganza with Jason Lanier in Las Vegas, NV  on Eventbrite

Come join us for 4 amazing days of workshop instruction in exciting Las Vegas, Nevada all around the WPPI photographers annual convention. This is NOT a shootout, where you just watch a photographer shoot. This is a true workshop where there is actual instruction. Many photographers who never teach workshops offer shootouts around WPPI to make a few extra bucks, I teach workshops all across the United States and have done so for years. This experience is truly for learning and we are going to do some AMAZING stuff! The schedule for the 4 days is as follows:

*Monday February 20, 2012 5-7pm: 1 on 1 Training Session- this is for 1 person only, it's 1 on 1 training where the 2-hour session is customized to precisely what you want or need to learn. We do a quick review of your portfolio, discuss what you need the most help with, and start teaching! The session is built around you and your preferences. So if you'd like to learn more about posing and shooting people we will get a model, a killer location and shoot! If you are more of a landscape photographer we find a beautiful place to shoot and start shooting! The bottom line is that this is personalized training where you can ask a million questions and get a million answers. This is your chance to get over the hump and get that edge you are looking for. These sessions are first come, first serve, so sign up today!

*Tuesday February 21, 2012 5-7pm: 1 on 1 Training Session- this is for 1 person only, it's 1 on 1 training where the 2-hour session is customized to precisely what you want or need to learn. We do a quick review of your portfolio, discuss what you need the most help with, and start teaching! The session is built around you and your preferences. So if you'd like to learn more about posing and shooting people we will get a model, a killer location and shoot! If you are more of a landscape photographer we find a beautiful place to shoot and start shooting! The bottom line is that this is personalized training where you can ask a million questions and get a million answers. This is your chance to get over the hump and get that edge you are looking for. These sessions are first come, first serve, so sign up today!

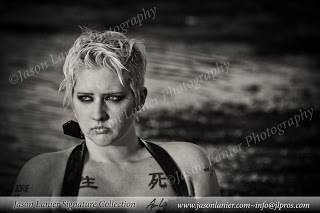
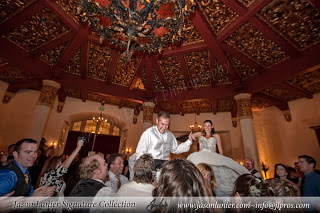
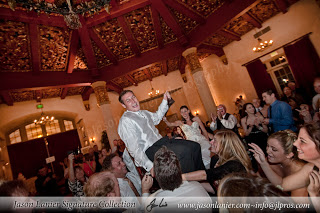
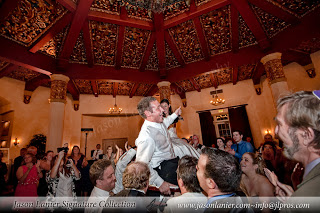
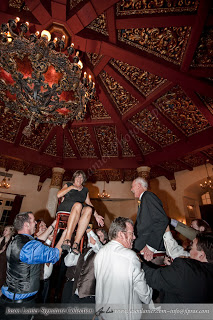
*Wednesday February 22, 2012 5-10pm: Group Night Session- this is the first of our two group sessions in Vegas. This group shoot will take place right smack down the middle of the Las Vegas Strip with models. We will meet at the entrance to the MGM Grand Conference Center at 5pm. This will be an amazing shoot where we go over some really essential stuff as well as some really fun and crazy styles including shooting with flash, video lights, off-camera flash, posing, and using natural light in a night-time environment to deliver some astounding results. This is not a session where you follow me around and just watch me shoot. I set up the shoot, and then help all of the other photographers in making sure they are getting amazing results as well. We have small class sizes and will have myself and another one of my lead shooters with me so everyone can get the attention they need. Come join us for an amazing shoot in Vegas! We purposely set up the time of the shoot between 5-10 when there are no platform classes at WPPI, so you won't miss anything! You can either pay $250 for this shoot individually or sign up for both shoots (Wednesday and Thursday for a total price of $450, a savings of $75!

**Please plan on us grabbing a snack towards the end of our shoot somewhere on the strip...nothing fancy but you should bring a little money as we will sit down as a group and discuss some of the things we did that made the shoot so much fun. Reviewing what we did is key to your learning process so you can remember what we did and how we did it. It also gives you a great opportunity to ask questions!

*Thursday February 23, 2012 10am-6pm: Group Say/Sunset Session- this is the second of our two group shoots in Vegas. On this shoot we are meeting at the entrance to the MGM Conference Center at 10am and then carpooling over to the Salt Flats about 45 minutes away. We are going to do a really cool shoot with models on the salt flats which will be a great opportunity to learn more about posing, shooting in the middle of the day, using reflectors, how to properly expose in bright conditions, and incorporating props into your shots. This is a must for anyone who shoots weddings as we typically struggle with these issues on the day of the wedding. We will then pack up our gear and head another 30 minutes east to a beautiful town that is remaining a secret location so we make sure there aren't other photographer shooting there. It has antique cars, old barns, old buildings, trucks, etc. It has been used for countless movies, TV shows, and music videos and it will be the backdrop for our shoot! Here we will incorporate all the amazing scenery and props available as the light turns into the golden hour, and we will continue shooting until the sun sets. Once the sun starts to go down we will again incorporate more video lights and off camera flash which will really raise the bar for creating amazing imagery. The cost for this session is $275, but if you register for both Wednesday and Thursday sessions you get both for only $450, a savings of $75! Come join us for an amazing time in Vegas!!!

Get WPPI Full Registration and Tradeshow included with your workshop! Limited to 3 tickets only, this option allows you to book both days of workshop classes with Jason Lanier AND get into WPPI for only $150 as one of his guests! That's a savings of hundreds of dollars. This is the ultimate experience to learn and grow with Jason and attend the WPPI Convention..the largest in the world!

*Please let us know if you will not have your own transportation so we can help you make carpool arrangements.

*Please make sure to wear comfortable clothing on all shoots and use your best judgment to make sure you bring appropriate clothing to factor in the time of day you will be shooting.

*Please bring snacks and bottled water as many of the places we go will not have any services available for food and beverage. We also highly recommend to use the restroom prior to our shoot at the Salt Flats. Once we get to our second location we will have a bathroom available.

*Please bring all the gear you have including monopods, tripods, reflectors, flashes, etc. and plenty of batteries. Also make sure to charge all of your gear 100% prior to the shoot so you don't end up running out. Make sure to clear your memory cards and have at least 12gb available to shoot with. We personally recommend even more if you can. We will really encourage you to shoot in RAW so having the appropriate amount of memory is very important.


We can't wait to see you in Vegas and look forward to an amazing time together!!!! For any questions please email us at info@jlpros.com, or give us a call at 213-494-7744 (Jason) or 909-260-3332 (Don).


Thanks!


Jason Lanier Photography

6 Comments

8 Comments

Creating Motion Blur in Wedding Images


Creating motion blur in wedding images- this shot was taken at my wedding for David and Elaine last month down in La Jolla, California. The key to creating a shot like this is to use a neutral density filter and a tripod which enables you to slow down your shutter and shoot on a tripod during the middle of a very sunny day like this one. You have to get the bride and groom to hold still which they did a great job of on this shot. The goal in this image was to get the water to appear as if it's continually moving, which makes it fun because the rocks and wedding couple are completely still. This is a trick that landscape photographers use, and since I am a landscape photographer I know how to do it! Camera settings: Nikon D3, 1/4 sec at f/22, 16mm at ISO 100, flash did not fire. Taken at 1:01pm on November 26, 2011 by Jason Lanier.

8 Comments

4 Comments

New Orleans Louisiana Workshop with Jason Lanier!


Come join us on February 28th and 29th 2012 for an amazing 2-days in New Orleans, Louisiana for a workshop with Jason Lanier that will make you not only change you as a photographer but also as a person. Tuition includes 2-days of training that encompass a full day of shooting and editing.

CLICK HERE TO BOOK NOW!!

Jason Lanier is a world traveled award winning photographer who specializes in weddings and landscape photography. He brings a unique blend of both of these worlds to take you to the next level as a photographer. Just in 2011 alone, Jason Lanier shot in Africa, Ireland, Mexico, the Caribbean, Alaska, and all over the United States, had his July wedding for Christina and Ransen featured by Disney Weddings, and won numerous Accolades of Excellence from WPPI, the largest print competition in the world.

Tuition is only $485 for both days and is the BEST money you can invest on your photography education. Jason's workshops are very hands on, and class size is limited to 20 participants so you get the attention you need to improve. Jason believes very strongly in breaking the mold of the traditional workshop which means:

  • Shoots- You are going to shoot in real locations...not just around a hotel like some other workshops
  • Selling stuff- Jason will not spend an hour trying to sell you on buying more of his stuff. All Jason has to offer is available to view on his website. Your time with him is precious and paid for, so he won't waste it trying to make more money off of you.
  • Editing- Jason will give you the tools you need for success. He isn't afraid to share his "secrets" as he believes that if the entire industry improves we will all benefit. Nothing is out of bounds.

Attendees will need to being a laptop with Adobe Lightroom and Photoshop (trial versions ok) prior to coming to the workshop. Final location details will be provided to all attendees 14-days prior to the workshop. For any questions please visit our website at www.jasonlanier.com and click on "Workshops". For any questions please contact us at WORKSHOPS@JLPROS.COM today!

4 Comments

6 Comments

Las Vegas, Nevada Photography Workshop by Jason Lanier


Come join us on February 23rd and 24th 2012 for an amazing 2-days in Las Vegas, Nevada for a workshop with Jason Lanier that will make you not only change you as a photographer but also as a person. Tuition includes 2-days of training that encompass a full day of shooting and editing.

CLICK HERE TO BOOK NOW!!

Jason Lanier is a world traveled award winning photographer who specializes in weddings and landscape photography. He brings a unique blend of both of these worlds to take you to the next level as a photographer. Just in 2011 alone, Jason Lanier shot in Africa, Ireland, Mexico, the Caribbean, Alaska, and all over the United States, had his July wedding for Christina and Ransen featured by Disney Weddings, and won numerous Accolades of Excellence from WPPI, the largest print competition in the world.

Tuition is only $485 for both days and is the BEST money you can invest on your photography education. Jason's workshops are very hands on, and class size is limited to 20 participants so you get the attention you need to improve. Jason believes very strongly in breaking the mold of the traditional workshop which means:

  • Shoots- You are going to shoot in real locations...not just around a hotel like some other workshops
  • Selling stuff- Jason will not spend an hour trying to sell you on buying more of his stuff. All Jason has to offer is available to view on his website. Your time with him is precious and paid for, so he won't waste it trying to make more money off of you.
  • Editing- Jason will give you the tools you need for success. He isn't afraid to share his "secrets" as he believes that if the entire industry improves we will all benefit. Nothing is out of bounds.

Attendees will need to being a laptop with Adobe Lightroom and Photoshop (trial versions ok) prior to coming to the workshop. Final location details will be provided to all attendees 14-days prior to the workshop. For any questions please visit our website at www.jasonlanier.com and click on "Workshops". For any questions please contact us at WORKSHOPS@JLPROS.COM today!

6 Comments

2 Comments

LOS ANGELES, CALIFORNIA PHOTOGRAPHY WORKSHOP


Come join us on January 24th and 25th 2012 for an amazing 2-days in Los Angeles, California for a workshop with Jason Lanier that will make you not only change you as a photographer but also as a person. Tuition includes 2-days of training that encompass a full day of shooting and editing.

CLICK HERE TO BOOK NOW!!

Jason Lanier is a world traveled award winning photographer who specializes in weddings and landscape photography. He brings a unique blend of both of these worlds to take you to the next level as a photographer. Just in 2011 alone, Jason Lanier shot in Africa, Ireland, Mexico, the Caribbean, Alaska, and all over the United States, had his July wedding for Christina and Ransen featured by Disney Weddings, and won numerous Accolades of Excellence from WPPI, the largest print competition in the world.

Tuition is only $485 for both days and is the BEST money you can invest on your photography education. Jason's workshops are very hands on, and class size is limited to 20 participants so you get the attention you need to improve. Jason believes very strongly in breaking the mold of the traditional workshop which means:

  • Shoots- You are going to shoot in real locations...not just around a hotel like some other workshops
  • Selling stuff- Jason will not spend an hour trying to sell you on buying more of his stuff. All Jason has to offer is available to view on his website. Your time with him is precious and paid for, so he won't waste it trying to make more money off of you.
  • Editing- Jason will give you the tools you need for success. He isn't afraid to share his "secrets" as he believes that if the entire industry improves we will all benefit. Nothing is out of bounds.

Attendees will need to being a laptop with Adobe Lightroom and Photoshop (trial versions ok) prior to coming to the workshop. Final location details will be provided to all attendees 14-days prior to the workshop. For any questions please visit our website at www.jasonlanier.com and click on "Workshops". For any questions please contact us at WORKSHOPS@JLPROS.COM today!

2 Comments

4 Comments

Phoenix, Arizona Photography Workshop by Jason Lanier


Come join us on January 17th and 18th 2012 for an amazing 2-days in Phoenix, Arizona for a workshop with Jason Lanier that will make you not only change you as a photographer but also as a person. Tuition includes 2-days of training that encompass a full day of shooting and editing.

CLICK HERE TO BOOK NOW!!

Jason Lanier is a world traveled award winning photographer who specializes in weddings and landscape photography. He brings a unique blend of both of these worlds to take you to the next level as a photographer. Just in 2011 alone, Jason Lanier shot in Africa, Ireland, Mexico, the Caribbean, Alaska, and all over the United States, had his July wedding for Christina and Ransen featured by Disney Weddings, and won numerous Accolades of Excellence from WPPI, the largest print competition in the world.

Tuition is only $485 for both days and is the BEST money you can invest on your photography education. Jason's workshops are very hands on, and class size is limited to 20 participants so you get the attention you need to improve. Jason believes very strongly in breaking the mold of the traditional workshop which means:

  • Shoots- You are going to shoot in real locations...not just around a hotel like some other workshops
  • Selling stuff- Jason will not spend an hour trying to sell you on buying more of his stuff. All Jason has to offer is available to view on his website. Your time with him is precious and paid for, so he won't waste it trying to make more money off of you.
  • Editing- Jason will give you the tools you need for success. He isn't afraid to share his "secrets" as he believes that if the entire industry improves we will all benefit. Nothing is out of bounds.

Attendees will need to being a laptop with Adobe Lightroom and Photoshop (trial versions ok) prior to coming to the workshop. Final location details will be provided to all attendees 14-days prior to the workshop. For any questions please visit our website at www.jasonlanier.com and click on "Workshops". For any questions please contact us at WORKSHOPS@JLPROS.COM today!

4 Comments

4 Comments

Shooting (Photographing) a Jewish Horah Wedding by Jason Lanier

Shooting a Jewish Horah is the one of the funnest things to shoot for a wedding photographer. Why? Because they are fun, loud, and always unpredictable. I have shot Horah's where people fell off of chairs (none were hurt), people were launched clear off the chairs, and just in general it's a heck of a way to kick off a new marriage.

First the bride and groom are lifted onto the chairs followed by the parents of the bride. The bride and groom hold a cloth in between them and hold on for dear life. As a photographer the best and only way to truly capture the essence of this moment is by getting into the action. It can be a little intimidating at first because there are a ton of people and you can't really even know where you will end up because you are too busy taking the pictures. But once you get the rhythm down, and you just decide to have fun with it, it can be a very rewarding experience.

In order to maximize the picture opportunity for your clients you need to make sure to set proper lighting, and you will need to make sure to use either a video light, an external flash, or both to get the best shots. You also need to make sure to keep your shutter speed fast enough because there is a lot of movement going on! For these shots below which were all shot on manual mode, the settings were: Nikon D700, 1/100 sec at f/4.0, 16mm at ISO 3200, flash fired.


4 Comments

5 Comments

Trash the Dress Composite Shot


Trash the Dress, watch it all happen in 1 photograph- this image was taken last week during my bridal trash the dress session with Randi, my bride from my Catalina wedding in August of this year. For this image I set my tripod up in a spot where I knew I could capture the full spectrum of everything happening within the frame. I then had Randi go from start to finish, getting her dress caught, and then we would cut with scissors. Each shot of her is a different picture, which were all stitched together in photoshop.

In photography it's so difficult to show a progression of something like a trash the dress session in only 1 picture. So, if you want to try and accomplish something like this, you pretty much have to do what I've done here. This is a lengthy process in shooting and editing, but the results are REALLY FUN! Camera settings: Nikon D700, 1/80 sec at f/4.0, 16mm at ISO 200, flash did not fire. Shot at 5:47pm on October 27, 2011 by Jason Lanier.

5 Comments

7 Comments

Should Photographers Add Fake Skies to their Pictures?


To Add or not to Add, that is the question. Since photographers learned how to add skies and other elements to their images, this is a question that has stayed in the industry since Photoshop taught us how to do it. Personally I don't like adding other elements to my imagery, I want them to be real. That being said, many times I find myself going to a location one time, and if the weather doesn't cooperate, I walk away with no shots to use.

FOR THE RECORD: If I were to ever use a "fake sky" I would certainly state that the image is a composite. I NEVER misrepresent my work..:)

I pride myself on my work and the skies that are present in my images and like any other self respecting landscape photographer I will wait many times/days/weeks for that perfect shot. This image was taken during my workshop in West Virginia at Blackwater Falls. It's a situation where I only had 1 hour to get the shot and then we moved to another location. So either I use a sky from another shot, or I really don't have a shot to share. Thoughts?

7 Comments

3 Comments

Photoshop Tip- How to Add Rain to your image


Today is the first of many Friday Fotoshop Fun Facts that I am going to start posting weekly. Check back on the blog to see these updates, and don't forget to follow my Facebook Fan Page as well as Twitter: @jlanierphoto.

For today's topic I wanted to show a very simple technique for adding a "rain" look to your image. This is all done in Photoshop CS4. The idea is to take a simple picture that doesn't have any rain and make it look like it does. The image below is a shot I took in Morgantown, West Virginia in October of 2011. Here's how to do it!


1. Open your image in Photoshop...


2. Create a duplicate layer by pressing Command J (Macs) Control J (PC)


3. Click on "Filter", "Render", and then choose, "Fibers"


4. The selection screen for Fibers will pop up. I chose to use 16 as my Variance and 4 as my Strength. Play around with it and choose what works best for your look!


5. This is what your screen will look like, don't panic, it's supposed to look like this...

6. Click on the layer mask button on the bottom of your layers palette as shown in red. This will create a mask for you to wipe away the rain and bring in the background image.


7. Click on "B" to select your brush tool as shown in red.


8. The brush toolbar will then show at the top of your screen. Select a large sized brush as I did here, "900 or higher" so you can wipe away big chunks of the fibers (fake rain). Select an Opacity of about 88% (so it wipes away a lot but still leaves some to be seen). Don't worry about the Flow...


9. Start wiping away the fake rain! This is what it looked like when I wiped away half of the screen.


10. This is what it looked like after I had wiped away all the fake rain at 88% Opacity. So in essence it left 12% of the rain in the image.


11. I then chose to turn my Opacity to 100% and wipe the fibers "fake rain" away completely in select areas of the image. In this image I wiped it all away in the grass areas.

And this is what it looked like when it was done! There are certainly a million ways to do a million things like "fake rain" in an image, but I choose to do tutorials on the most streamlined and already built into Photoshop way to do it. I hope this helps! Please let me know what topics in Photoshop you'd like me to address for topics on upcoming weeks. Thanks and stay tuned!

3 Comments

1 Comment

Jason Lanier Photography on Twitter

Hey everyone! After starting a great Fan Page on Facebook I am finally getting around to launching our Twitter Page! So if you'd like hints, tips, and more updates from Jason Lanier Photography, Twitter is the place to go! Just go to @jlanierphoto and check out what we're doing!

http://twitter.com/#/jlanierphoto

1 Comment